
Over the years, a computer quietly fills up with programs. There is the photo tool you tried once, the game you never really played, the free trial that came with the machine, and a dozen other odds and ends gathering digital dust. Clearing out the ones you no longer use is a bit like tidying a cluttered closet: it frees up space, helps everything run more smoothly, and just feels good. It is also perfectly safe to do yourself, as long as you follow a couple of simple rules. Here is a friendly guide to doing it the right way, on both Windows and Apple computers.
Clearing out software you never use brings a few real benefits:
This is the most important part of the whole article, so it comes first. As you look through the list of programs on your computer, you will see many names you do not recognize. That is completely normal. Some of them are pieces that your computer or your hardware needs in order to work properly, with technical-sounding names you were never meant to understand.
The rule is simple: only remove a program if you clearly recognize it and know you do not use it. If you are not sure what something is, leave it be. Do not delete an entry just because its name looks unfamiliar. And never try to remove programs by digging into the deeper parts of your computer, such as system folders or the settings registry, since that is where real damage can be done. Sticking to the straightforward methods below keeps you completely safe.
Good, safe candidates to remove include games you never play, expired free trials such as trial antivirus software, shopping or coupon add-ons, promotional apps that came pre-installed, duplicate tools that do the same job, and anything you installed once out of curiosity and never touched again.
On Windows 11, the Settings app is the proper and safest place to remove most programs. Here is how:
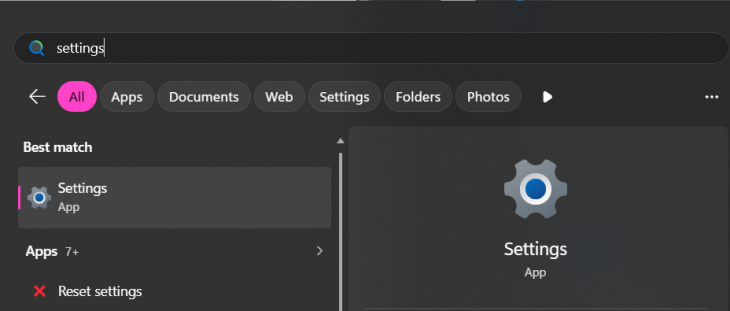
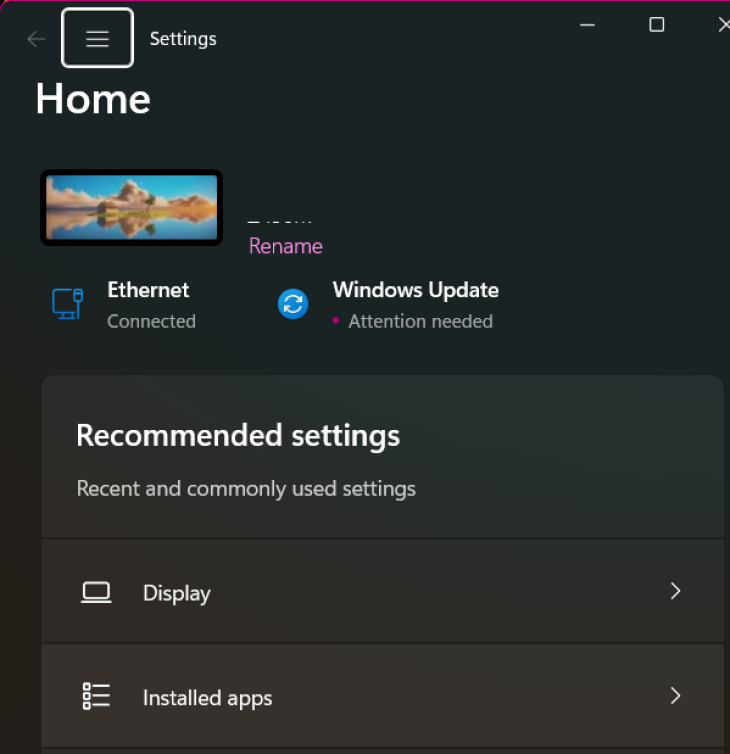
A quick shortcut: you can also find a program in the Start menu, right-click its name, and choose "Uninstall" right there.
Some older desktop programs show up more reliably in the classic Control Panel. To use it, click the Start button, type "Control Panel," and open it. Then click "Programs," followed by "Programs and Features." Select the program you want to remove and click "Uninstall" at the top. This window also lets you sort the list by size or by the date installed, by clicking those column headings, which is handy for spotting the biggest space-hogs or something you added recently.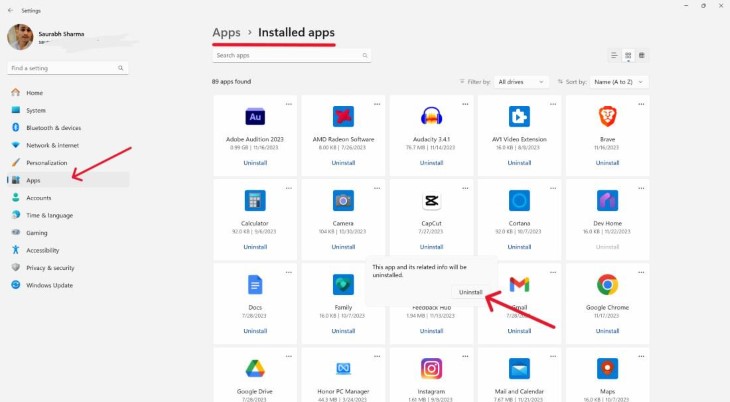
Removing a Program on an Apple Mac
On a Mac, most programs can be removed with an easy drag to the Trash:
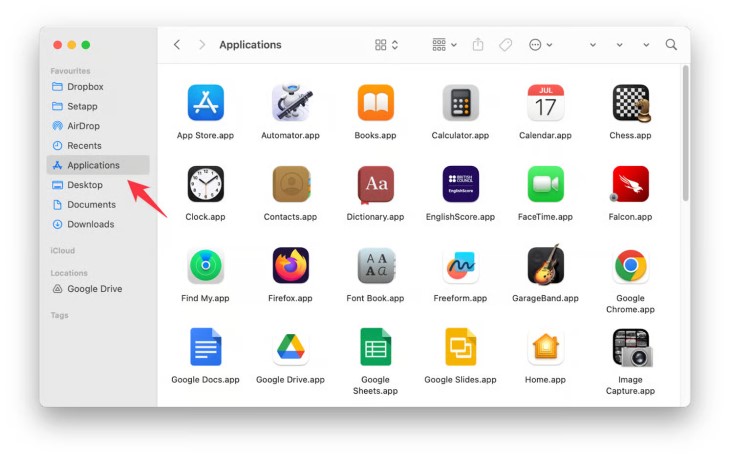
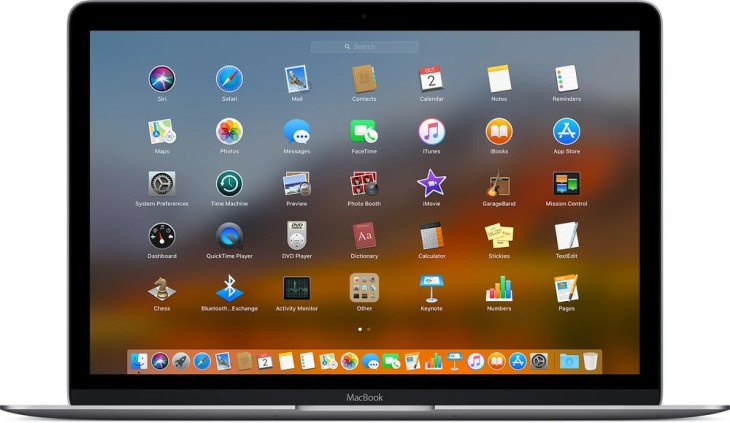
For programs you got from the App Store, there is an even simpler route. Open Launchpad (the rocket-ship icon), then click and hold on the program's icon until the icons begin to jiggle. A small X will appear on the corner of the program. Click it, confirm, and the program is gone.
One thing to note: a few Mac programs come with their own dedicated uninstaller, especially larger ones. If you see an "Uninstaller" included with the program, it is best to run that rather than simply dragging the app to the Trash, as it will tidy up more thoroughly.
When you remove a program, it sometimes leaves behind a few small settings files. For the vast majority of people, this is harmless and not worth worrying about, as these bits are usually tiny. Resist any urge to go hunting for them in your computer's system folders, since that is exactly the kind of digging that can cause problems. If you truly want a spotless removal, the safest approach is to use the software maker's own uninstaller, or a well-reviewed removal tool. Be cautious here, though: many so-called "cleaner" programs advertised online are junk or worse, so only ever use a reputable one, and when in doubt, ask someone you trust before installing anything new.
Occasionally a stubborn program refuses to budge. Before doing anything drastic, try these gentle steps in order:
If it still will not go, that is a perfectly good moment to ask a knowledgeable family member or a trusted computer technician for a hand. It is far better than forcing the issue in ways that could unsettle your computer.