Windows 11 brought many changes, and it’s normal to feel a bit frustrated—especially if you’re used to older versions of Windows. The good news is that most common issues have simple solutions you can do yourself. In this article, we’ll explain the frequent problems people run into on Windows 11 and walk through easy, no-fuss fixes. Our focus is on everyday frustrations (slow performance, confusing new layouts, missing features, settings changing unexpectedly, etc.) and how to solve them without any advanced technical steps or extra software. Let’s get started, one issue at a time.
Slow Performance and Freezes
Does your Windows 11 PC feel sluggish or freeze up often? You’re not alone—this is a top complaint. The new Windows can sometimes run slow, especially on older machines or after upgrading from Windows 10. Here’s how to speed things up with basic tweaks:
- Keep Windows Updated: Make sure you have the latest Windows updates. Microsoft frequently releases fixes that improve performance and stability. Updating Windows 11 can resolve many slowdowns. To check, open Settings > Windows Update and click Check for updates. Install any pending updates and restart your PC.
- Limit Startup Programs: Too many apps launching at startup can bog down your system. You can disable unnecessary startup programs in a few clicks. Press Ctrl + Shift + Esc to open Task Manager and go to the Startup tab. For each program you don’t need right when the PC boots (e.g., rarely-used utilities), click it and choose Disable. This prevents it from auto-starting and frees up memory and CPU for other tasks.
- Close Background Apps: If your PC is still slow, check for apps running in the background. In Task Manager’s Processes tab, you can see what’s using a lot of CPU or RAM. Close any app you’re not actively using (especially web browsers with many tabs, which can consume resources). This can help if something got left running and is eating up power.

- Free Up Disk Space: Low disk space can make Windows crawl. Windows 11 might have old files (especially if you upgraded from Windows 10) taking up space. Use the built-in Disk Cleanup tool to remove junk:
1. Click Start and type “Disk Cleanup,” then open it.
2. Choose your C: drive and let it scan.
3. In the list, check Previous Windows installation(s) (if listed) and other items like Temporary files.
4. Click OK to delete those files. This can reclaim several gigabytes of space and improve performance.
5. Also consider emptying your Recycle Bin and deleting files in Downloads you no longer need.
- Adjust Visual Effects (Optional): Windows 11 has pretty animations and translucency, but turning these off can boost speed on an older PC. In the Start menu, search for “Adjust the appearance of Windows” and open the system settings. Select “Adjust for best performance,” which will disable fancy effects. The interface will look simpler but may run smoother. (This step is optional—only do it if you need every bit of speed, since it changes the visual style.)
By following these tips, you should notice your PC running faster and with fewer freezes. Simple maintenance like this goes a long way in keeping Windows 11 performing well. And remember, if you ever suspect a specific problem (like a certain app causing slowness), Windows 11 has a built-in Troubleshoot feature under Settings > System > Troubleshoot that can find and fix some issues automatically.
Finding Your Way in the New Start Menu
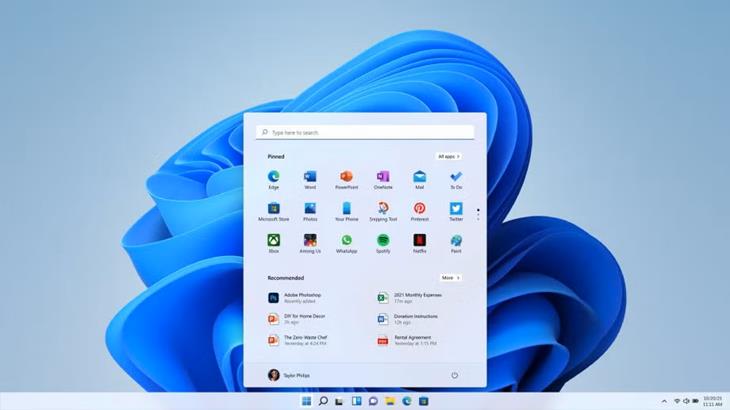
One of the first things you’ll notice in Windows 11 is the redesigned Start Menu. It’s centered by default and looks quite different from Windows 10’s menu. This change can be confusing, but you can make the Start Menu easier to use with a few adjustments:
- Align the Start Menu to the Left: If you instinctively move your mouse to the bottom-left corner for the Start button, you can put it back there. Go to Settings > Personalization > Taskbar, expand Taskbar behaviors, and find Taskbar alignment. Change it from Center to Left. Now the Start button and app icons will sit in the bottom-left, just like you remember.
- All Apps and Search: Windows 11’s Start Menu shows a grid of pinned apps and a “Recommended” section for recent files. To see all your apps, click the All apps button at the top right of the Start menu. This brings up an alphabetical list of everything installed. You can scroll or use the search bar at the top to find any program. If you ever can’t find something, just hit the Windows key and start typing the app or file name—the Start Menu will search your PC (this is often faster than hunting through menus).
- Customize Pinned Apps: The new Start menu doesn’t use live tiles, but you can “pin” your favorite apps for quick access. To pin an app, find it in All Apps, right-click it, and choose Pin to Start. You can drag pins around to organize them. If there are apps you don’t want in the Start menu, right-click their icon and choose Unpin from Start. Windows 11 even lets you group pins into folders (if you have the newer 22H2 update or later): drag one pinned app on top of another to create a folder, which you can name and use to keep similar apps together (for example, a folder for “Office Apps”).
- Tweak the Recommended Section: The lower part of the Start menu tries to show recently opened files or new apps (under “Recommended”). Some find this useful; others find it cluttered or confusing. You have control over it. Go to Settings > Personalization > Start. Here you can choose to show more pins (and less recommendations) or vice versa. You can also turn off Show recently added apps, Show most used apps, or Show recently opened items if you prefer a cleaner Start menu. For example, turning all those off will make the Recommended area almost empty, so the menu only shows your pinned apps.
- Restore Folder Shortcuts: In Windows 10, the Start menu had quick links to folders like Settings, Documents, Pictures, etc. In Windows 11, these are turned off by default, but you can turn them on for convenience. Open Settings > Personalization > Start > Folders. You’ll see a list of common folders with toggles (Settings, File Explorer, Documents, Downloads, Music, Pictures, etc.). Switch On any folder you want quick access to. These will appear as small icons next to the power button in the Start menu. For instance, if you toggle on Documents and Pictures, you’ll see their icons at the bottom of Start—one click takes you straight to those folders.
Take a moment to personalize the Start menu to your liking. Once you pin your key apps and add useful folder shortcuts, it will start to feel much friendlier. The new design might be different, but with these tweaks, you can make it work comfortably for you.
Taskbar Changes and Missing Features
Besides the Start menu, the Windows 11 taskbar (the bar at the bottom of the screen) also got a makeover—and not all changes were welcome. You might notice some familiar features are gone or different. Here are some common taskbar-related frustrations and how to address them:
- No Right-Click Menu on the Taskbar: In Windows 10, you could right-click the taskbar for a menu to access settings or open Task Manager. In Windows 11, a right-click on an empty taskbar space only gives a Taskbar settings option. So how do you open Task Manager quickly now? The easiest way: press Ctrl + Shift + Esc on your keyboard to launch Task Manager directly. Another way is to right-click the Start button (or press Windows key + X)—this opens a hidden “power user” menu, and Task Manager is on that list. (Microsoft heard the complaints and eventually added “Task Manager” back to the taskbar right-click menu in a late 2022 update for Windows 11. If your system is fully updated, you can now right-click the taskbar and see Task Manager in the menu, just like old times.)
- Combined Taskbar Icons (No Labels): Windows 11 initially forces the taskbar to always combine your open windows into app icons (with no text labels). For example, if you have two Word documents open, they stack under one Word icon without showing file names. Many users missed the old style where each window was separate with its title on the taskbar. The good news: Microsoft has brought back the option to un-combine taskbar buttons in a recent update! Make sure you’ve updated to Windows 11 version 22H2 (the 2023 updates or newer). Then, you can enable the classic style:
1. Right-click the taskbar and select Taskbar settings, or go to Settings > Personalization > Taskbar.
2. Expand Taskbar behaviors.
3. Look for “Combine taskbar buttons and hide labels” and set it to Never. This tells Windows to never group icons together—each window will appear as its own labeled button on the taskbar, just like in Windows 7/10. (If you don’t see this option, you might need to install the latest Windows updates.)
After changing that setting, you’ll see, for example, two separate Word buttons labeled with document names when two documents are open. This can make multitasking easier if you prefer identifying windows by name.
- Taskbar Stuck at Bottom: Some folks like to move the taskbar to the top or side of the screen. Unfortunately, Windows 11 does not support moving the taskbar to other sides (at least not as of now)—it’s locked to the bottom. Microsoft rebuilt the taskbar from scratch in Windows 11 and hasn’t (yet) added the flexibility to reposition it. There’s no simple fix for this within Windows 11’s settings. If it’s any consolation, you’re not doing anything wrong—it’s just a limitation of the new design. (There are third-party tools that can adjust it, but those are outside the scope of this guide since we’re avoiding extra software.) We can hope a future update allows moving the taskbar again; for now, we have to live with it at the bottom.
- Can’t Drag Files onto Taskbar Icons: In original Windows 11, if you tried to drag a file onto an app icon on the taskbar (say dragging a photo onto a Photoshop icon to open it), nothing happened—this feature was removed at launch. Many people found that frustrating since it worked in Windows 10. The fix: Update Windows 11 to the latest version. The 2022 update (22H2) restored the drag-and-drop to taskbar function. Now you can again drag a file to a taskbar icon, wait a moment, and the corresponding window will pop up so you can drop the file into it (just like before). Keep in mind, the target application must be already open for this to work. If you’re updated but it’s still not working, ensure the app is running or open first. This brought back much of the old convenience. (If for some reason you cannot update, a temporary workaround is to open the app first and use File > Open within the app, or drag the file onto the app in the taskbar after it’s open and active. But ideally, get the update for full functionality.)
- Multiple Monitors Clock: If you use a second monitor, you might have noticed initially Windows 11 didn’t show the clock on the second screen’s taskbar. This was an oversight that bothered multi-monitor users. Microsoft listened and fixed it in an update. Now, the date and time should appear on all taskbars if you have more than one display (as of Windows 11 22H2). If you still don’t see it on your second monitor, make sure you’ve installed the latest cumulative updates for Windows 11.
In short, many “missing” taskbar features have gradually come back as Microsoft updates Windows 11. Ensure your system is up to date to take advantage of these fixes. For the remaining limitations (like not moving the taskbar), it’s a matter of waiting for future improvements. In the meantime, use the available workarounds: keyboard shortcuts for Task Manager, the new ungroup option for icons, and so on, to make the Windows 11 taskbar feel more familiar.
Default Apps Keep Changing (Browser and Others)
Another everyday annoyance is Windows 11 sometimes insisting on its own apps. You might set a default browser or PDF reader, only to find Windows pushing Edge or another built-in app again—especially after a big update. Or you may simply find the process of changing default apps confusing. Here’s how to take control of your default programs:
- Making Your Preferred Browser the Default: When Windows 11 first launched, changing the default web browser was tedious—you had to manually assign every file type (HTM, HTML, PDF, etc.) to your browser of choice. Thankfully, Microsoft heard the complaints and made it much easier to switch the default browser in a later update. Now, if your system is up to date, you can do it in one go.
How to change default browser: Go to Settings > Apps > Default Apps. Scroll down and click your preferred browser (for example, Google Chrome or Firefox). If you have the Windows 11 update that enables this, you’ll see a button that says “Set default”—click that to make this browser the default for all web-related purposes. This single click will set the browser as default for common link and webpage file types (HTTP, HTTPS, .html, etc.).
If you don’t see a one-click button: You can still change the defaults manually. In that same Default Apps screen, you’ll see a list of file extensions (like .HTM, .HTML, .PDF, etc.). Click each one that currently says “Microsoft Edge” and select your preferred app from the pop-up list. You don’t need to do every single extension—focus on the ones you care about (for instance, .HTM, .HTML, .PDF for web and PDF, perhaps .SVG or others if you encounter them). It’s a bit of work, but you usually only need to do it once.
- Stopping Windows from Resetting Defaults: Windows updates have been known to reset some defaults (for example, setting Edge back as the default PDF reader or browser). This can be frustrating. If you notice a default app has reverted, just revisit the Default Apps settings and change it again. There’s not a permanent lock for this, but the good news is these reset events are less frequent now. As of 2025, Microsoft is also discussing making default app choices more respected and easier to manage in upcoming versions. For now, if an update changes something like your browser, simply follow the above steps to assert your choice again. You can also uninstall any apps you never use (for instance, if you never use Edge, you can’t fully remove it, but you can remove other unwanted apps through Settings > Apps > Installed Apps to avoid prompts).
- Changing Other Default Apps: The Default Apps menu in settings is your one-stop for all file types and links. If, say, photos open in an app you don’t like, or music files use the wrong player, you can change those too. Search for the file type or app in Settings > Apps > Default Apps. For example, to change your default PDF viewer, search for “.pdf” in that settings page and choose the app you want to use for PDF from the list. Or click on the app (e.g., “Photos” or “Movies & TV”) and swap the associations to your preferred program. It’s similar to how you set the browser. While it’s not always one-click (except for browsers), it’s doable without extra tools. Microsoft has indicated they’re working on a more user-friendly interface for this in the future, but until then, a little manual configuration will do the trick.
One more tip: Choose default app when opening a file. If you double-click a file and it opens in the wrong app, you can change it from the file itself. Right-click the file, choose Open with > Choose another app, select the app you want, and check the box that says “Always use this app for this file type.” That’s a quick way to set a default for a specific file extension on the fly.
By taking these steps, you won’t have to constantly fight Windows 11 over which browser or program opens your files. Once set, your preferences should stick (at least until a major update, at which point just reapply them). It’s your PC, after all—you get to decide what apps you use!
The New Right-Click Menu (Where Are My Options?)
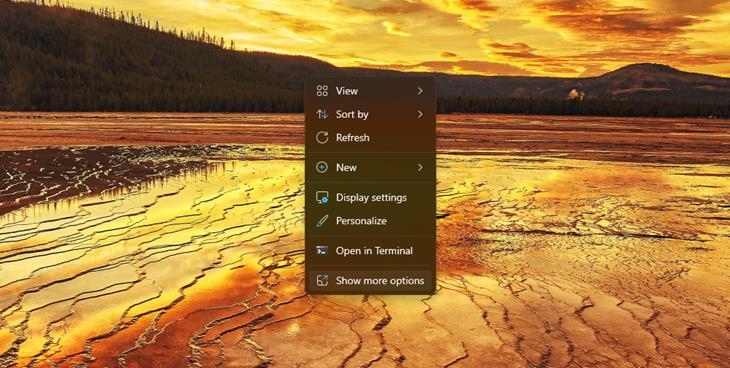
Windows 11 introduced a redesigned context menu (the menu that appears when you right-click on files or the desktop). If you feel some options are missing or hidden, you’re right. The new menu is simpler and shows only the most common actions with icons (like copy, paste, rename, delete) at the top, and a few other options. Long-time Windows users might wonder where choices like “Refresh” or “Print” or third-party extensions went. Don’t worry—they’re still there, just a bit tucked away.
Here’s how to access the full traditional right-click menu when you need it:
- “Show More Options”: At the bottom of the new context menu, you’ll see an item that says Show More Options. Clicking this will bring up the classic Windows 10-style context menu with all the usual entries (keyboard shortcut: Shift + F10 will directly open the full menu). For example, if you right-click on the desktop and want the old Refresh option, just click “Show More Options” and you’ll see Refresh in the legacy menu. This extra click is a bit of a hassle, but it’s the intended way to access anything that’s not in the shortened Windows 11 menu.
- Common Actions Icons: In the first level of the new menu, you’ll notice icons instead of words for some actions:
- A pair of scissors = Cut
- Two pages = Copy
- A clipboard with an arrow = Paste
- A trash can = Delete
- A renaming icon (letters “Aa”) = Rename
If you’re unsure, hover over the icon and a tooltip will appear with the action name. Knowing these can save you from needing the old menu for basic file operations.
- New “Copy as path” and Share options: Windows 11’s context menu also added a couple of handy items like Copy as path (which copies the file’s location to the clipboard—useful for advanced users, but you can ignore it if you don’t need it) and a Share option (to quickly share files via nearby sharing or apps). These are new but don’t interfere with the basics.
If you find the new menu cumbersome, just remember the Shift + F10 trick—it’s a quick way to bring up the full context options without even clicking “Show more.” Over time, Microsoft may refine this menu (they streamlined it to look cleaner, especially for touch users). But all the functionality you need is still available, and no feature was truly removed—it might just take one extra step to reach it. So, whether it’s printing a document or checking file properties, use “Show More Options” to see everything as you did in older Windows versions.
(Tech tip: For the specific case of the Desktop Refresh—many people click Refresh on the desktop out of habit. In Windows 11’s new menu, Refresh might not show until you click “Show More Options.” You can also simply press F5 on the desktop, which still triggers a refresh.)
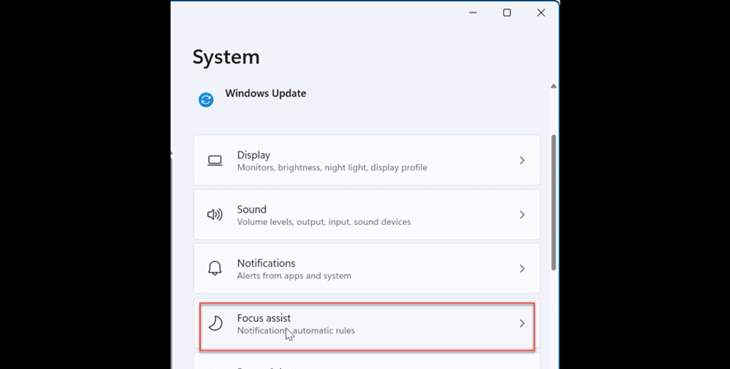
Too Many Notifications? Try Focus Assist
Are notifications popping up and disturbing you? Windows 11 tends to send notifications for emails, apps, calendar reminders, news, and more. If you find these frequent pop-ups distracting (for example, while you’re trying to work or watch a movie), Windows 11 offers a built-in way to quiet them: Focus Assist, also known in some places as “Do Not Disturb.” This feature lets you pause or limit notifications during certain times.
Here’s how to use Focus Assist for peace and quiet:
- Quick Toggle: Click on the date and time in the bottom-right corner of the taskbar. This opens the Notification Center. At the top, you’ll see a bell icon (🔔) or a moon icon (🌙). In newer versions, Windows 11 has a quick “Do Not Disturb” button represented by a bell icon—clicking that will mute notifications until you turn it off. On some versions, you might need to click a button labeled Focus Assist. Either way, one click can silence notifications.
- Focus Assist Modes: Windows 11’s Focus Assist has two main modes if you dig into settings:
- Priority Only: Only notifications from a priority list of contacts/apps will show. You can customize this list (for instance, you might allow notifications from your family or an important app like Microsoft Teams, and block everything else during focus time).
- Alarms Only: Absolutely no notifications except alarms will disturb you. This is great for total concentration—you won’t see email or app alerts at all until you exit Focus or a set time ends.
By default, if you turn on Focus Assist from the Notification Center, it might activate Priority Only mode. You can change what’s considered “Priority” by going to Settings > System > Notifications > Focus assist (or by clicking Focus Assist settings when you toggle it). There, you can choose which apps or people are allowed to break through.
- Scheduled Quiet Times: If you want Windows to automatically silence notifications at certain times (say, every night after 10 PM or during your lunch hour), you can set up automatic rules. In Settings > System > Focus assist, look for the automatic rules section. You can schedule focus times or have it turn on in specific conditions (like when duplicating your display or playing a game). For example, you might schedule Do Not Disturb daily from 9 PM to 7 AM so that you aren’t bothered by pings late at night.
- Visual Quieting: Focus Assist not only stops the pop-up toasts, it also can stop the taskbar app icons from flashing and hide badge icons if you choose, so the taskbar stays calm. When Focus Assist is on, you’ll see a small moon icon in the notification area to remind you. Any notifications that come in while Focus Assist is active are collected quietly—you can view them later in the Notification Center once you turn Focus off.
Using Focus Assist is a simple yet effective way to take back control of your time and screen. It’s completely under your control—turn it on when you need an interruption-free session, or schedule it so you have guaranteed quiet hours. Windows 11’s notifications system is more refined than previous versions, and with Focus Assist, it makes them less distracting by giving you this do not disturb mode. So next time you’re feeling bombarded by notifications, give yourself a break by clicking that little moon icon and enjoy some focused, notification-free computer time.
Search Can’t Find My Files
You hit the search button (🔍) on the taskbar or the Start menu and type a file name—but Windows 11 isn’t finding the file you know is there. This can happen, especially if you just added a lot of files or upgraded to Windows 11 recently. Windows 11 uses an index to speed up searching, but if that index hasn’t caught up or got corrupted, searches might miss things. Don’t worry, you can fix it so your files become searchable again:
- Give it Time after Upgrades: First, note that if you just upgraded to Windows 11 or added a new folder of files, the system might still be indexing (cataloguing) them. Indexing can take hours if you have a lot of data, and during that time search results might be incomplete. If it’s been less than a day since a big change, you might simply wait a bit and try again later once indexing finishes (your PC can be on but idle for it to index in the background).
- Check Indexing Options: If search still isn’t working properly after some time, you can manually rebuild the search index:
1. Open the Start menu and type “Indexing Options,” then open that result. (You can also find it in Control Panel if you search within Control Panel.)
2. In the Indexing Options window, you’ll see a list of locations that Windows is indexing (like Start Menu, Users folder, etc.). If the folder where your files are located isn’t listed (for example, a secondary hard drive or a specific folder you store documents in), you can add it by clicking Modify and checking that folder.
3. Next, click the Advanced button. In the Advanced Options, you’ll see a section for Troubleshooting with a Rebuild button. Click Rebuild and confirm. This will delete the existing index and rebuild it from scratch.
4. It will take some time (you’ll see an estimate of how many items are indexed and it will count up). You can continue using your PC. Once the rebuild is done, try your search again.
- Searching All Locations: By default, Windows 11 might not index certain areas (for performance reasons, it may not index your entire C: drive). If you often search for files in a non-indexed location, Windows will still look there but slower. You can force a search anywhere by using the search filters. For example, in the search window, choose Documents or Folders in the filter drop-down to narrow the search to certain file types or locations. If you frequently need to search a folder that’s not indexed, consider adding it to the index locations as described above, so future searches include it.
- Use File Explorer Search: Alternatively, if the taskbar search isn’t finding a file, try opening File Explorer and navigating to the folder where you think the file is, then use the search box at the top right of that window. File Explorer can search within the current folder and subfolders. If the index is an issue, File Explorer search will eventually find the file by scanning, though it might be slower. This can be a fallback method to locate something immediately.
Usually, rebuilding the index or adjusting what’s indexed will solve search issues. After a rebuild, Windows 11’s search should be able to find your documents, pictures, and other files as expected. It’s a one-time fix that can save a lot of frustration. Remember, the search index is what makes results instant, so keeping it healthy ensures you can rely on that handy search bar to pull up your files on demand.
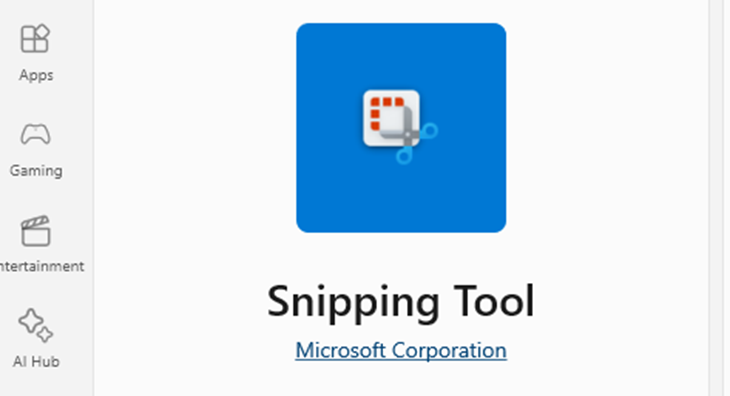
Snipping Tool Isn’t Working
The Snipping Tool is a handy utility for taking screenshots (snips) of your screen. On Windows 11, the Snipping Tool got combined with a feature called Snip & Sketch, and it’s supposed to be better than ever. However, some users have encountered an issue where the Snipping Tool just won’t open or capture screenshots, or it gives an error. This tends to be an uncommon glitch, but it’s solvable with a few easy steps:
- Update Windows 11: Microsoft has released updates to fix Snipping Tool bugs. The first thing to do if your Snipping Tool isn’t opening or working is to make sure your system is up to date. Go to Settings > Windows Update and click Check for updates. Install any updates, then try the Snipping Tool again after restarting. In many cases, a Windows update restored the tool’s functionality.
- Use the Keyboard Shortcut (Snip & Sketch): Windows 11’s screenshot function can be invoked without opening the app interface at all. Press Windows key + Shift + S together—your screen will dim and a small snipping menu will appear at the top of the screen. You can choose the type of snip (rectangular, freeform, window, or full-screen). Select what you need and snip the area you want; the captured image goes to your clipboard and also shows a notification. Click the notification to edit or save the snip. This method works even if the Snipping Tool app isn’t launching, because it uses the snipping service in the background. It’s a great workaround and, in fact, a primary way to use the tool in Windows 11.
- Repair or Reset the Snipping Tool app: If the Snipping Tool app itself seems broken (for example, it opens but freezes, or doesn’t respond), you can try to repair or reset it. Go to Settings > Apps > Installed Apps (or Apps > Apps & Features). Find Snipping Tool in the list. Click the three-dot menu next to it and select Advanced options. Here, you’ll find a Repair button and a Reset button. First, click Repair and test the app after that. This won’t remove any settings. If it still has issues, click Reset to restore the app to default state. Then test it again.
- Reinstall Snipping Tool (via Microsoft Store): The Snipping Tool is a built-in app that can actually be uninstalled and reinstalled if needed. In the Installed Apps settings, locate Snipping Tool, click the menu, and choose Uninstall. Confirm to remove it. Then open the Microsoft Store app, search for “Snipping Tool,” and install it again. This can fix any corrupted program files. Don’t worry—Snipping Tool is free and by Microsoft, so reinstalling from the Store is safe. After reinstalling, try taking a snip to see if it works.
- Alternative Screenshot Methods: If all else fails, remember you have other ways to capture the screen:
- Press Print Screen (PrtScn) on your keyboard to copy the entire screen to the clipboard, then paste (Ctrl+V) into Paint or Word to save it.
- Press Alt + Print Screen to capture the currently active window only (also copies to clipboard).
These are not as fancy as Snipping Tool, but they can capture images in a pinch. There are also third-party screenshot tools, but before resorting to those, the steps above should get Snipping Tool back in shape in most cases. In fact, Microsoft has fixed most Snipping Tool issues through updates, so a fully updated Windows 11 should have a working snipping feature.
With these steps, you should have your screenshot functionality back. For most users, updating Windows and using the Win + Shift + S shortcut resolves the issue immediately. The Snipping Tool is very useful for grabbing snippets of information on your screen, and it’s even better on Windows 11 (when it’s working) because of the integrated editing features. Now you can continue capturing images of your screen without frustration.
---
Final Tip: Windows 11 is evolving, and Microsoft has been responding to user feedback. Many early quirks have been fixed through updates. It’s a good idea to keep your Windows 11 updated not only for security, but also to get usability improvements. And to avoid surprises, you can take control of when updates happen. For example, under Settings > Windows Update > Advanced options, you can turn off “Restart this device as soon as possible when a restart is required” (so it won’t reboot unexpectedly), and set Active hours so automatic restarts only happen at times when you’re not usually using the PC. This way, Windows will update on your schedule, and you won’t be caught off guard by a restart in the middle of your work.
Sources: Recommendations and solutions are based on guidance from ITPro, PCMag, Windows Central, Microsoft Support, Lifewire, TechRadar, iFixScreens, and gHacks Tech News, compiled from recent articles and updates as of April 2025.