Have you ever experienced your computer freezing mid-action? Or maybe deleting an important file or folder you didn’t know how to restore? We are certain that one or both of these things happened to most of you. The most well-known solution is actually taking preventative measures by copying everything that’s important on your computer to a thumb-drive, but the Windows system has some other simple options that some of you may not know when it comes to backing up and restoring files. Keep reading this guide to learn all the backup and restore options that Windows 10 and Windows 7 have to offer.

If this is the first time you’re opening up the Backup and Restore Center, you must follow these steps so that you can set your preferences for this process:
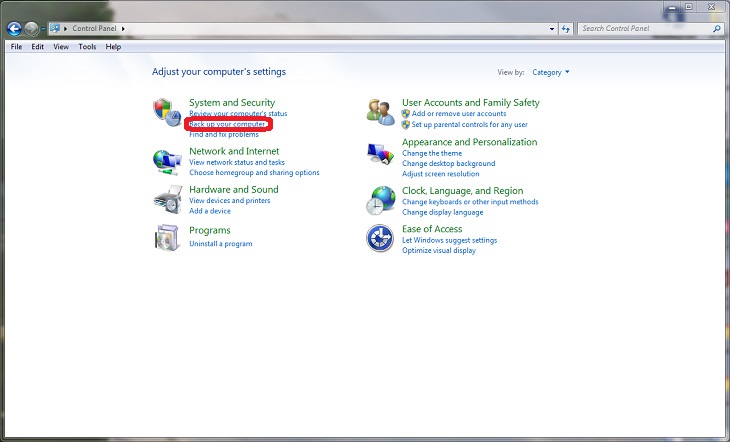
1. Click "Start" and enter the "Control Panel", where you’ll select the "Backup and Restore" option under "System and Security."
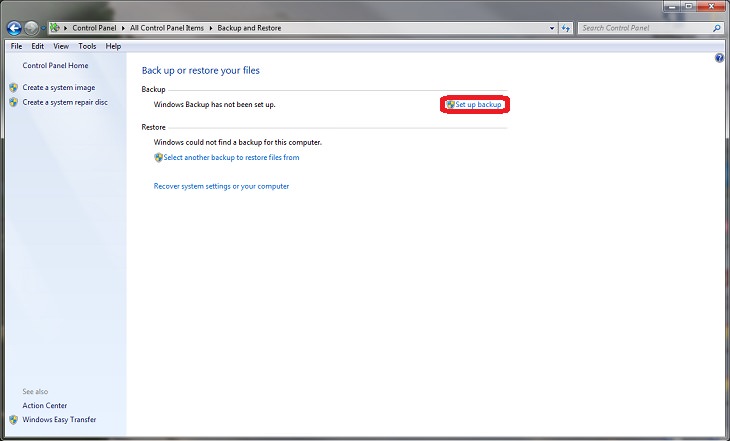
2. Click “Set Up Backup.” If you are prompted for an administrator password or confirmation, type the password or the confirmation provider number.
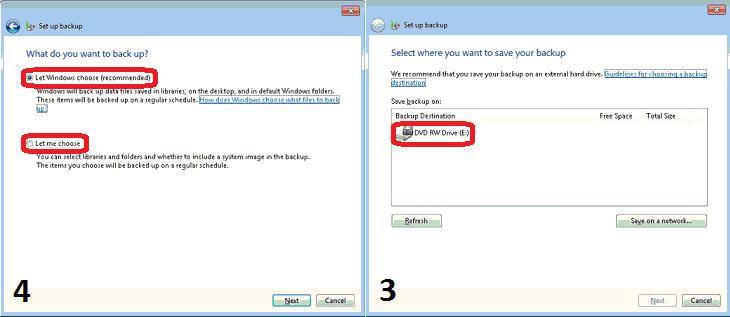
3. Now, select the location where you want the backup to be saved - external drive.
4. Select the files you want to back up; You can choose "Let Windows choose" to back up cached files in frequently used folders, or you can choose "Let me choose" so that you can manually mark the files and folders that are important to you to back up.
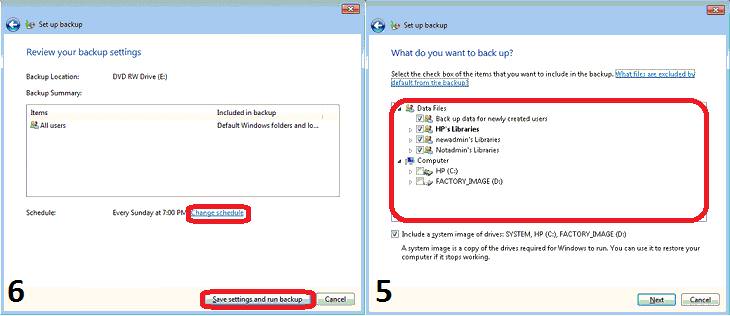
5. Click "Next"; If you select "Allow Windows to choose", proceed to the next step: Review the backup settings selected by the system, see that they are appropriate for you, and start the backup; If you chose "Allow me to choose", you should now select the directories and folders you want to back up, and then click “Next.”
6. Review the settings you have selected, and after making sure that everything is correct, click "Save settings and run backup". Note that “Backup and Restore” sets a weekly backup schedule by default, and to change the schedule or to turn off automatic backups, click “Change Schedule” and choose the one that suits you.
To restore all the files that you backed up by using the “Windows File Backup Wizard”, you must follow these steps:
1. If your backup files are on an external hard drive, you must now connect it to your computer.
2. Now, click "Start" and then "Control Panel" and select "Back up your computer.”

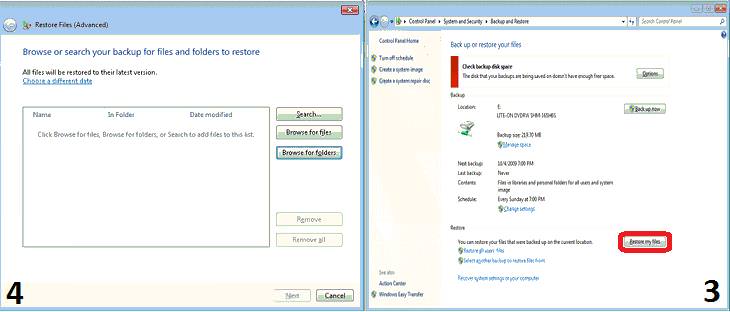
3. Click "Recover my files" or "Restore all users' files" and the "File Recovery" window will open.
4. Now add the files and folders you want to restore to the recovery window by clicking "Search," "Browse for files" or "Browse for folders".
5. When you finish adding all the files and folders that you want to restore, click “Next.”
6. Now choose to save the recovered files to the original location or another location. Note that if you want to save the files in a different location, click "Browse" to set their new location.
7. Click "Restore"; Now the File Backup Wizard will restore them, when it finishes, click “Finish.”
You can use a restore point to restore your computer's system files to a previous point in time. It is important to note that restore points are created automatically each week by System Restore when the computer detects a change in the file composition, such as when installing software or a driver. To manually create a restore point, and restore to it, follow these steps:
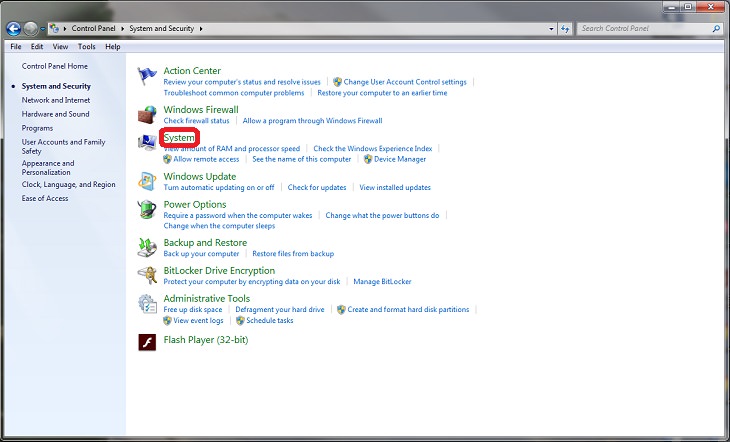
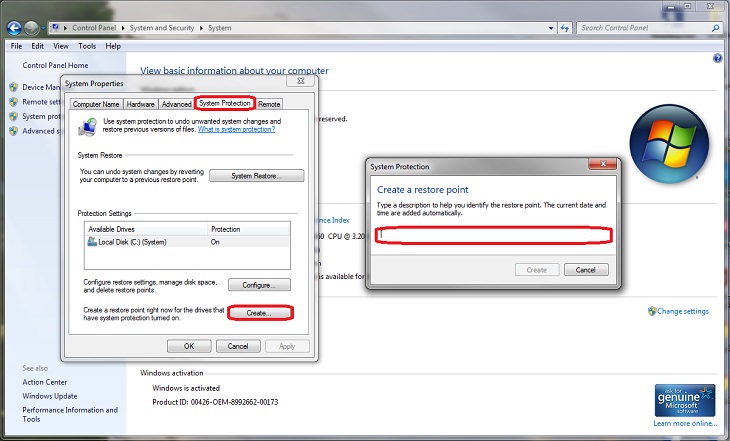
1. Click "Start" and then click "Control Panel.” Select "System and Security" and click on "System."
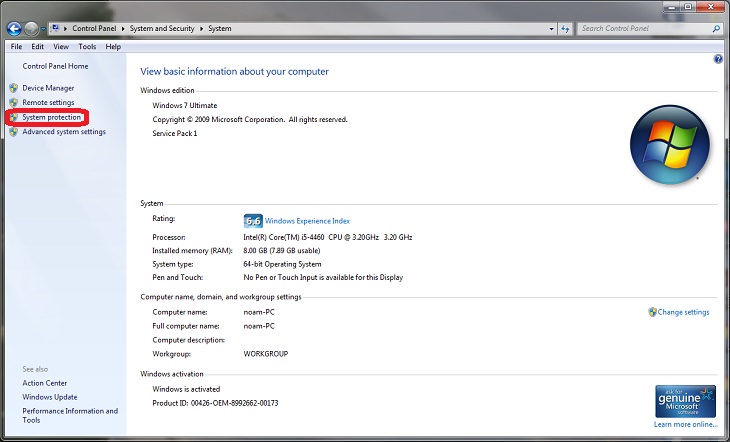
2. In the window that opens in front of you, select "System protection" in the left pane.
3. In the small window that opens, select the "System protection" tab, and then select "Create."
4. You can now save a restore point to whichever name you choose to give it and, in the future, select it if you want to restore the data.
Now, in order to restore to that restore point, you must follow these steps:
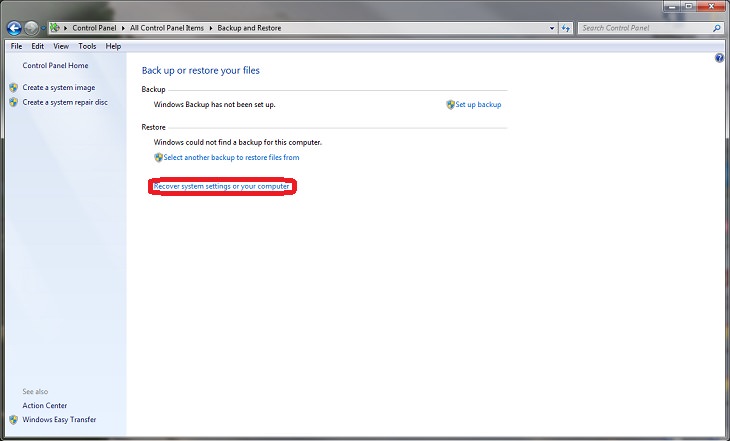
1. Click "Start", then "Control Panel" and select "System and Security" and "Back up your computer."

2. Click "Recover system settings or your computer" and in the window that opens, select "Open system restore".
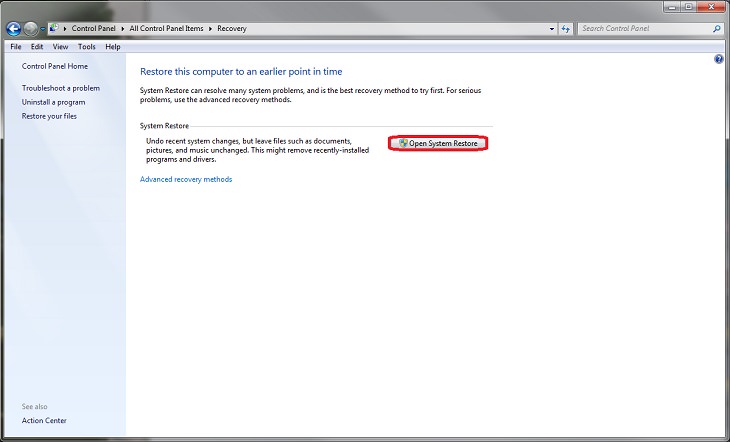
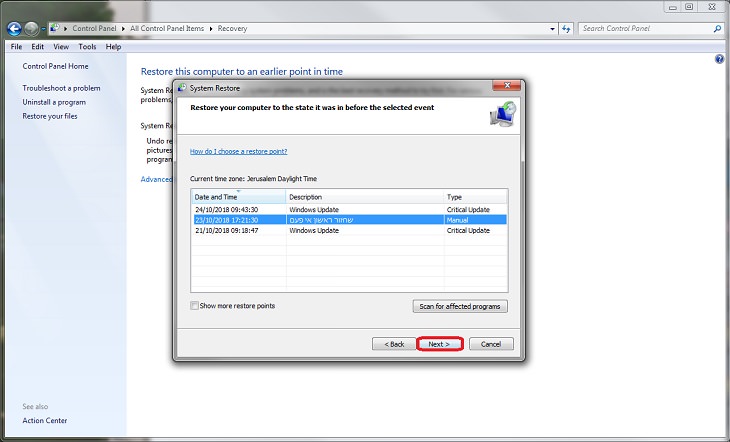
3. In the window that opens before you choose the desired restore point and continue the recovery process according to the instructions until the "Finish" button, after which your computer will return to the restore point you set.
The File Backup Wizard allows you to create an image of your entire computer that can be used to restore files in the event of hardware failure. To create a system image, you must follow these steps:
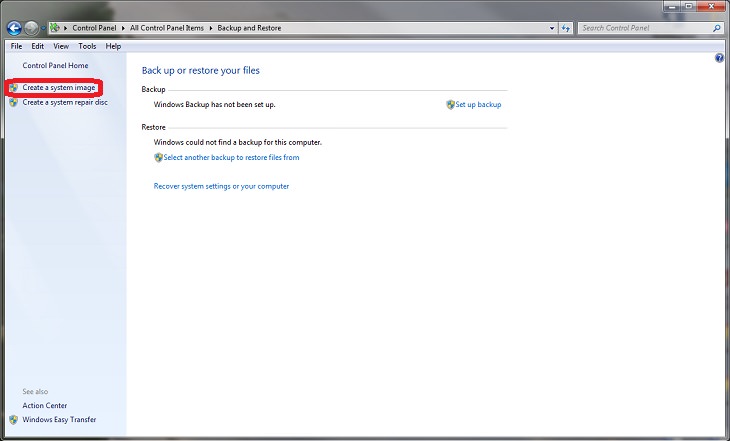
1. Open the Backup and Restore Center as you’ve already learned in the previous sections.
2. Click "Create a system image" - Windows will now look for available backup devices such as an external hard drive, a DVD burning drive, or a network drive.
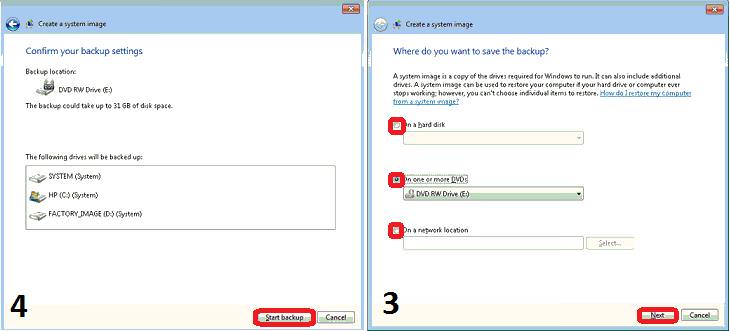
3. Now select the location you want to save the system image to, and then click Next - It is recommended that you do not use CDs and you should also rely on an external or USB portable drive.
4. Confirm the settings you have selected and click "Start backup" and then click "Finish."
To restore your computer by using a system image, you must follow these steps:
1. Access the "Backup and Restore Center" as you’ve already learned to do and click "Restore system settings."
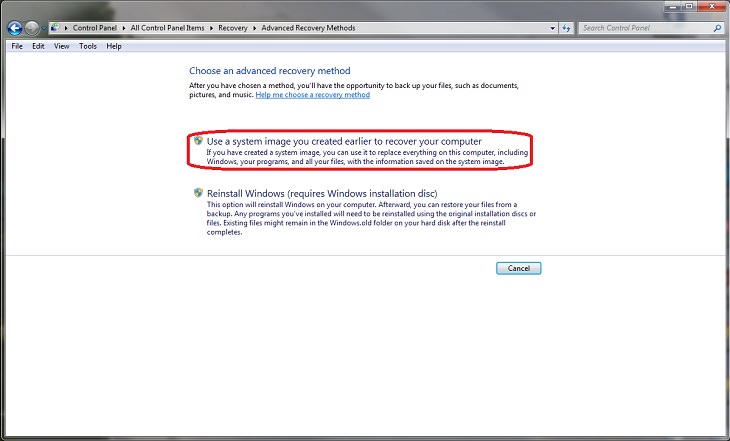
2. Now in this window, click "Advanced Recovery Methods" and select "Recover Computer with System Image."
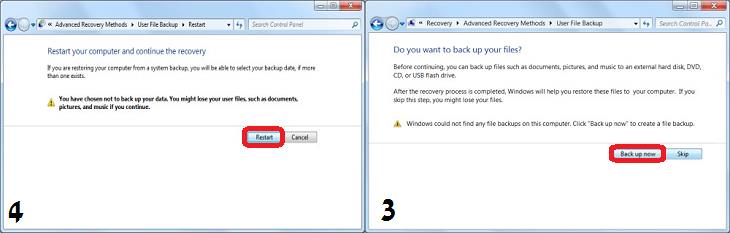
3. Before performing the restore, it is important to check if you have added any files to your computer since you created the system image files if so, click "Back up now" to save copies of your most recent files. If you already have an up-to-date backup of your files, click "Skip."
4. Click "Restart" to continue the restore. When Windows restarts, select the keyboard input method, and then click Next.
5. Click "Use the most recent system image available (recommended)" and then click "Next".
6. On the Select More Recovery Options page, click Next.
7. On the confirmation page, click Finish and then "Yes" - Windows is now restoring the computer, which may take several minutes to several hours, and then the computer will restart automatically.
8. If you created a backup of user files before restoring the computer, you can restore them now by clicking "Restore My Files" and follow the instructions on the screen.
In this system, the File Backup and Restore Wizard is somewhat similar to the Windows 7 operating system, and to back up and restore files you must follow these steps:
1. Click "Start", select the "Settings" icon and enter "Updates & Security."
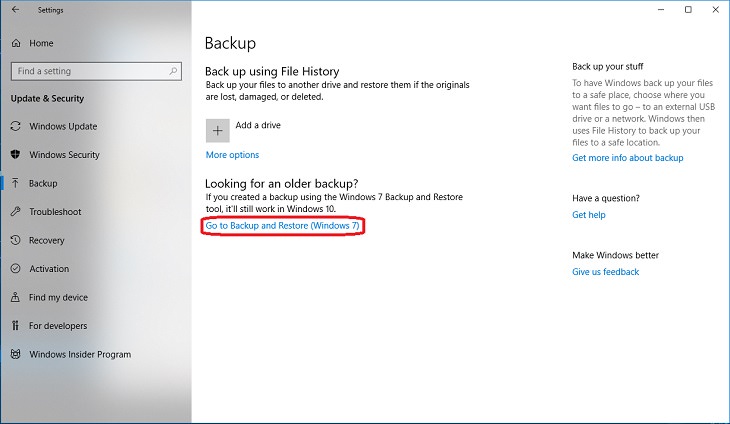
2. Now, right click on "Backup" - here you can select "Go to Backup and Restore (Windows 7)" and back up your files according to the instructions above. If you do not want to do so, you should continue to follow the instructions below.
3. Click "Add a drive" and select an external drive or network location for your backups.
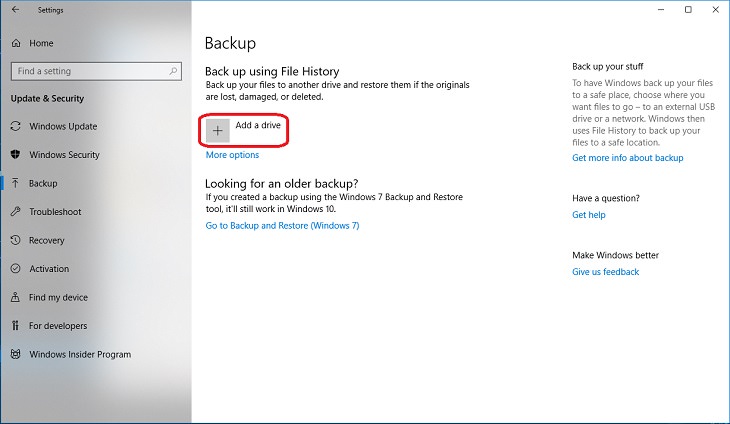
4. At this point, your computer will back up everything in your user folder (C: \ Users \ username). If you want to change the selection of the files to be backed up or the frequency of the backups, go to "More Options" in the same window.
5. Under the More Options window, you can immediately back up your files by clicking "Back up now" and you can exclude certain folders from your backups by adding them under "Exclude these folders".
With File History, you can restore one file or all the files you have backed up. You can also find different versions of the same files from different dates.
In order for you to recover the files you have backed up, you must follow these steps:
1. If you’ve backed up the files to an external drive, connect it to your computer now.
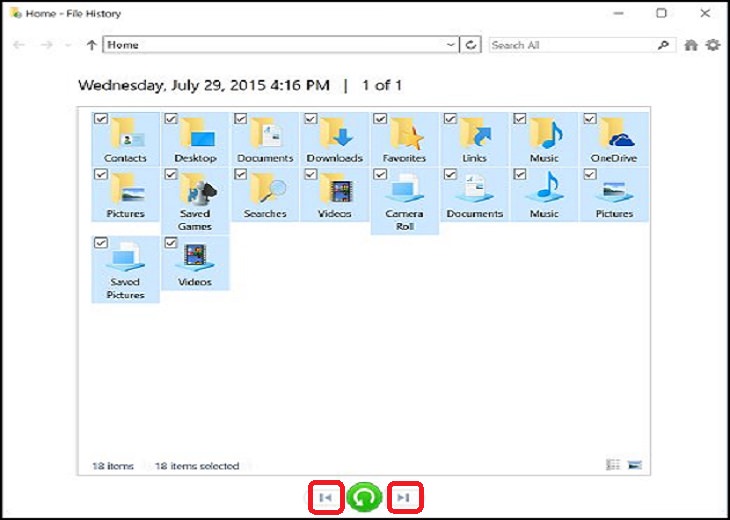
2. In the search bar next to the "Start" button, search for and open "Restore your files with file history".
3. Click the Back and Next icons to select the backup point you want to restore.
4. Select the files or folders to restore, click the Restore icon, and wait until Windows finishes the operation.