Microsoft OneDrive is currently one of the most well-known cloud storage services. It’s easy to install and use and if you have a computer that runs Windows 10, then it is already available with any installation. If you don't use Windows 10, then you can simply create a Microsoft account and download and install the OneDrive software on your computer devices. There’s also a Microsoft OneDrive app for smartphones that can be installed on various platforms.
The standard personal version of OneDrive offers users access to 5GB of free storage space in the cloud. This can be increased to 100 GB or 1 TB of space with a subscription.
Whether you are a new user or have had Microsoft OneDrive for a while, there are plenty of neat features in it that you might not be aware of. Read on to learn some great tips that will make you maximize OneDrive’s full benefits.
1. Manage your storage
Most computers come with 500 GB of storage or smaller. You can of course get an external hard drive if you need to extend some space, but a more convenient way to save space is to use OneDrive.
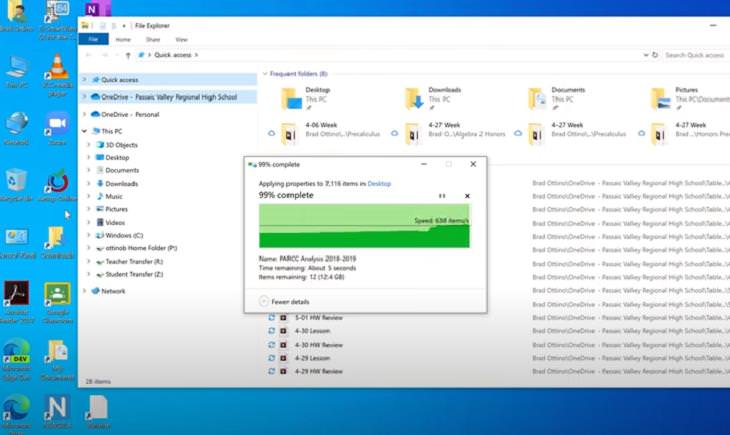
Go to the OneDrive folder on your PC and right-click the files and folders you don't need on your system. Next, choose Free up space on the menu and the selected files will get uploaded to the cloud and will be freed from your computer. If you have access to an internet connection, you can open those files anytime from the cloud.
Now, be mindful of the number of files you keep transferring to the cloud. After all, you can easily forget that you are overloading it with huge files. That’s why you must keep checking the OneDrive Manage Storage page from time to time to make sure you're not going over your limits. It will notify you of how much storage is available, and how much is used by your account.
2. Keep your files always available
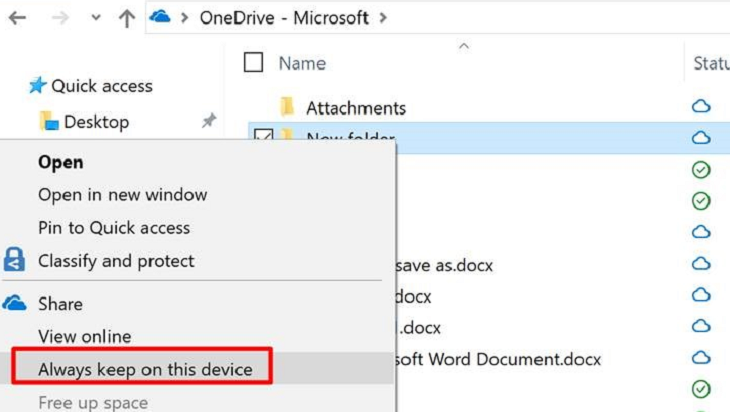
OneDrive has a nifty feature called Always keep on this device which, as the name suggests, is useful if you want a synced copy of the cloud storage's files and folders kept on a PC. By using this option, you can place synced copies of the OneDrive files and folders on your computer and always access them, even when you don’t have an internet connection.
Right-click on the important files or folders you need on your system all the time, and click on Always keep on this device. Once you do this, a checkmark will appear side the file, and the file hosting service will be instructed to always keep a copy of it locally and never move it to cloud-only.
3. Share files with others
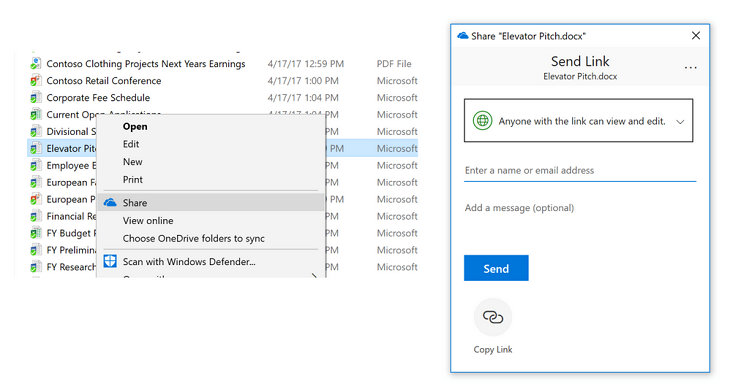
One of the biggest highlights of cloud storage services is the ease with which you can share files with others. In OneDrive, you simply have to right-click the file or folder you want to share, and then select Share. This will open up the share dialog where you will have the option of writing the email of the person you want to share a file to. Above that, there will be an option titled Anyone with the link can edit. If you want the receiver to only view the file, then click on this option and it will open a new window named ‘Link settings’ where you can uncheck the box that says ‘Allow editing’. Once you have put the email of the receiver, click on send and they will receive the link of the file you wanted to send. Alternatively, you can also use the ‘Copy link’ option and share it through some other means like maybe WhatsApp or Facebook Messenger.
4. Add expiry to links before sharing
While we are talking about sharing files, there’s another neat feature in it that you can explore: adding expiry links to your files before sharing. This is handy if, for instance, you only want a shared file to be edited by the receiver for the next 2 days. Go to Share > Link Settings > Set Expiration Date and you will then be able to add a date and time to a sharable link before sending it to anyone else. Once the set date is over, the receiver won’t be able to edit the file any longer.
5. Keep your photos and videos safe
If you install the OneDrive app on your smartphone, then you can automatically upload your camera roll to it. Just go to the app, tap the Me icon at the bottom. Next, tap on Settings and then Camera upload. Set Camera upload to On and you are set. To make sure videos automatically upload as well, turn on Include videos.
The best thing about this feature is that even if you delete a photo or video from your phone, the copies in OneDrive won't be affected. This will be useful if you delete a photo or video by mistake or lose your phone. Because once you log in to your OneDrive account from any device, you will be able to find all your synced photos and videos.
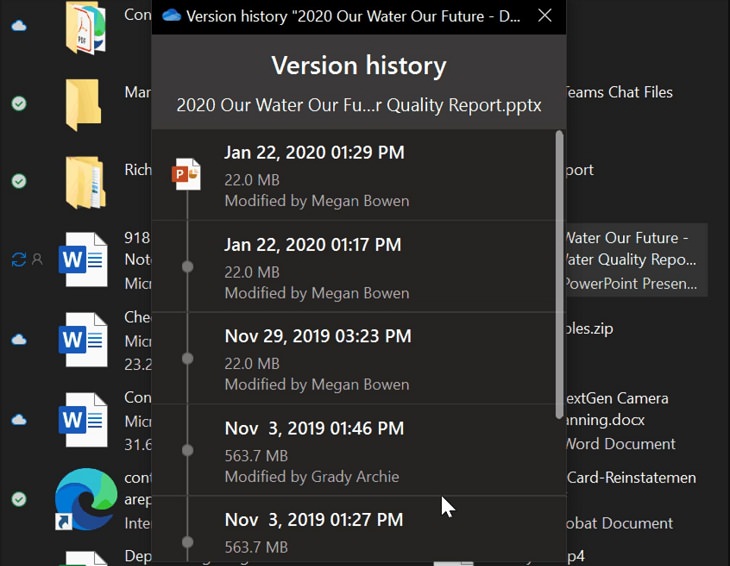
6. Use version history to restore previous versions of a file
Another handy feature in OneDrive is Version history which allows you to see and restore older versions of all your files in your cloud storage service. Say, for example, you made an unintentional change to an important file and can’t undo it. Just right-click on the file you want to restore and choose Version history. A new window will appear and will show you all the versions of the file that’s saved in OneDrive, along with the file size, and the profile that made the changes. The great thing about this feature is that it works with all file types, including photos, and videos.
As of now, this feature is only available on the website or your desktop and not on mobile devices.
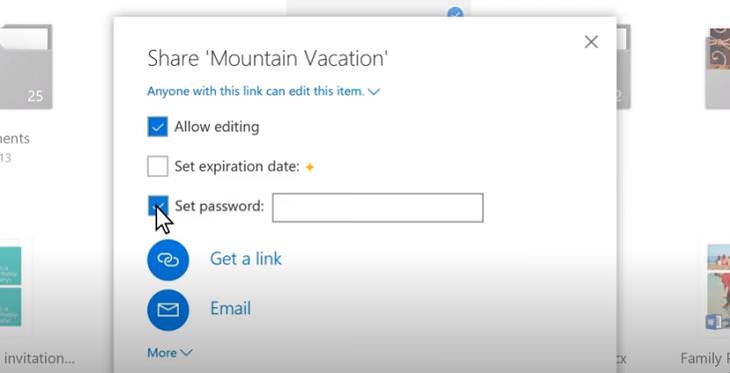
7. Add passwords to links
If you are sharing some sensitive information through OneDrive, then there’s an option to add passwords to links before sending them. This is to ensure that only those familiar with the password will be able to view the content in the link. As of now, the feature is only limited to the web version.
To share on the file you have to send, turn on Set password, add a new password, and copy that link. Make sure you share that password with the receiver so that they can access the content from the link when you send it.
8. Find the files you shared and received
If you have been using OneDrive for a while, then it’s likely that you already have many items in it. And in all the clutter, it may at times be confusing to find the files that someone shared with you. This is pretty easy, really. Just log in to the OneDrive Live website and go to the Shared menu. Here, under the section Shared by me, you will be able to see all the files you shared with others. Below this, you will find the files that were shared with you under the names of each person who shared them.
To access this feature on the mobile app, go to the bottom menu and choose Shared. This will show you a list of profiles to select. Click on any profile and you will find all the files they have shared with you.
Share these useful tips with other OneDrive users...