Can you relate to me in terms of the hours I've wasted over the phone with my kids and grand-kids over the years? Being part of the older generation, I've always struggled to do various things on my computer, such as installing programs that I needed or changing vital settings, so you can imagine my amazement when I found out that sharing my computer screen with a relative or friend is a possibility! In this guide, I will outline three different ways in which you can share your screen with a person of your choice. I personally recommend Skype, as it is incredibly straightforward, however this guide gives you the option to choose which method suits you best. Without further ado, let's dive into this computer screen-sharing guide that covers both Macs and PCs:
Before we start, why should I bother with screen sharing?

Screen sharing has a variety of applications in the real world, namely for webinars (an online seminar) or one-one-one demonstrations, business meetings and education. With that being said, the biggest benefit that you can reap using it at home is allowing someone that's a whole lot more tech-savvy than you to take over your computer and help you do what you need to do, such as fix a problem, install something, or change a setting. Not only will this save you precious time, but it will save you plenty of aggravation also. As a side benefit, it's quite an interesting thing to witness when you know that it's possible for someone to take over your computer from the other side of the world!
How secure is screen sharing?

In essence, if you're sharing your screen with someone you know well, you have nothing to worry about. The various applications and programs that allow screen sharing do so over secure connections. The biggest worry is leaving things open on the screen that you're sharing that are private or personal, and that you do not wish anyone to see as a result. Before sharing your screen, the biggest precaution you need to take is ensure that you're logged out of your key accounts, such as your email and social media accounts. Once you've done that, you're good to go.
Screen Sharing Method 1: Skype
1. If you do not have it already, you need to install Skype on your computer. Simply download it and follow the instructions on screen. Note that the person you intend to share your screen with must also have it installed. Should you not wish to install Skype, you can also use the web app.
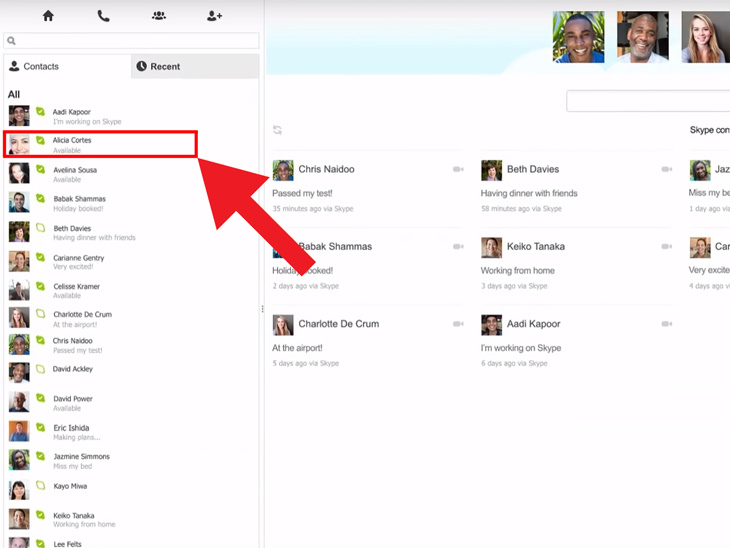
2. Open Skype from your desktop, start or Apple menu.
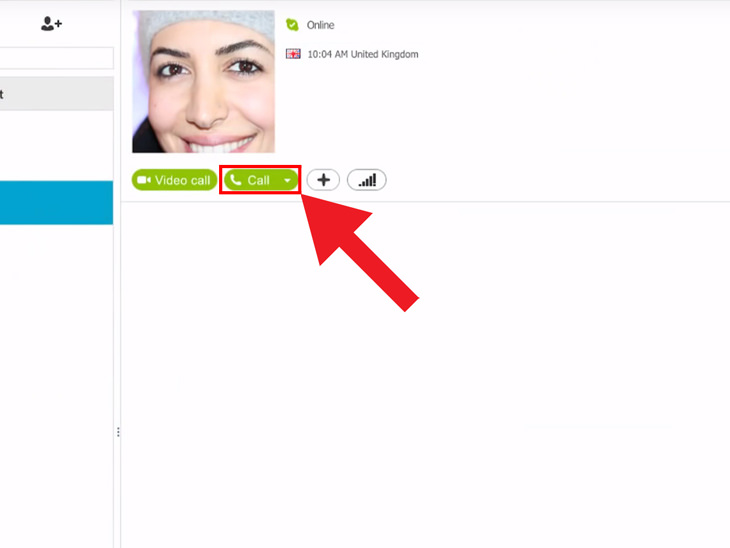
3. Start a voice or video call with the person that you want to share your screen with.
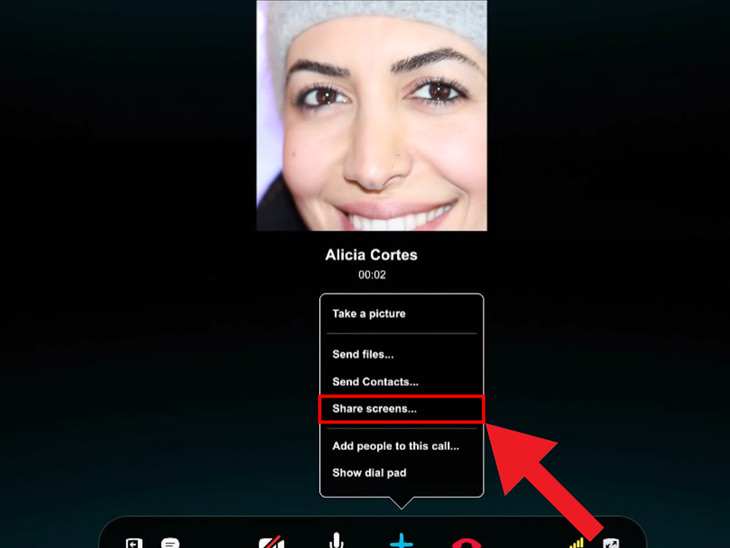
4. Once the call is initiated, click on the + icon in the call bar.
5. Select Share Screens.
5. When you’re on the share screen, a drop-down menu will appear. This allows you to choose what to share. In other words, you can share a specific window open on your computer, or you can share your entire screen.
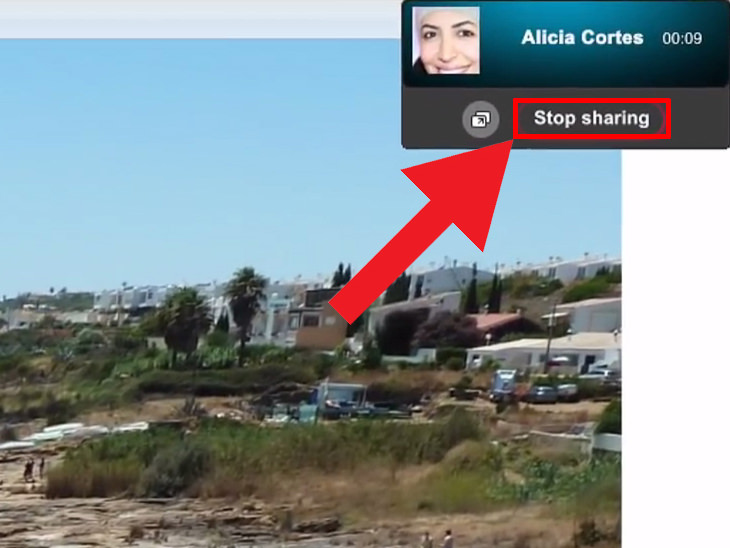
6. Click on stop sharing when you’re ready to end the screen-sharing session.
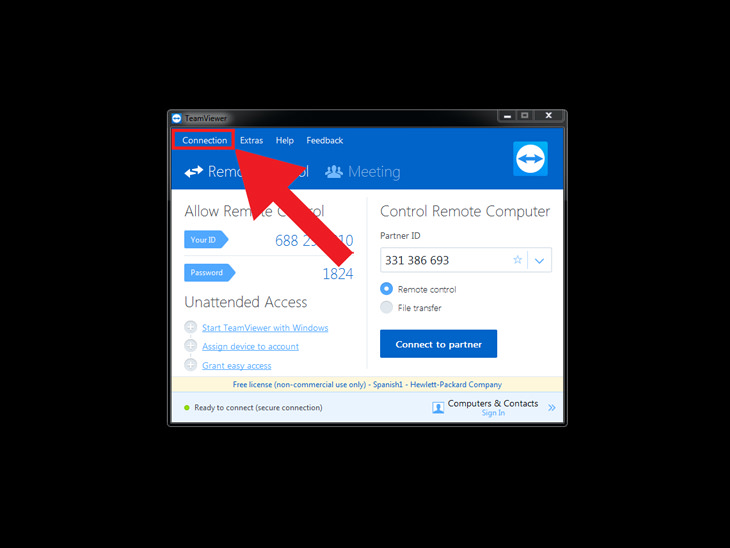
Screen Sharing Method 2: TeamViewer
1. If you do not have it already, you need to install Team Viewer on your computer. Simply download it and follow the instructions on screen. Note that the person you intend to share your screen with must also have it installed.
2. Open TeamViewer from your desktop, start or Apple menu.
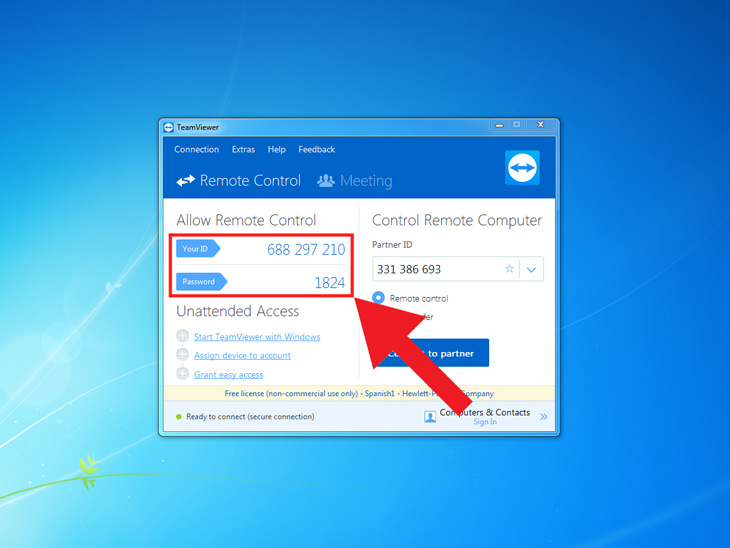
3. When the main TeamViewer window pops up, you’ll see that it has two tabs, which are called Remote Control and Meeting respectively.
4. Keeping to the Remote Control tab, take note of your ID and password as displayed on screen.
5. Supply the ID and password to the person that you intend to share your screen with.
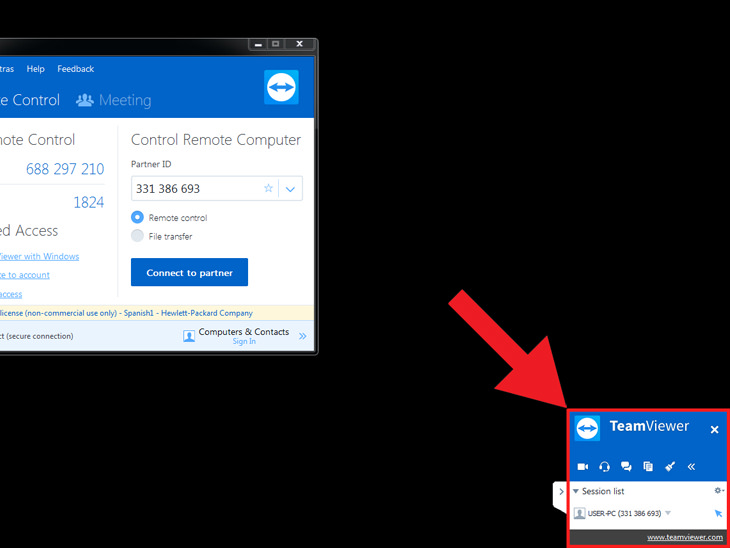
6. Once the other person has entered the relevant information, they will be able to take over your screen.
7. Disconnect from the other person’s computer via the Connection drop-down menu. You will then be prompted to add the person to your partner list. Should you intend to share your screen with the person again in future, click yes, otherwise click no.
8. Last but not least, you will be asked to buy a TeamViewer license via a popup window. If you’re going to use this program for any reason other than your own personal use at home, I recommend that you buy the one-time payment license. If you’re not, simply click OK.
Screen Sharing Method 3: Google Chrome Remote Desktop
1. If you do not have it already, you need to install the Google Chrome web browser. Simply download it and follow the instructions on screen. Note that the person you intend to share your screen with must also have it installed.
2. Install the Google Chrome Remote Desktop app.
3. Once both of the above are completed, open the Google Chrome web browser on your computer.
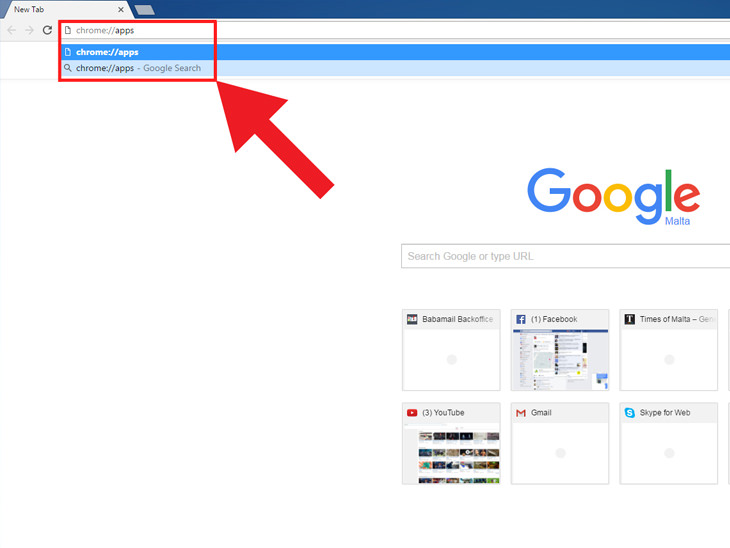
4. In the address bar of Google Chrome, type in: chrome://apps and then hit the enter key on your keyboard.
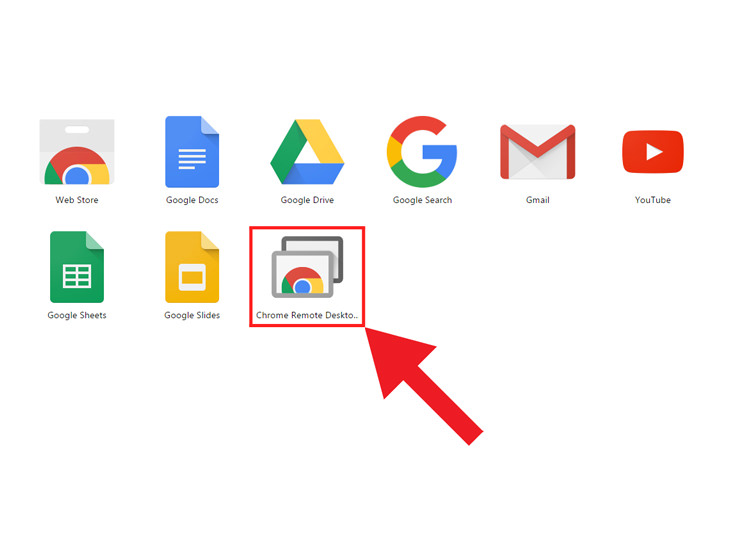
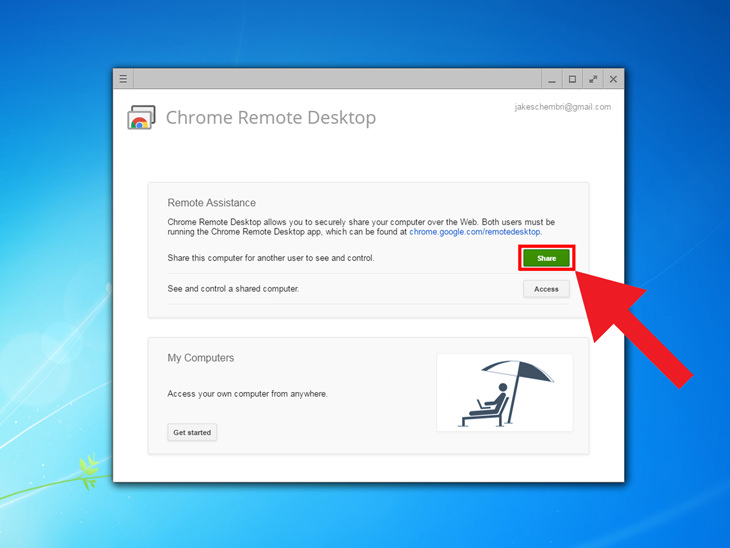
5. In the app list, click on Chrome Remote Desktop.
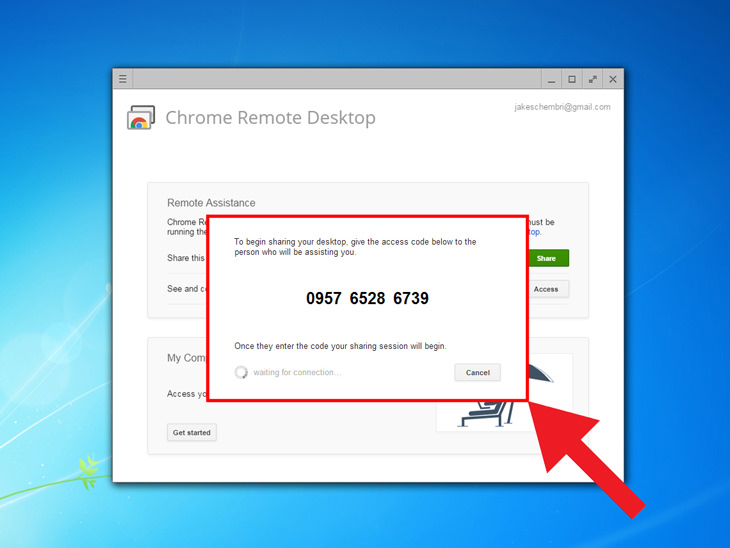
6. Click the Share button on your screen to create an access code.
7. Send the access code to the person that you want to share your computer screen with.
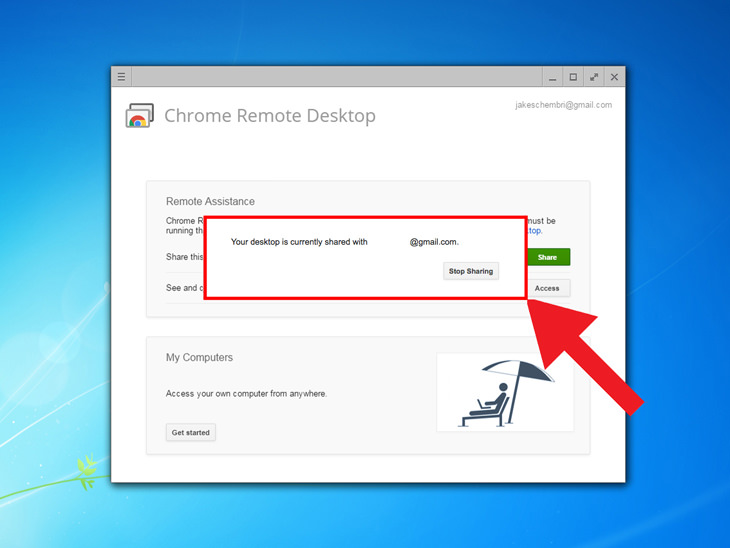
8. When the other person enters the access code, they will be able to see your email address and have full control over your computer.
9. Click on stop sharing when you’re ready to end the screen-sharing session.