Imagine stepping into your very own sauna after a long, exhausting day — no gym membership, no driving, no waiting. Just pure, melting relaxation right in your own home. Sounds like a dream? It's actually more achievable than you think, and this guide will walk you through everything you need to get started.
First, What Kind of Sauna Do You Want?
Before you pick up a single tool, it helps to know what you're building. There are a few popular options to consider. A traditional Finnish sauna uses dry heat with occasional steam from pouring water over hot rocks — the classic experience most people picture. A steam room cranks up the humidity to 100% for that thick, enveloping warmth. Infrared saunas work differently, heating your body directly rather than the air around you, which many people find gentler and easier on the lungs — a great choice if you have respiratory sensitivities. And then there are barrel saunas — those charming cylindrical outdoor structures that are often the most budget-friendly route and require the least construction work.
💡 Practical tip: If this is your first sauna build, an infrared kit or barrel sauna is the smartest place to start. They require far less construction expertise and can be up and running in a weekend.
Indoor or Outdoor — That's the Big Question
One of the first decisions you'll need to make is where your sauna will live. An indoor sauna can be built inside a basement, large closet, or bathroom, and has the advantage of existing walls, electricity, and shelter already in place. An outdoor sauna gives you more flexibility in size and that special feeling of stepping outside into the fresh air after a good sweat — but it does require more planning, including a solid foundation and an electrical hookup.
💡 Practical tip: A spare bathroom is actually one of the best indoor locations because the waterproofing and drainage infrastructure is already there. For outdoor builds, an old garden shed is a surprisingly good starting point — the shell is already done, and you're essentially just converting the interior.
Size, Location, and Practical Considerations
Think about how many people will be using it regularly, because that determines how large it needs to be. A good rule of thumb is to allow roughly 2 feet of bench space per person. You'll also want easy access to electricity and water, good ventilation for both safety and performance, and a quick check of local building codes before you start construction — some areas require a permit for structures over a certain size.
💡 Practical tip: Don't overbuild. A smaller, well-built sauna heats up faster, costs less to run, and is actually more enjoyable for most people than a large one that takes forever to reach temperature. A 4x6 foot space is plenty for two people.
Kits vs. Custom — Which Is Right for You?
If you're not the most experienced DIYer, good news — sauna kits exist that come with nearly everything you need to transform a spare room or garden shed into a proper sauna. For those who love a hands-on project and want full control over the design, a custom build is incredibly rewarding and can save you significant money on labor.
💡 Practical tip: If you go the custom route, get at least two quotes from electricians before starting — the electrical work is typically the biggest variable cost in the whole project, and prices can differ dramatically.
Choosing Your Heater
Your heater choice shapes the entire experience. Electric heaters are convenient, heat up quickly, and are the most common choice for home saunas. Gas heaters are similarly efficient but require a plumber's involvement. Wood-burning heaters have an undeniable rustic charm and work great off the grid, though they take longer to heat up and require more tending.
💡 Practical tip: For most home saunas, a 4–6 kW electric heater is the sweet spot. Go too small and your sauna struggles to reach temperature; go too large and you're wasting energy. A good rule is roughly 1 kW per 45 cubic feet of sauna space.

The Right Materials Make All the Difference
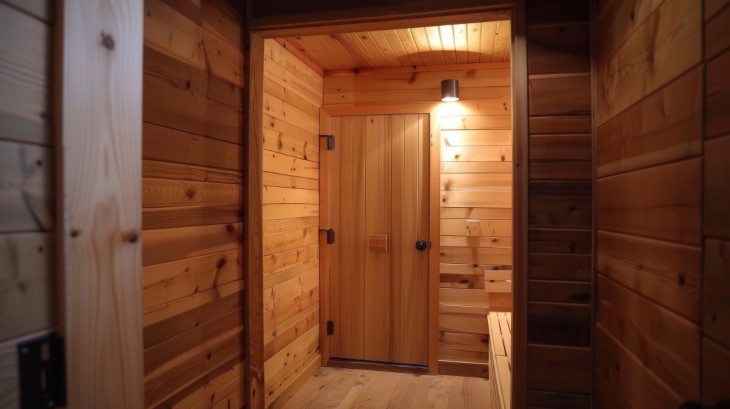
A sauna is a hot, steamy environment, so the materials you choose have to be able to handle the heat — literally. Softwoods like cedar, poplar, and hemlock are the go-to choices because they expand and contract without cracking. Cedar in particular is a fan favorite for its natural antimicrobial properties and that wonderful woody scent. You'll also need fiberglass insulation, a foil-faced vapor barrier to keep moisture in check, tempered glass for any doors or windows, and electrical components rated for high-humidity environments.
💡 Practical tip: If cedar feels too expensive, hemlock is a fantastic alternative that's significantly cheaper, looks beautiful, and performs just as well in the heat. Avoid treated or painted wood entirely — when heated, it can release harmful fumes.
The Building Process, Simplified
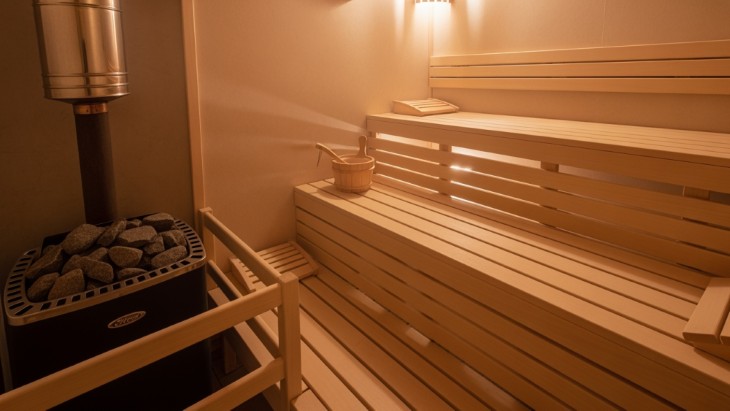
The basic steps follow a logical sequence. You start by preparing the location and waterproofing the floor, then run the electrical wiring while the walls are still open. Next comes insulation, followed by the vapor barrier, and then the wood paneling that gives a sauna its signature look and feel. Once the walls and ceiling are done, you build the bench — a simple frame with evenly spaced wooden slats — before installing the heater, lights, and thermostat.
💡 Practical tip: When installing paneling, always start with the ceiling before moving to the walls. It's much easier to cut and fit wall panels around a finished ceiling than the other way around. Also leave a small 1/4 inch gap between panels to allow for natural expansion — skipping this step is one of the most common mistakes first-time builders make.
💡 Practical tip: For the bench, space the wooden slats about 1/4 inch apart. This allows water to drain through and air to circulate underneath, which keeps the wood from rotting and makes cleaning much easier.
Don't Skip the Safety Details
A few things are non-negotiable. Always use tempered glass for doors and windows, install GFCI electrical outlets, and ensure proper ventilation with fresh air intake near the floor and exhaust near the ceiling. Maintain the correct clearances around your heater as specified by the manufacturer, slope the floor slightly toward a drain, and seal all wood surfaces with a water-resistant sealant.
💡 Practical tip: Add a simple hook on the outside of the door for a towel. It sounds trivial, but it's one of those small details you'll thank yourself for every single time you use it.
Keeping It in Great Shape
Once your sauna is up and running, maintenance is simple but important. After each use, scrub the benches and floor with a mild soap solution, rinse well, and let everything dry completely before closing it up. Check the wood regularly for signs of wear, replace sauna rocks when they start to crumble or lose their heat retention, and inspect electrical connections once a year.
💡 Practical tip: Leave the sauna door slightly open after use so air can circulate and moisture can escape. Closing it up while everything is still damp is the fastest way to encourage mold and wood deterioration.
The Bottom Line
Building a home sauna is one of those home projects that keeps giving back long after the work is done. Whether you go for a cozy indoor corner sauna or a stunning outdoor barrel sauna in the backyard, the investment in your relaxation and wellbeing is absolutely worth it. So roll up your sleeves — your personal retreat is closer than you think.