1. Terra Cotta Fountain
Materials:
• Upper bowl approximately 21” in diameter
• Lower basin approximately 32” in diameter
• Planter
• Small terra cotta dish
• Water pump
• Plastic cord
• Plastic pipe plug x 2
• Pipe bushing
• Plastic pump output tube
• Garden hose fitting
• Large brass washer
• Soldering iron
• 1/2” Copper riser pipe
• Female garden hose connector
• Shouldered bushing
Method:
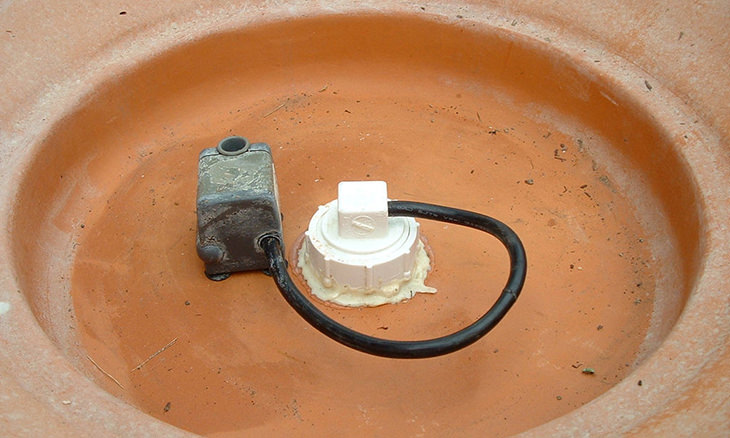
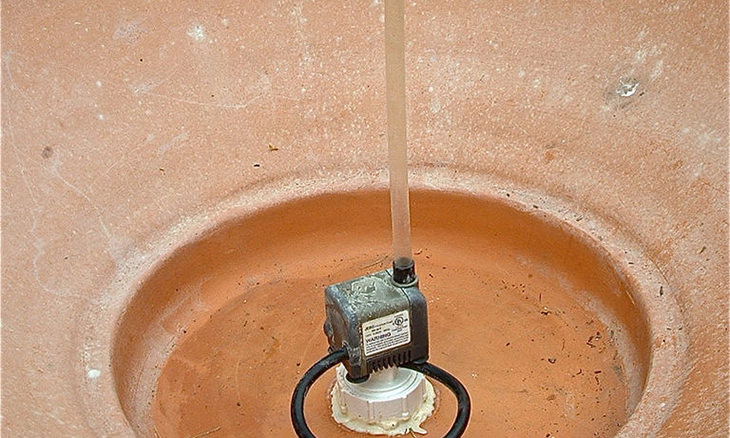
1. Place the fountain pump in the basin and affix.
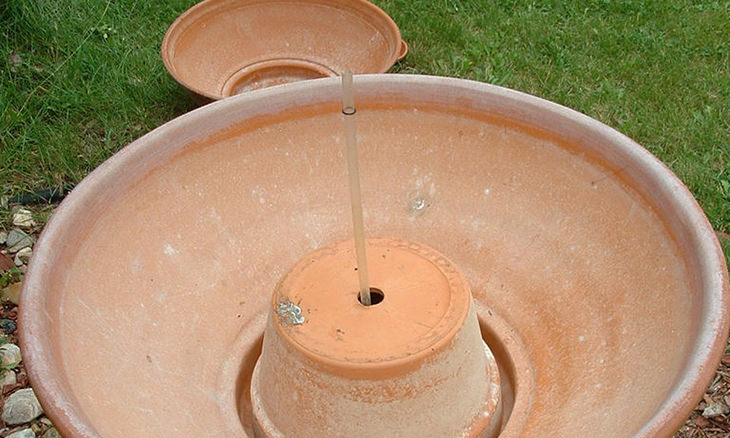
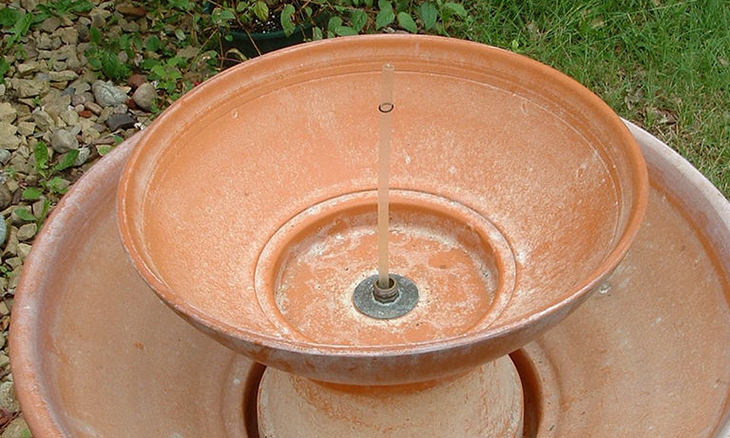
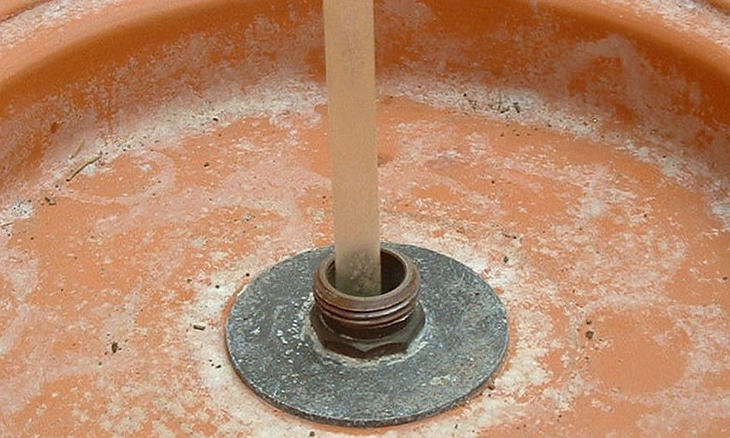
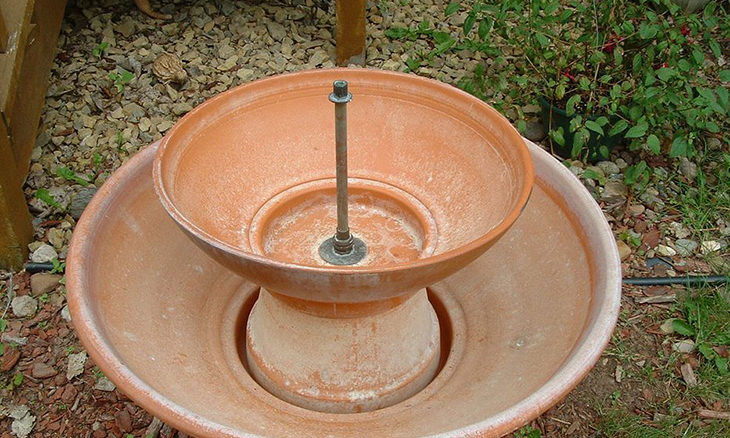
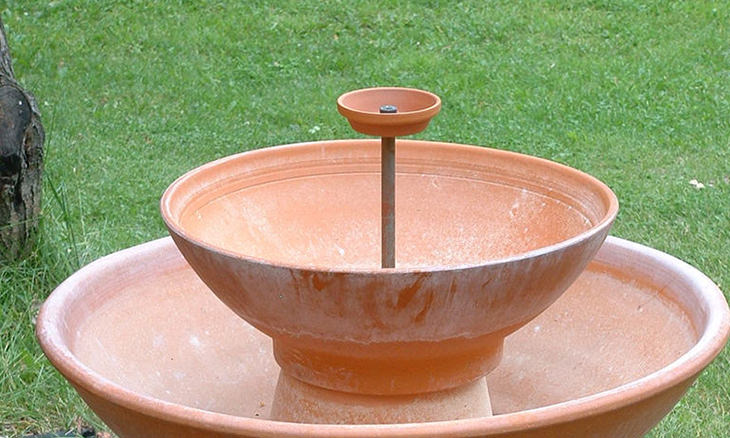
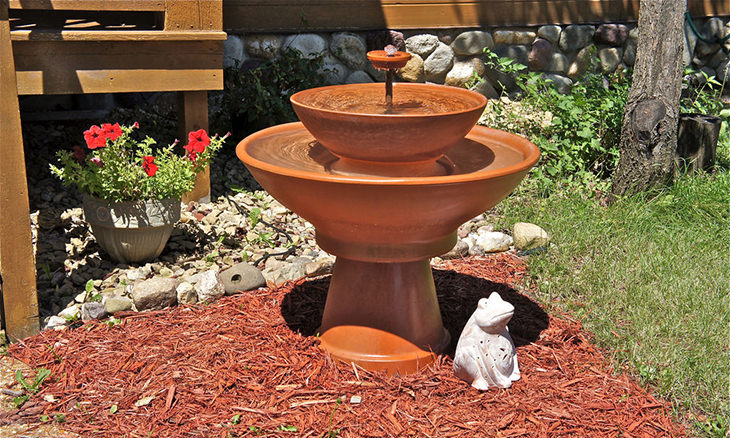
9. Add a shouldered bushing to the top of the riser pipe in order to support the small terra cotta dish. This is used to catch water bubbling out of the riser and spreads it to drip into the basin below for aeration.
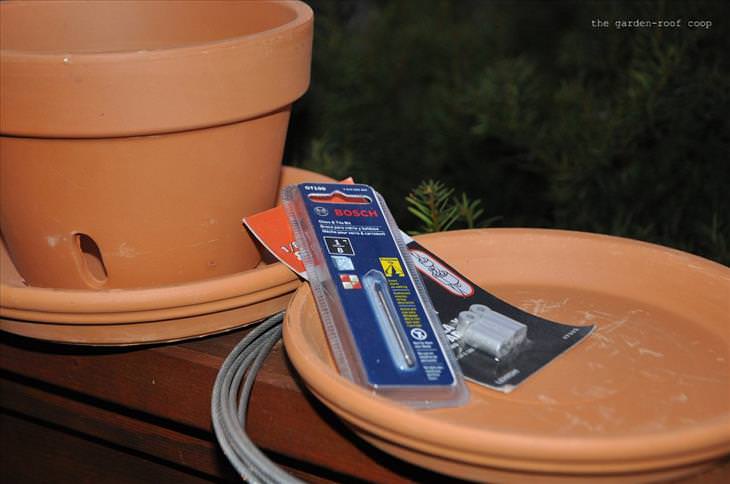
Materials:
• Terracotta or clay flowerpot and two saucers. I used an orchid pot (which has pre-drilled holes), but I also made one out of an azalea pot and drilled seed holes (any flowerpot that you have on hand and want to re-purpose as a feeder will work). The saucer needs to cover the top of the flowerpot (as a lid).
• Glass and tile drill bits (1/2" for seed openings, 1/8" for hanging)
• 3/32" vinyl coated wire rope (about 2 feet)
• 1/8" ferrule and stop set
• Pliers
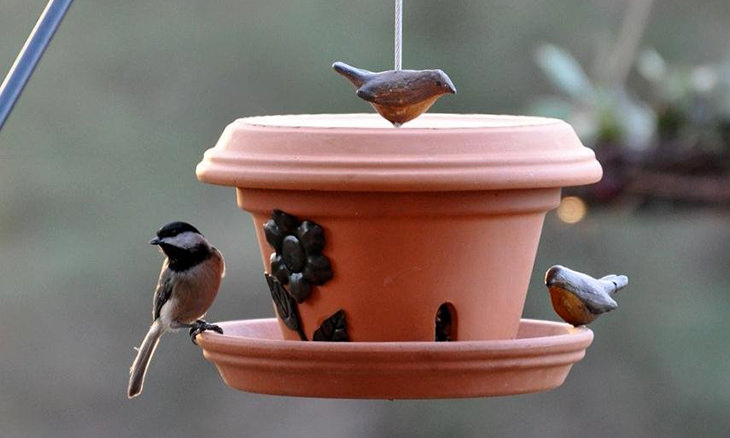
Method:
1. Drill 1/8” holes in the center of each saucer. Use the appropriate drill bit.
2. Add three drainage holes to the base saucer.
3. Use a 1/2” bit to drill three seed holes about one inch from the bottom of the flowerpot.
4. Thread the wire rope through the top saucer, flower pot, and base saucer.
5. Clamp the ferrule using pliers and stop onto the wire at the base and top.
6. Add a few embellishments to the bird feeder to improve its appearance if you wish.
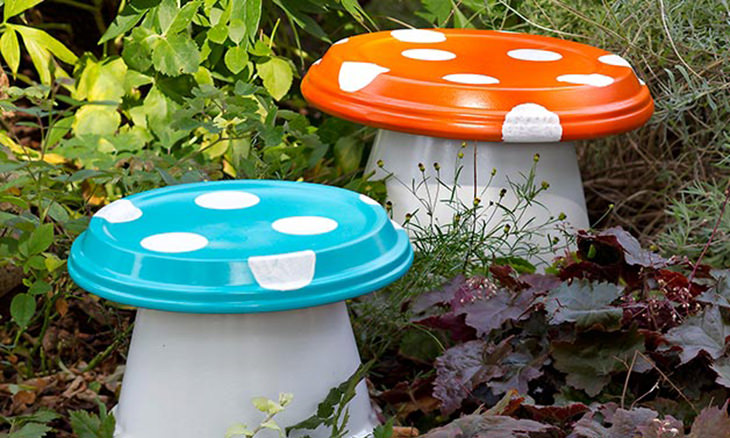
Materials:
• 2-3 round terra cotta pots in various sizes
• 2-3 round terra cotta drain plates (each 3-5 in. wider than the bottom of the matching pot)
• Spray paint, in white, and in choice of colors for mushroom tops
• White acrylic craft paint
• Waterproof clear paint- on or spray sealer
• 2-in.-wide round sponge or spouncer
• Small paintbrush
• Epoxy or waterproof outdoor glue (optional)
Method:
1. Spray-paint the exterior of the pots white in a well-ventilated area, and spray their undersides in a contrasting color. Apply as many coats of spray as required, and leave to dry for 24-48 hours.
2. To create the dots on the mushroom tops, dip a round sponge or spouncer in white acrylic paint. Coat it liberally and then press it to a painted drain plate. Remove quickly to leave a white dot. Fill in any light areas of paint with a small paintbrush.
3. Repeat step two, making several randomly-placed white dots on each painted drain plate. Leave all the dots to dry completely.
4. After they’re done drying, coat all painted surfaces with a layer of clear, waterproof sealer. Leave to dry for 24 to 48 hours.
5. Center a drain plate, painted side up, on top of each upside-down pot. Use epoxy or waterproof outdoor glue to adhere the drain plate to the base.
6. Find a good spot in your garden to display your fabulous new DIY mushrooms!