One of the most popular desserts that both kids and adults alike enjoy are marshmallows. While they can be excessively sticky on their own, they can many day-to-day snacks even more delicious. S’mores are a staple for any good campfire or wintertime snack. Rice crispy treats are another sweet treat that anyone can enjoy. You can add marshmallows to your hot chocolate, or even bake cookies with them. The possibilities are endless, but so is the dosage of sugar, as well as synthetic dyes and other determinedly unhealthy components commonly found in store-bought marshmallows.
This recipe allows you to make your own gooey delight right in your home, and avoid adding any harmful substances. Though no marshmallow can ever be truly “healthy”, it doesn't mean you can't enjoy them as a rare treat. While the process can be a little messy, it’s a fun activity even the kids can join in on, and the clean up is easy!
Here’s What You Need
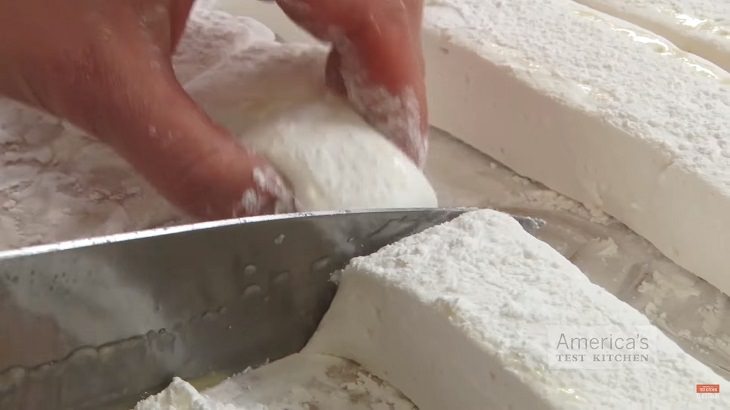
Image Source: America's Test Kitchen/ YouTube
To start with, you’ll need a baking pan and aluminum foil to line the pan, since we’re dealing with a sticky substance. It also helps to keep all your other ingredients prepped and ready. That includes:
Making Your Mallows!
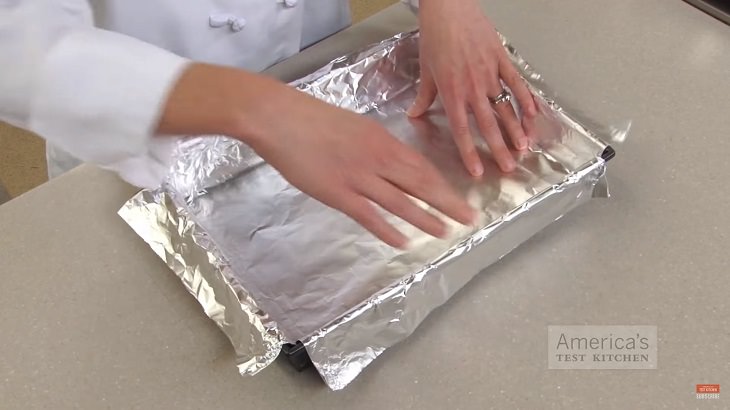
Image Source: America's Test Kitchen/ YouTube
The aluminum foil on your pan is to make it easier to remove the marshmallows when done. To add to this endeavor, make sure you spray the pan thoroughly with vegetable oil, so the marshmallows can be easily separated from the foil.
Next comes the gelatin, which is what gives the marshmallow its shape and solidity. Pour half a cup of water (ideally cold) into a bowl and sprinkle the gelatin over it. Let the gelatin powder sit in the cold water for a minimum of 15 minutes, while the sugar mixture is made ready.
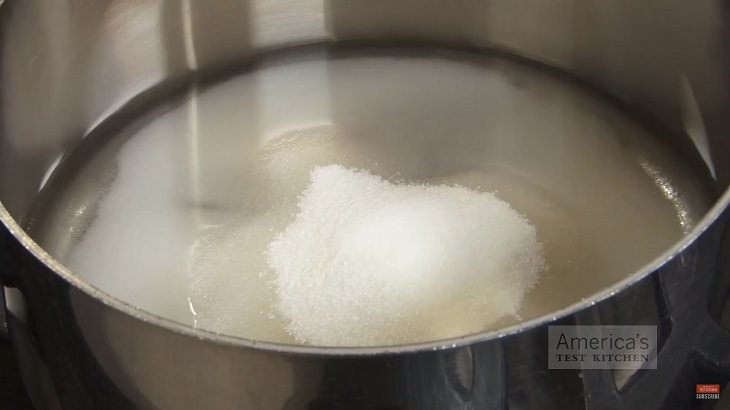
Image Source: America's Test Kitchen/ YouTube
For the sugar mix, you’ll need a saucepan and half a cup of water poured into it. Next, you’ll need to add the corn syrup, the granulated sugar, and the salt. Be careful how you pour the sugar, and ensure all the sugar is poured only into the center of the pan. Sugar on the sides could result in the crystallization of the sugar, which could affect the texture of your marshmallows.
Put the saucepan over a medium to high flame and let it sit for about 6 to 8 minutes. Do not stir the mixture under any circumstances, though you can occasionally swirl the pan to allow the liquid to circulate as it heats. The syrup should reach 240 degrees Fahrenheit (115°C) precisely.

Image Source: America's Test Kitchen/ YouTube
By this point, your gelatin mix should have solidified, so use a whisker to break it up into smaller, finer bits. As you are breaking up your gelatin, carefully pour in the sugar syrup so as to not hit the sides of the bowl or cause any splatter. Continue mixing this concoction for at least 10 to 12 minutes and no less.
You’ll see the opaque mixture eventually turn into a white, thick, fluffy mix. Make sure to keep stirring long enough for the bowl to cool a bit but still stay quite warm. The mixture shouldn’t be allowed to become too cool as that could make it extremely difficult to remove the mix from the bowl.
About 9 minutes into the mixing, you can add a little flavor to make your marshmallows complete. Vanilla extract will provide the usual familiar flavor of marshmallows, but you can even add chocolate, mint, cinnamon or other extracts to give it some extra oomph.
Act fast!
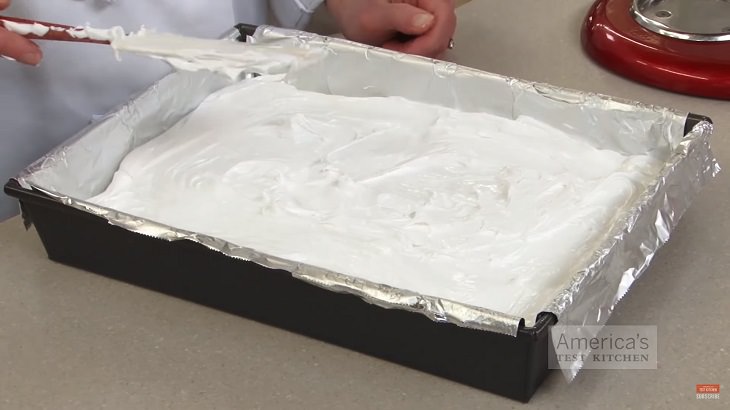
Image Source: America's Test Kitchen/ YouTube
Once your extract is added and your mixture is thoroughly mixed but still warm, the mixture needs to be moved into the pan. This is the slightly trickier part as the cooler the mix gets the more it solidifies making it harder to move. While the mix is still hot, take a spatula and cover it with vegetable oil. Use the spatula to push the entirety of the mixture into your foil-coated pan.
This part also requires a little sacrifice as you can’t get every last bit of the fluff in the bowl onto the pan. Every second your fussing over the fluff in the bowl, the mixture in your pan is solidifying into an odd and uncomfortable shape. Get as much as you can out, and then spread the mix evenly across the pan.
The last thing you need is the final sweetening touch, which consists of a combination of confectioners sugar and corn starch. Sprinkle a little on the top of the mix in the pan and then leave the rest for when the cut cubes of marshmallow are being prepared. Now you just need to cover the pan with plastic wrap and leave it for the night to set.
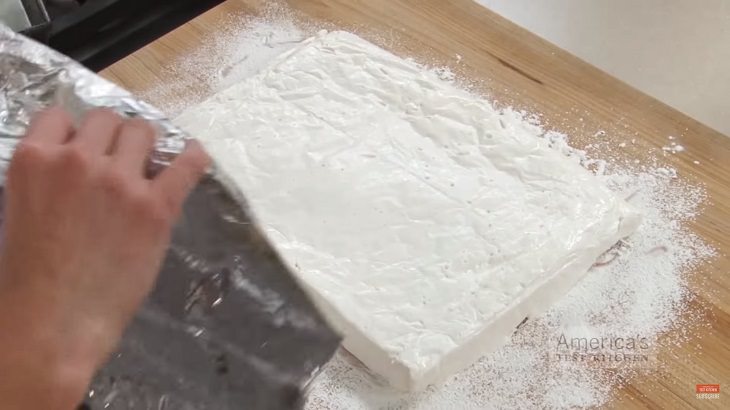
Image Source: America's Test Kitchen/ YouTube
The next day, the fluff should have set. Sprinkle some of the sugar and corn starch mixture on a cutting board and then turn the foil over the dust, so the now-solid marshmallow rectangle can be fitted on the dust. Sprinkle more of the powder over the top side of the rectangle.
Now, spray a heavy knife thoroughly with vegetable oil and start cutting the rectangle into even 1 inch long strips. Spray your knife with more oil if you find it getting too sticky or difficult to slice. Cut those strips into bite-sized marshmallow cubes. The last thing you need to do is individually coat each cube in the powder sugar mix and then tap out any excess powder over the sink using a sieve.
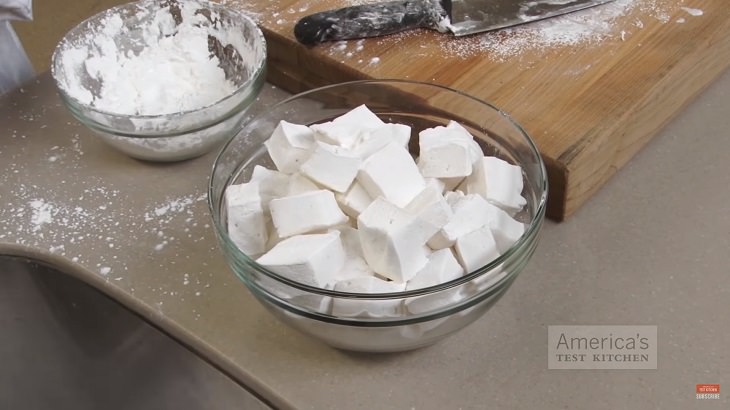
Image Source: America's Test Kitchen/ YouTube
These marshmallows can last up to three weeks and be stored in an airtight container or a Ziploc bag. While they are still heavy in the sugar, they are free of numerous preservatives and additives commonly found in store-bought marshmallows. Not to mention, you can customize them to your preference. The marshmallows are on you for the next camping trip!
For a full video recipe and instructions for these Homemade marshmallows, check out this video: