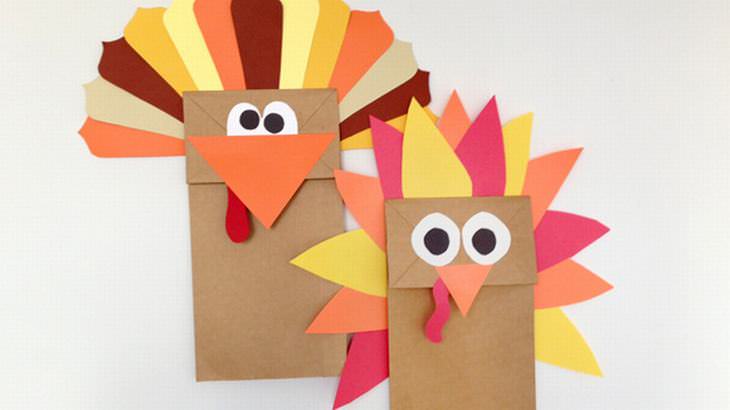
This turkey puppet craft is simple, fun and costs less than a dollar to create. Kids can create different shapes for the feathers, or they can swap turkeys for Pilgrims and Indians.
Time needed: 30 minutes
Approximate cost: $0.60
Materials:
• 1 paper lunch bag
• A few sheets construction paper or card stock (suggested: red, yellow, orange, black, white)
• Scissors
• Glue stick
Procedure:
1. Cut 10 to 15 brightly colored "feathers" out of the colored paper (see picture above).
2. Cut two white eyes, two black pupils (for the eyes), one orange beak and one red snood or wattle (the flesh hanging around a turkey's beak).
3. Using the glue stick, stick the feathers to the back (non-flap) side of the paper bag. Fan them out as much as possible for a fuller and more colorful look.
4. Then, stick the eyes, the pupils, beak and snood/wattle to the flap/bottom of the paper bag.

This DIY crafts project is more than just a cute craft. It's also a great way for kids to express their gratitude. Here's what you need to do:
Time needed: 30-45 minutes
Approximate cost: $2.50
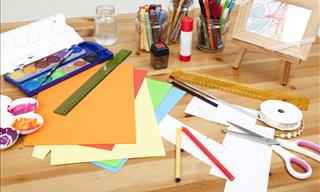
Materials:
• 1 empty baby food jar (cleaned, dried, and label removed)
• 1 bag peanut butter or chocolate candies
• A few pieces construction paper or card stock (suggested: red, green, orange, yellow, etc.)
• 1 set googly eyes
• Scissors
• White glue
• Markers
Procedure:
1. Fill the baby jar with candy and seal the lid tightly.
2. Cut 8 to 12 small feathers from the construction paper and on each feather write something you are thankful for.
3. Using the glue, or a stapler if you have, fix the feathers to each other, fanning them out as much as possible.
4. Glue the feather fan to the back of the jar and hold it for a few minutes until the glue dries. It may be better to lie the jar on its face, so the feathers don't slide down during drying.
5. Meanwhile, cut a beak and snood/wattle out of the construction paper.
6. Stick the beak, the snood/wattle and the eyes to the front of the jar. When sticking the eyes, hold for a few minutes so the glue begins to dry. It may be a good idea to lie the jar on its back so its eyes don't slide down while drying.
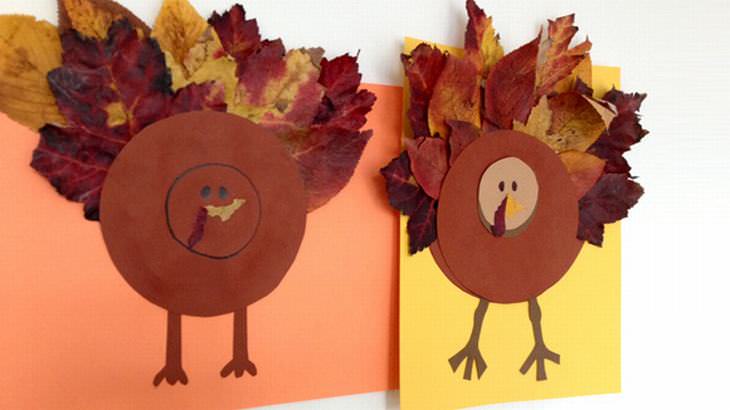
Most of the materials you need for this craft can be found right outside of your front door. Select leaves that are full of color to make the brightest turkey.
Time needed: 30-40 minutes
Approximate cost: $0.75
Materials:
• 1 large can (for tracing)
• 1 small can (for tracing)
• 3 pieces cardstock (suggested: yellow, brown, orange)
• 10-20 leaves of many colors
• Scissors
• White glue
• Black marker
Procedure:
1. Using large and small cans, trace two circles onto a piece of brown cardstock. Cut the circles and set aside.
2. Place one piece of the card stock, preferably orange or yellow, onto a table or counter. Fan your leaves out to create a turkey tail. Glue the bottom of the leaves to the card stock. Then glue the larger circle to the bottom of the leaves and glue the smaller circle on top of the larger circle.
3. Using either markers, card stock, or leaves, create eyes, a beak, a snood/wattle and legs.
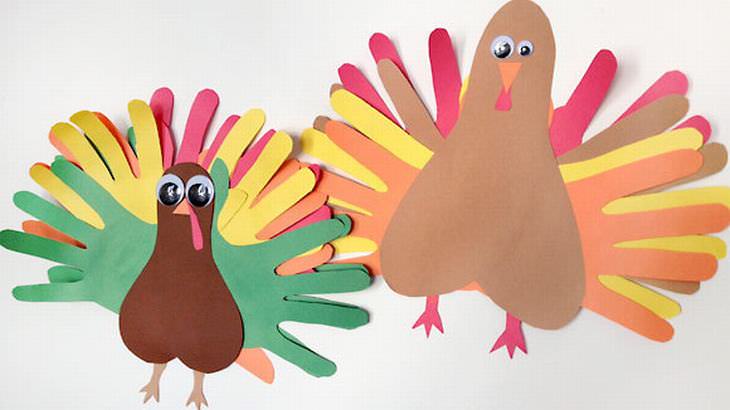
This is a fun project your grandkids will surely love. To make this project they will use cut-outs of their own hands and feet. For a fun table centerpiece, you can also glue three turkeys together.
Time needed: 30-45 minutes
Approximate cost: $0.50
Materials:
• A few pieces construction paper or card stock (suggested: red, orange, yellow, green, brown, white, black)
• 1 set googly eyes
• Scissors
• Glue stick
Procedure:
1.On one or two pieces of brown construction paper, trace the feet, going around the toes, not between them.
2. Using the brown construction paper once again, trace the feet. (Go around the toes – not between.) Cut the feet out and glue them together at the heels, with the toe area facing outward. This is the turkey’s body.
3. Trace your hands on several pieces of colored construction paper. Cut them out, arrange them in a fan of feathers, and glue them to the turkey’s body.
4. Using the remaining construction paper, cut out legs, a beak, and a snood/wattle. Affix them to the turkey. Then, finish the face off with the googly eyes, and you’re done.
5. Coffee Filter Turkey
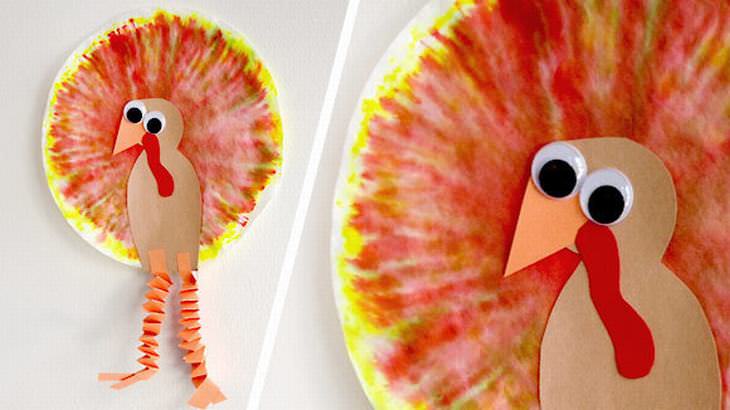
Markers and mist create a pretty tie-dye effect for these easy Thanksgiving crafts. Hanging them on the windows will create a neat light effect when the sun streams through.
Time needed: 30-45 minutes (plus 20-30 minutes drying time)
Approximate cost: $0.50
Materials:
• 1 coffee filter
• Water-soluble markers
• Spray bottle
• Paper towels or cardboard
• A few pieces construction paper (suggested: red, orange, brown)
• 1 set googly eyes
• Scissors
• Glue stick
Procedure:
1. Use any color you like to color in the coffee filter. The messier the better. Then lightly spray the colored filter with the water bottle. Hold the filter by its edges, set it on the paper towels or a cardboard to dry. The colors will run, so avoid placing it on fabric.
2. As the filter is drying, create the legs by cutting two long, thin (11"x1/2") strips of orange construction paper. Glue them together at the corners, creating a right angle Fold the bottom strip up over the top one, creating another right angle in the opposite direction. Continue to fold the strips one over the other, creating an accordion effect. When there is 1 inch left on each strip, glue them together, or leave them hanging to create a foot effect.
3. Cut out a body, a beak, and a snood or a wattle from the construction paper sticking them to the dried coffee filter with the glue. Attach the legs and hang them in your home or on a window, allowing light to stream through.
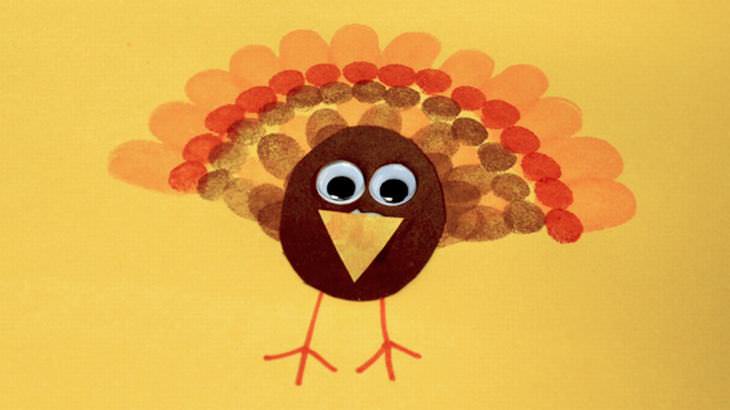
Got young grandchildren? This thumbprint turkey craft is ideal for them.
Time needed: 30 minutes
Approximate cost: $10
Materials:
• 1 piece yellow or white cardstock
• 3 ink pads (suggested: brown, orange, red)
• A few pieces construction paper (suggested: brown, orange, red)
• 1 set googly eyes
• Scissors
• Glue stick
Procedure:
1. At a table or counter, set out the cardstock and open the ink pad containers, placing them next to the card stock.
2. Press your thumb onto one ink pad, then press it on to the cardstock, making a firm thumbprint. Repeat this several times, making a semi-circle under the one you just made.
3. To make different rows, wash your hands and begin the process again using different colors.
4. Cut a small turkey body using the brown construction paper, gluing it just under your thumbprint feathers.
5. Then cut a beak and snood or wattle out of the orange and red construction paper gluing it on to the turkey body. You can add feet if you'd like. To finish off, glue the googly eyes to your turkey.