Our home is one of the most expensive purchases we will ever make - whether renting or buying. But as time passes on, a number of things will need to be seen to. Yet while it may be tempting to call a professional when something breaks, chances are you can take care of the problem yourself. In fact, most home repairs can be done with little to no experience. But be sure to do research on anything you don't particularly understand - especially if you're dealing with electricity which can be extremely hazardous. Below is a list of simple repairs you can do alone - most require some special tools, so be sure that you have everything you need first.
A broken toilet lever is relatively easy to fix. Most of the time, if pressing the lever doesn't flush the toilet, all you need to do is pop the tank open and re-attach the chain. Sometimes, the handle itself can become corroded. Or, any of the pieces that connect the handle to the flapper, including the handle, nut, metal rod or chain, can break. It's easy to replace all of these parts cheaply though.
To do so, you will need:
- Adjustable wrench
- Replacement toilet lever kit (if broken)
While it may be tempting to call a plumber to unclog the toilet, before you do so, try these two things. First, use a plunger - but make sure that you get the right one (a toilet not a sink plunger). If there isn't enough water in the bowl, pour enough water in allowing the head of the plunger to submerge, giving it eight to ten good downward thrusts. If it's a minor clog, it should clear up at this point and the water should flow freely.
If not, you'll need to use a toilet auger, which costs more than plungers but they deal with tough clogs better. Run the end of the auger into the toilet until the end reaches the clog, then start turning the crank. If you get a good grip on it you should be able to pull the clog out.
Here's what you will need:
- Toilet plunger
- Toilet auger
One of the most common issues at home is a pipe leak under the kitchen or bathroom sink. This usually occurs because of a worn out washer or a loose, or broken compression nut that's sealing it. To fix these you will need to turn the water off to the sink. Some sinks have a shut off valve right next to the sink itself, but others may be far away - possibly in the basement. So depending on how the pipes in your house are structured, you will need to follow your pipes.
Once the water is off, place a bucket underneath the pipe and twist off the compression nuts. At this point, you can rinse out the curved pipe, better known as a P-trap, which can get quit grody. Once you've replaced the washer, or possibly the entire P-trap, you can screw it back in and turn the water on.
You will need:
- Bucket
- Replacement P-trap or washer
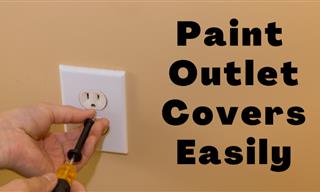
Most electrical work in your home should be done by a professional. However, light switches are among the easiest to replace. Just be sure to turn off the circuit breaker before you start as electricity can be quite dangerous to handle. To get this done you can use a flathead screwdriver to remove the faceplate covering the switch.
Use a Phillips head screwdriver to remove the switch from the wall. You will see two wires connected to the screws on the switch. To ensure there's no electricity running through them, be sure to test the wires first. Then disconnect the wires and attach them to the new switch and put everything back together.
You will need:
- Flathead screwdriver
- Phillips head screwdriver
- Replacement light switch
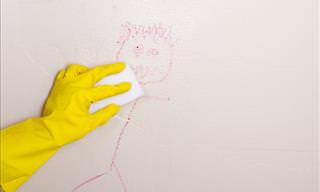
Most holes can be fixed pretty easily and cheaply. The easiest holes to fix are screw or nail holes from hanging everything from pictures to TVs. For holes like these, you will want to clean the area of any debris and wipe down the wall. Then using a putty knife press some spackle into the wall and let it dry. Once that's done, use some fine grain sandpaper to sand it down until it's nice and flat. Depending on how seamless you need it to be and what color your walls are you may need to apply a coat of paint.
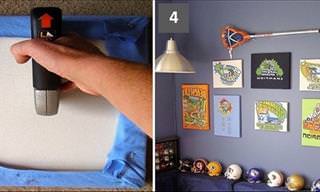
To cover up larger holes you will need to cut out a rectangular section of the dry wall surrounding the hole. Then cut a piece of drywall from some scraps, or whole pieces which you can buy from a hardware store. A small piece of wood to brace the scrap drywall patch can also be used by placing it inside the wall and drilling screws into it above and below the hole. After which, add a third screw into the drywall patch and add some drywall tape around the seams. To finish off, slather on some joint compound using a large putty knife to scrape it down until it's mostly flat. Then sand it down once the compound has dried and paint if necessary.
You will need:
- Putty knife
- Spackle/joint compound
- Drywall
- Drywall tape
- 1x1 wood board
- Electric drill
- Wood screws