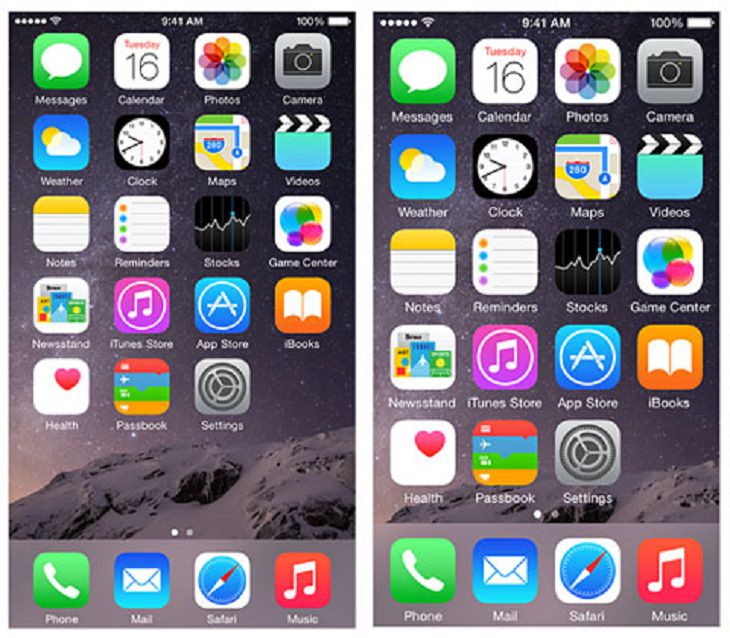
As we age, our eyesight tends to decline. Many seniors also have problems seeing clearly at close distances, especially when reading or using a phone. To deal with this issue, you can enable Display Zoom to make everything on the screen larger.
This is what you need to do:
1. Go to Settings and select Display & Brightness.
2. Scroll to Display Zoom and tap the View field under it.
3. Here, choose Zoomed. You will be shown a few previews that will help you understand the differences this feature will make.
4. Click on Set. Now you will be asked to restart the device to apply the change.
2. Increase the size of the font
Another way to improve overall readability on your iPhone is by increasing the font size. This will be helpful for those who find the text that we get in iPhone menus and messages to be small.
This is what you do:
1. Go to Settings and tap Accessibility.
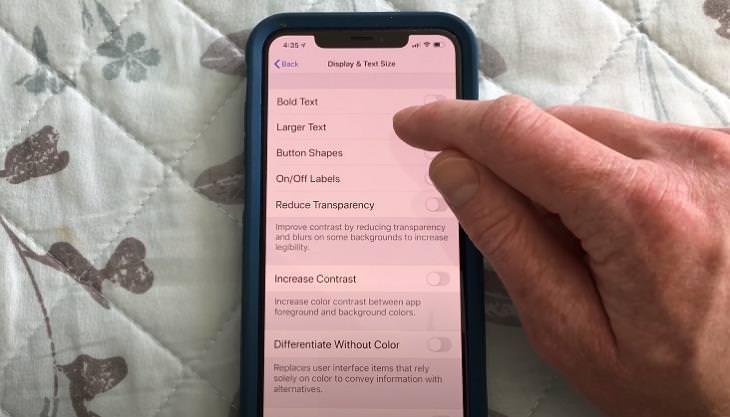
2. Now tap on under the Vision heading, tap on Display & Text Size.
3. Select Larger Text.
4. Move the slider at the bottom of the screen to the right to increase the text size.
5. If the text size still isn’t comfortable enough for you, tap on the Larger Accessibility Sizes slider at the top. This will let you further enlarge the text on the phone.
3. Enable the "Spoken Content" feature
Your iPhone has a feature called "Spoken Content" that reads the contents of any text that you select out loud to you. This can be particularly useful for the visually impaired. It can even come in handy when you just want to listen to some written content (say, an article) instead of looking at your screen.
Here's how to enable it:
1. Go to Settings > Accessibility.
2. Tap Spoken Content under the Vision section.
3. Enable Speech Selection. Now, whenever you select any text on your phone, there will be a Speak option next to it for reading it out loud.
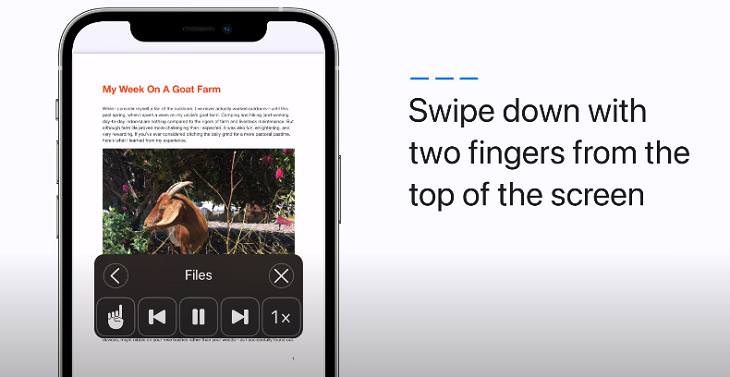
4. If you want to read everything on the screen, enable Speak Screen, which is right below Speech Selection. Now you have to swipe down with two fingers from the top of the screen and the device will read the entire text out loud to you.
5. In case you wish to slow down the speaking rate, just drag a slider at the bottom of this same screen.
4. Make the ringing louder
If you are giving an iPhone to a senior who is hard of hearing, it would be better to first make sure that the ringer volume is loud enough for them so that they don’t end up missing calls and other alerts.
1. Go to Settings > Sounds & Haptics.
2. Adjust the slider under Ringer and Alerts to the right. The more you move the slider to the right, the louder the phone will ring. Set it to your preferred volume.
3. Another good idea would be to enable the Vibrate on Ring and Vibrate on Silent options to lessen the chances of the user missing calls.
5. Enable "Find my iPhone"
This is a really useful option for tracking down a stolen iPhone device. It can also help you find your phone if you misplace it somewhere because it will force your phone to ring, even on silent mode.
"Find My" is usually enabled during the phone's initial setup. To check if it's working:
1. Go to Settings and tap your name at the top.
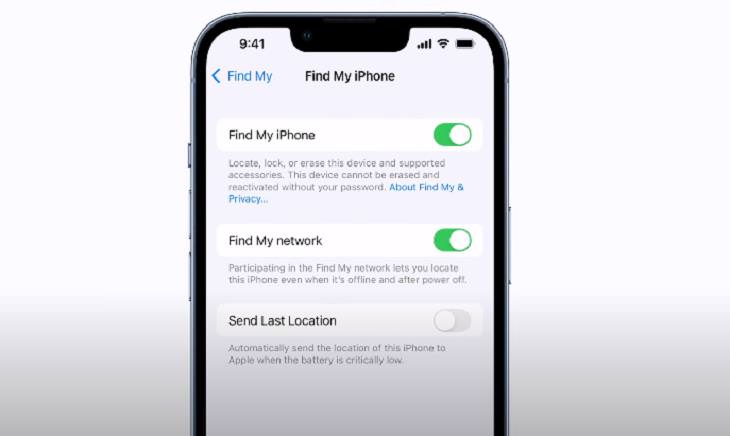
2. Select Find My and turn on Find my iPhone.
3. At the bottom of this page you will find an option called Send Last Location. It’s a good idea to turn this on as well as it will send the location of the device to Apple when the battery is about to die.
The Find My app can also be used to keep track of the user and their location by their friends or family if they too are in the same Family Sharing group or using the same Apple ID.
6. Use the "Emergency SOS" feature
The Emergency SOS feature on your iPhone will immediately notify your emergency contacts if you’re in trouble. This option should be enabled on every iPhone user’s device but is even more important for seniors. To activate the function, the user needs to press the phone's Side or Top button five times on older iPhones or press and hold the Side button and one of the Volume buttons for several seconds on the iPhone 8 or later.
As soon as the Emergency SOS slider appears, just drag it. On an iPhone 8 or later, you would need to continue holding the buttons. Your phone will then automatically contact the emergency number for your region and then alert your emergency contacts with your location.
You can also let this feature contact emergency services without using the slider. For this, you have to:
1. Go to Settings > Emergency SOS.
2. Enable Auto Call.
3. Also make sure that you have added Emergency Contacts in the Health app by tapping Set up Emergency Contacts in Health right below the Auto Call button. Tap Edit and add the contacts you want or edit the existing ones.
7. Set Up Medical ID
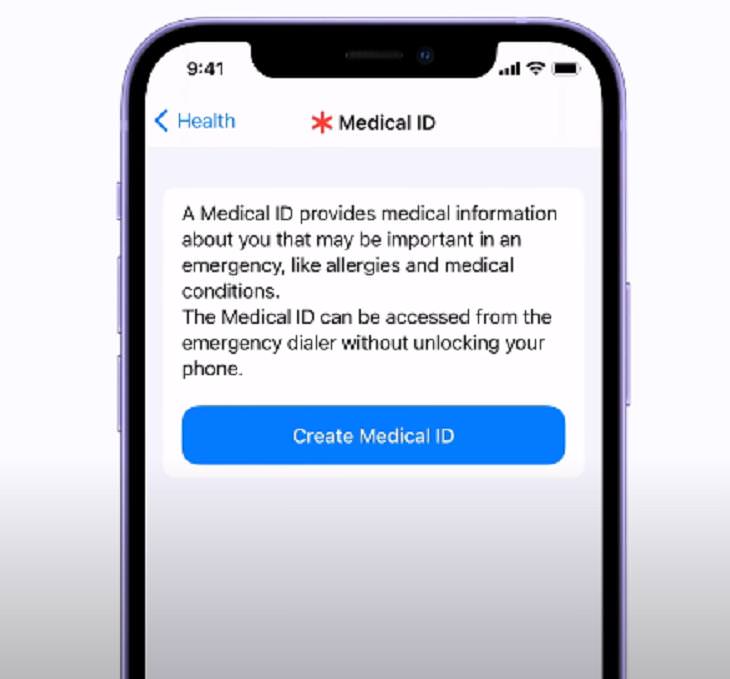
Your iPhone's Health app has an option called Medical ID. This allows you to store your relevant medical information as a digital medical identification tag. In case of an emergency, where the phone owner is unconscious or not in the condition to communicate, the paramedics can quickly check your existing health conditions, the medications you take, and other relevant stuff that needs immediate attention.
Here’s how you set it up:
1. In Settings, scroll down and tap Health.
2. Tap Medical ID and then tap on the Create Medical ID button.
3. Tap the "+" button next to a field to add your information.
4. Enable Show When Locked. This will make sure that your medical information is available for anyone to see even on the lock screen in case of an emergency.
5. Tap Next and review your information to make sure it’s correct. Now, tap Done.
To access your medical ID quickly press and hold the side button and one of the volume buttons at the same time. Then drag the Medical ID slider to view your information.
8. Set up a Favorite Contacts list
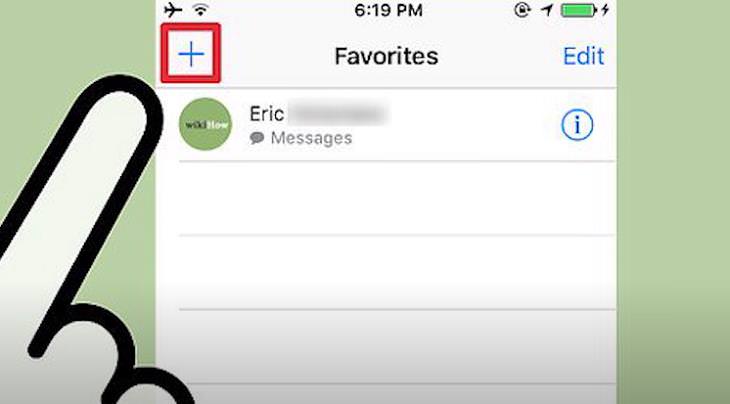
Scrolling through your contact list all the time while making a call isn’t always convenient. This is why seniors must set up a Favorites list on their iPhone that will keep their frequent contacts just a few taps away.
Here’s how you do it:
1. Open the Phone app and select Favorites from the bottom bar.
2. Tap the "+" button at the top-left corner to get your contact list.
3. Now, select the contacts you want to add to your Favorites. You can even choose the method of contact you commonly use for them, like calling or messaging.
4. If you want to remove any contact from your Favorites list, use the Edit button at the top-right.
Share this post with those who will find it useful