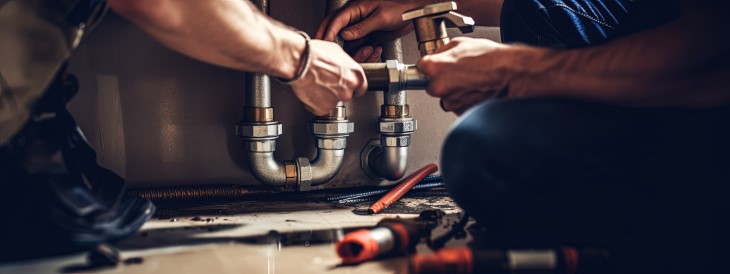
Basic plumbing repairs and upgrades are popular DIY projects for homeowners, and many are well within reach of the average home repair enthusiast. However, it's surprisingly easy to overlook details that can create serious problems down the line. Here are the most common plumbing mistakes to watch out for.
1. Over-Tightening Connections
While you want secure connections to prevent leaks, excessive force can cause significant damage that may not be immediately apparent. Over-tightening plastic pipes can lead to stress fractures and cracks that may not appear right away but will eventually cause leaks, sometimes weeks or months after installation. These delayed failures can be particularly problematic because they're harder to diagnose and may cause hidden water damage before discovery.
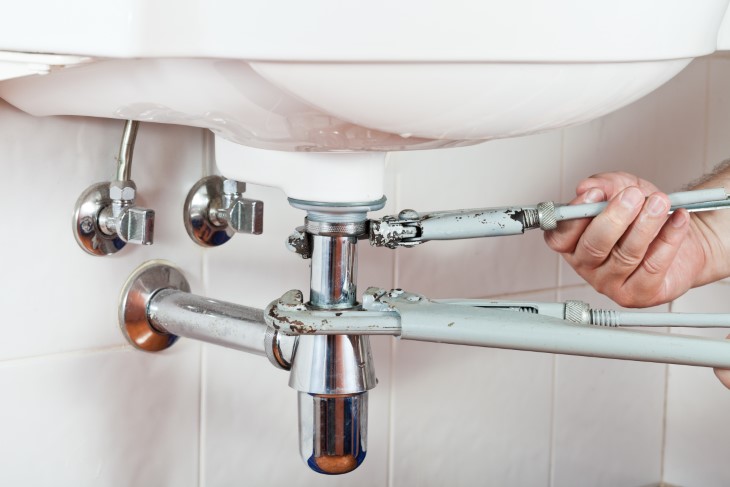
Ceramic fixtures like toilets are particularly vulnerable to over-tightening - too much pressure when securing bolts can fracture the ceramic material, creating hairline cracks that compromise the entire fixture. This is especially true for toilet base bolts and tank-to-bowl connections. Even metal pipes and fittings can be compromised through stripped threads, over-compressed washers, or broken seals. When threads are stripped, the connection loses its ability to create a watertight seal, and replacing damaged threaded components often requires cutting pipes and installing new sections. The key is to tighten connections firmly but stop as soon as you feel resistance increasing significantly.
The opposite problem is equally troublesome and can lead to persistent slow leaks that waste water and cause gradual damage. When instructions call for "hand tight" connections, this subjective term varies significantly based on individual strength and experience level. What feels tight to one person may be loose to another, leading to inconsistent results.
Most plumbing connections need to be snug, which typically means hand-tightening followed by an extra quarter to half turn with a wrench - but not much more than that. The goal is to compress gaskets and washers just enough to create a seal without deforming them. Under-tightened connections may not leak immediately during testing, but vibrations from water pressure, temperature changes causing expansion and contraction, and normal settling of the home can gradually loosen inadequate connections over time. This is particularly common with supply line connections to faucets and toilets, where the constant water pressure can work loose an insufficiently tightened fitting. When in doubt, check the manufacturer's specifications for torque requirements, or tighten until snug and then test thoroughly for leaks before considering the job complete.
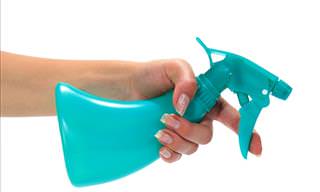
Plumber's tape (also called Teflon tape) seals connections by filling small gaps in threads. However, if wrapped incorrectly, it will unravel during installation. To apply it properly, hold the fitting with threads facing you and wrap clockwise. Apply three steady layers, then tear and press the end into the previous layer. If done correctly, the tail should face left as you begin installation.
Different tapes are designed for different materials and purposes. Thin white or thick pink tape typically works for water-carrying fittings. Yellow tape is specifically rated for gas lines. When working with compression or flare fittings, skip the tape entirely. Always read packaging carefully and match the product to your specific plumbing situation.
While convenient, commercial drain cleaners are harsh chemicals that damage plumbing systems. They corrode pipes, erode rubber gaskets, and can eat away protective layers on porcelain and stainless steel fixtures. If they fail to clear the clog, you'll have toxic chemicals trapped in your pipes. A drain snake or auger is a much better solution that clears drains effectively without the chemical damage.
Most plumbing jobs aren't difficult, but they can be frustrating without proper preparation. Always purchase extra washers, gaskets, supply lines, O-rings, faucet stems, cartridges, and other essential components. Take measurements beforehand or bring the old part with you to ensure correct sizing. Verify you have the right tools - some jobs require specialized plumber's wrenches. Being without a toilet or kitchen sink is a major inconvenience, so minimize repair time by having everything ready before starting.
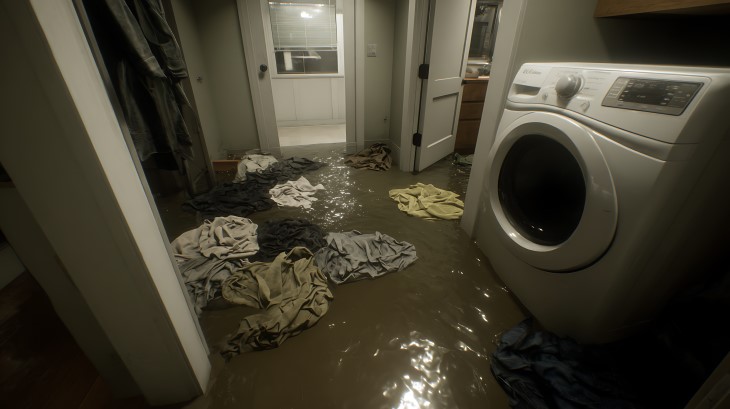
Water under pressure will flow through any available opening with surprising force and volume. Never attempt plumbing repairs without shutting off the water at the source - this is the single most important step in any plumbing project. Skipping this step guarantees a mess and potential water damage that can quickly escalate from a minor inconvenience to a major disaster.
Household water systems typically operate at 40-80 PSI (pounds per square inch), which means water will spray forcefully from any disconnected pipe or fitting. Even a small half-inch supply line can discharge several gallons per minute, quickly flooding floors, damaging cabinets, ruining drywall, and soaking through to rooms below. The chaos of dealing with spraying water makes it nearly impossible to complete repairs properly, and the panic of an unexpected flood often leads to rushed mistakes and improper installations.
Before starting any plumbing work, locate the appropriate shutoff valve. For minor repairs like replacing a faucet or toilet, use the local shutoff valve typically found on the supply line near the fixture. For larger projects or if local valves don't exist, shut off water at the main valve, usually located near the water meter, in the basement, or where the main line enters the house. After closing the valve, open a faucet at a lower level to drain remaining water from the lines and relieve pressure - this prevents unexpected water flow when you disconnect fittings. Taking these simple precautions transforms a potentially catastrophic situation into a controlled, manageable repair project.
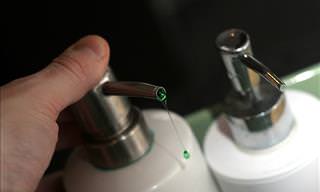
Shutoff valves can be located near individual fixtures or at the main water line near the street or meter. These valves commonly stick when unused, but forcing them will break the knob. If you can't loosen it, use a wrench to loosen the nut behind the knob, which breaks the seal and allows it to turn.
Enthusiasm often overrides planning. Whatever you dismantle must be reassembled correctly after repairs. Take photos before taking anything apart - these pictures will be invaluable references if you get stuck during reassembly.
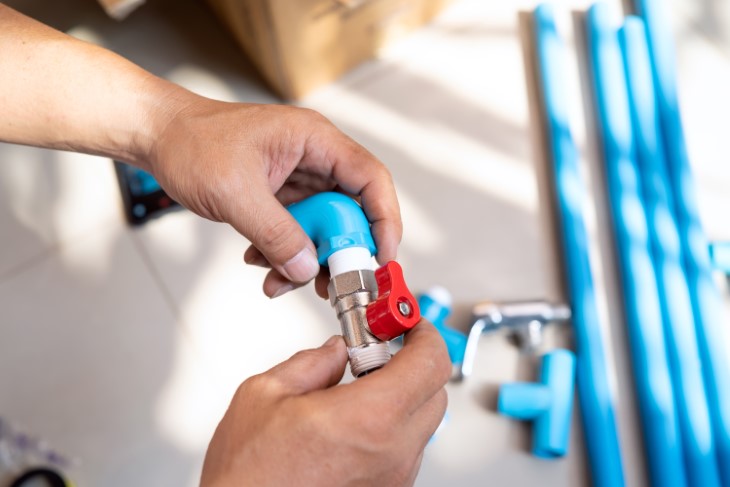
Metal works with metal, and PVC pairs with PVC. Don't mix materials, even different types of metals. Ensure you know the exact parts needed, including size, for a lasting repair. Avoid temporary fixes with wrong materials - the resulting drips and floods will cost far more in time, money, and inconvenience.
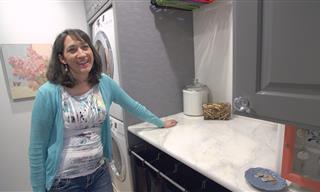
Bathroom, kitchen, and laundry room fixtures come in varying quality levels, including their surface finishes, and these finishes can range from durable commercial-grade coatings to delicate decorative surfaces. Some finishes are easily damaged by scrapes, scratches, or peeling, and once damaged, they're often impossible to repair without replacing the entire fixture. Chrome, brushed nickel, oil-rubbed bronze, and specialty finishes like matte black or brass can all be marred by improper tool use during installation or repair.
Metal wrenches and pliers are particularly problematic because their serrated jaws can leave permanent teeth marks, scratches, or gouges in soft metals and finished surfaces. Even a moment of carelessness can ruin an expensive faucet or fixture. To protect surfaces, always wrap a soft cloth or rag around the fixture before applying any wrench or pliers - this creates a protective barrier that prevents direct metal-to-metal contact. For frequently accessed nuts and connections, consider investing in specialized plumbing tools designed specifically to prevent damage, such as basin wrenches with smooth, rubber-coated jaws, or strap wrenches that grip using friction rather than teeth.
Pay particular attention when working with decorative escutcheon plates, exposed trap assemblies under pedestal sinks, and ornate fixture bodies. These components are often made from softer metals or have thin decorative coatings that scratch easily. When tightening connections on visible fixtures, work carefully and patiently rather than forcing anything. Remember that a damaged finish not only looks unsightly but can also decrease your home's value and may require expensive fixture replacement to restore the proper aesthetic. The few extra seconds it takes to protect finishes properly is time well invested compared to the cost and hassle of replacing a damaged fixture.
Many plumbing projects require permits, especially during remodels or renovations. Check with your local planning department to determine if your project needs one. Permits ensure safety by verifying proper supplies, layout, and water runoff. While obtaining permits can be time-consuming and may require blueprints, professional approval, and inspections, they protect everyone involved - current homeowners, future owners, renters, neighbors, and contractors.
Skipping permits typically surfaces later, resulting in fines or requirements to tear out completed work for inspection. Both penalties are sometimes implemented simultaneously.
Water flows downhill, and many plumbing functions rely entirely on gravity for proper drainage. Without proper slope for runoff, stagnant water becomes problematic, creating issues ranging from foul odors to structural damage. This applies to showers, patios, downspout runoff, sump pump discharge areas, and anywhere water drainage occurs.
For drain pipes, the standard slope is typically 1/4 inch per foot of horizontal run - enough to keep water moving but not so steep that water flows too quickly and leaves solid waste behind. Too little slope and water pools in the pipes, leading to clogs and bacterial growth. Too much slope and the water races ahead of solid waste, leaving it to accumulate and create blockages. Shower pans must slope toward the drain at approximately 1/4 inch per foot as well, otherwise water pools on the surface, creating slip hazards, mildew growth, and potential water damage to the subfloor.
Outdoor applications are equally critical. Patios and walkways need proper slope away from the house foundation - typically a minimum of 1/8 inch per foot - to prevent water from collecting against foundation walls where it can seep into basements or crawl spaces. Downspout extensions and French drains also require careful slope calculations to ensure water moves away from structures efficiently. Using a level and measuring carefully during installation prevents these drainage problems before they start.
Proper fixture location relates to both local codes and convenience. Toilets should sit 15-18 inches from front and side walls. Replacing a round toilet with an elongated model can block door closure or press against walls. When replacing fixtures, new ones may not align or sit the same way as their predecessors.
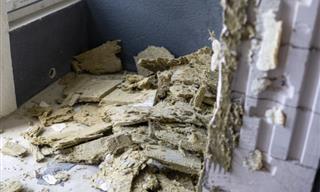
In cold climates, protecting pipes from freezing is absolutely essential to prevent catastrophic damage. Frozen water expands with tremendous force and bursts pipes, potentially damaging irrigation systems, flooding basements, or rupturing pipes hidden behind walls where leaks can go undetected for extended periods, causing massive water damage and mold growth.
Before cold weather arrives, take comprehensive winterization steps. Drain all unused water lines, including outdoor spigots, irrigation systems, and any pipes in unheated areas like garages, crawl spaces, or attics. Purge irrigation systems completely by blowing out lines with compressed air - any remaining water can freeze and crack pipes or sprinkler heads. For pipes that must remain in service during winter, leave faucets running with a slight stream (even a pencil-thin flow) to keep water moving, as flowing water is much less likely to freeze than standing water.
Open cupboard doors beneath bathroom and kitchen sinks to allow warm air from your heated living space to circulate around pipes, particularly those on exterior walls. Consider wrapping exposed pipes with foam insulation sleeves or heat tape for additional protection. Place insulating caps or covers on outdoor faucets and hose bibs. If you're leaving a property vacant during winter, either keep the heat on at a minimum of 55°F or completely drain the entire plumbing system, including water heaters and toilet tanks. In extremely cold climates, some homeowners also insulate their water meter and main supply line. The modest time and expense of proper winterization is insignificant compared to the thousands of dollars in damage and repair costs that burst pipes can cause.
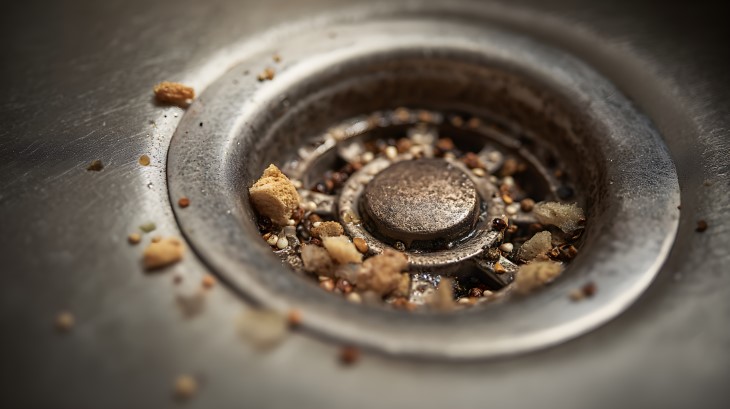
Drains need to stay clear for proper flow, and what you put down them has a direct impact on your plumbing system's longevity and function. Never put grease, fats, or cooking oils down drains - while they may be liquid when hot, they solidify as they cool along the pipe's journey, coating the interior walls and gradually narrowing the passage until clogs form. This buildup accumulates over time and attracts other debris, creating stubborn blockages that are difficult and expensive to remove. Even running hot water while pouring grease down doesn't help - the grease will eventually cool and solidify somewhere in your pipes or, worse, in the municipal sewer system.
Only flush human waste and toilet paper down toilets - these are the only materials specifically designed to break down in water and pass through plumbing systems safely. Even products labeled "flushable," like baby wipes, disinfecting wipes, and feminine hygiene products, should go in the trash instead. Despite marketing claims, these items don't disintegrate quickly enough and frequently cause clogs in household plumbing and municipal sewer systems. The term "flushable" simply means they'll go down the toilet initially, not that they're safe for your pipes.
Similarly, avoid putting coffee grounds, eggshells, pasta, rice, and fibrous vegetables down garbage disposals or drains. Coffee grounds clump together and form dense sediment, while pasta and rice continue to expand with water absorption. Fibrous materials like celery, asparagus, and corn husks wrap around disposal blades and create tangles in pipes. Treat your drains with respect - when in doubt, throw it out in the trash instead. Proper disposal habits prevent the majority of household drain clogs and save significant money on plumber visits and potential pipe repairs over time.
Managing your own plumbing projects develops valuable DIY skills and saves money. For each project, carefully consider the time estimate, permit requirements, and whether you have the necessary skills. By avoiding these common mistakes, you'll ensure repairs that last and prevent costly problems down the road.