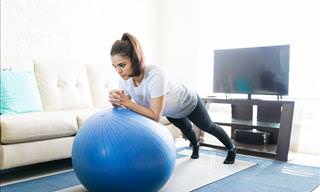
If your muscles are feeling tight, achy or just plain stiff, you may want to give a foam roller a go. It can also be used as a great prop after a workout. To help you get started on using your foam roller here are five exercises that will make you feel better and less sore. So, whenever you are in need of some relief, grab the roller and do each of these moves for one minute. Bear in mind that the harder the roller, the more pressure it will put on your muscles.
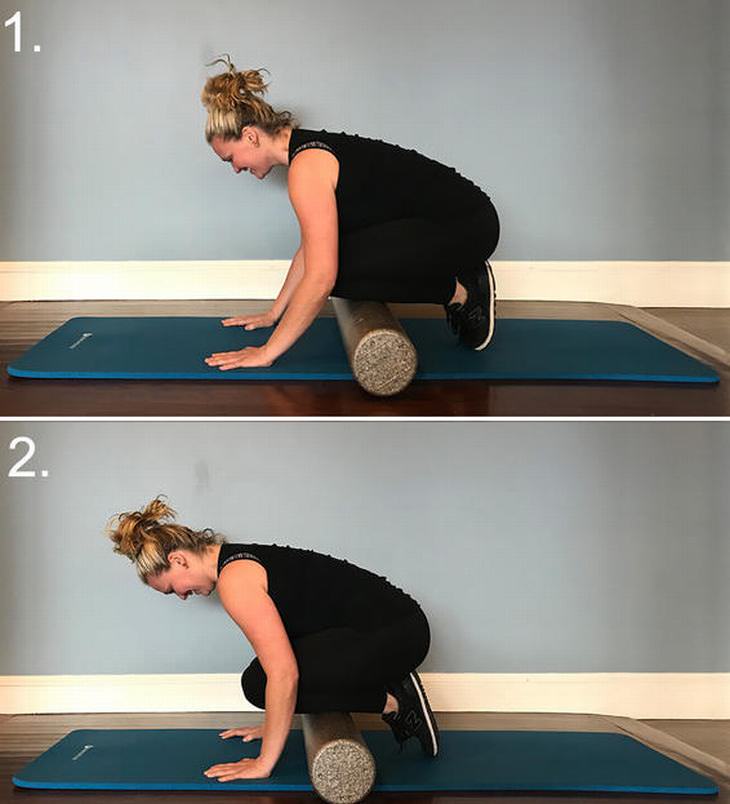
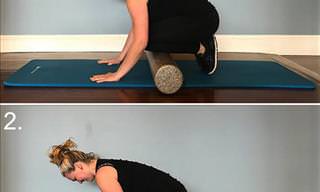
1. Kneel and roll
Start with your hands on the floor, keeping your shoulders, elbows, and wrists aligned and the roller parallel to your shoulders. Slowly bring one shin at a time on top of your roller and keep your abs pulled in so you can stabilize. Carefully roll back and forth to massage your shins and keep your core firm to ensure the pressure stays on the tops of your legs and not in the back. Maintain pressure in your hands. If you're looking for something extra, rock side to side in addition to front and back.
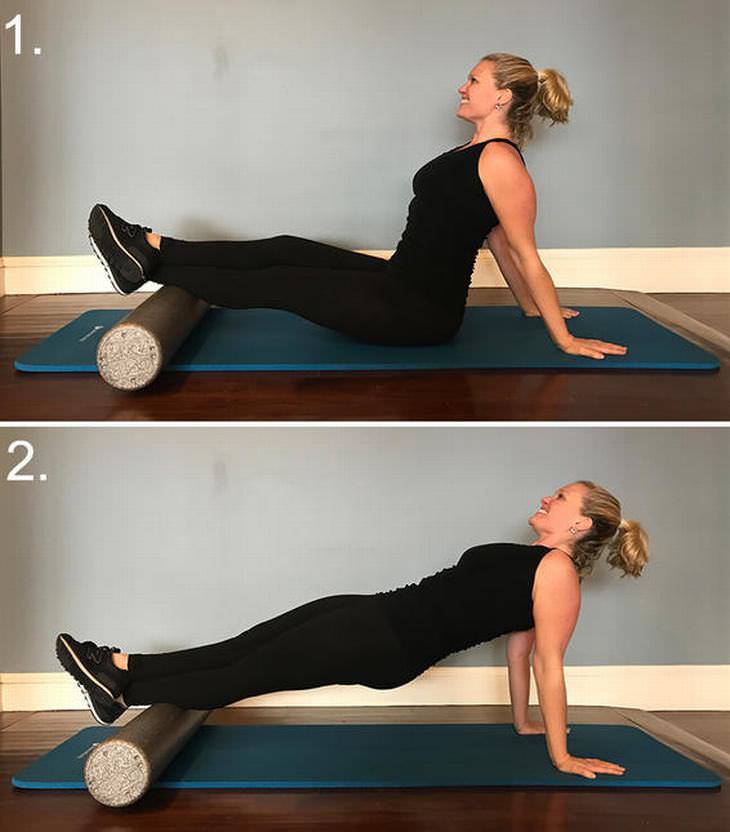
2. Crossed Calf
Sit on your backside keeping your hands firmly pressed into the floor just behind you. With your legs outstretched bring one leg on top of the roller and cross the other ankle over the top of that leg. Now, push your backside up and off the mat without sinking into your shoulder and roll back and forth. When you feel one side loosen up, switch to the other side.
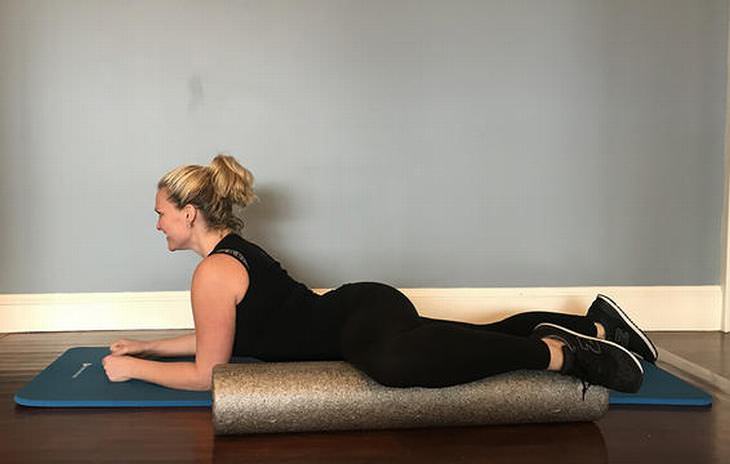
3. Inner Thigh Release
Turn your roller vertical placing it to the side of you. Lie on your mat face down with your forearms underneath you. Bend one knee up towards your armpit placing your inner thigh on the roller. Roll away and back towards your hips, massaging that inner thigh. When you are ready, switch sides.
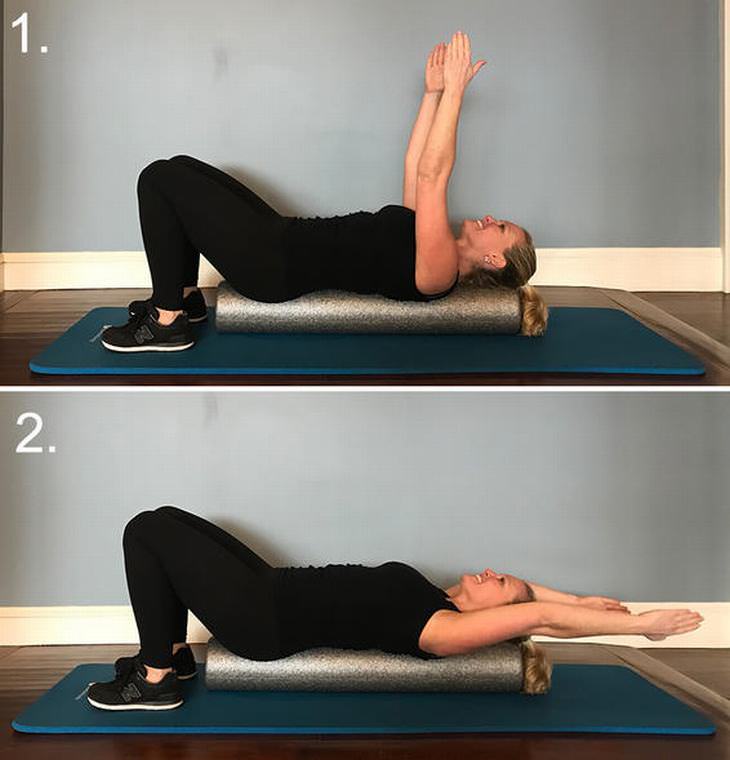
4. “T” Chest Opener
Keep the roller vertical and turn to lie on top of the roller facing up. Ensure that your head and tailbone are fully supported. Reach your arms up towards the ceiling and slowly open your arms out to a 'T' position. Keep your spine on the roller and only go as far as you can without letting your ribs go. Practice this move if you sit down all day or feel tight in the shoulders.
5. “I” Shoulder Release
Start in the same position as the previous exercise, ensuring that your head and tailbone are fully supported. Reach your arms overhead, shoulder distance apart. Then, lower your arms to the floor behind you without losing your torso connection to the roller. Watch your range of motion and try to keep your shoulders down as you reach. If it feels painful stop and hold whatever feels good. As your muscles begin to release you might be able to lower your arms more.
Subscribe and REMOVE ALL ADS
LOVE our articles but HATE our ads? For only $3.89 per month, enjoy a seamless, ad-free experience that lets you focus on what matters most — enjoying all of our content, uninterrupted. 🔒 100% Secure Payment 📅 Cancel Anytime, No Strings Attached Unlock a cleaner, faster browsing experience today and gain the freedom to navigate without visual clutter.
Ready for a Ad-Free experience? Upgrade now for just $3.89/month!
To enable your Ad-Free Subscription, please fill the fields below
Thank you for your subscription!
Your subscription was successful, now you can enjoy an ad-free experience!! Note: To make sure you get no ads, please make sure to log in to your account. If you are logged in already, then refresh the page. The subscription can be cancelled at any time.
This content is reserved for our members
Join Our Community for FREE and Enjoy:
Full and free access to ALL content.
The 'Daily Mail' service sends the highest quality and the most fascinating content directly to your inbox.