The squat, whether performed kneeling or standing, is a widely recognized exercise familiar to most people, even those who don't regularly engage in sports or exercise. It is a highly effective way to strengthen the lower body, with various techniques available to perform it. However, like any fitness routine, incorrect execution can lead to long-term damage or even injury, making it crucial to focus on maintaining a stable posture and proper movements. To help you achieve the perfect squat, this guide will cover the common mistakes to avoid, how to adjust your movements, and useful techniques.
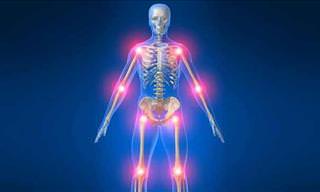
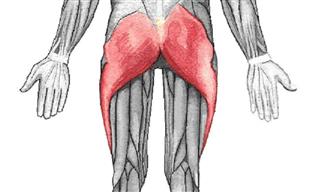
Performing the squat exercise can provide numerous advantages as it targets significant muscles like the quadriceps, hamstrings, and gluteus maximus. Despite its seemingly simple nature, it is a complicated exercise that involves various central joints such as the hip, knee, and ankle. To avoid the potential damage that may lead to chronic injuries in the spine or knees and achieve desirable outcomes, it is essential to refrain from committing the following mistakes:
1. Avoid skipping warm-up exercises
Before undertaking any fitness routine, it is crucial to perform proper warm-up exercises that effectively prepare the body for the upcoming physical exertion. To prepare for the squat exercise, follow these steps:
A. Increase body temperature and heart rate via aerobic activities such as jogging.
B. Engage in light exercises that activate the muscles involved in the workout. You may choose one or two of the nine exercises meant for leg and lower body training.
C. To properly prepare the body for exercise, it is important to shake the bones and joints and perform several squats as part of the warm-up.
2. Start your movement from the hips and not the knees
When performing a squat, it is crucial to initiate the movement from the pelvis, rather than the knees. This prevents excessive pressure on the quadriceps femoris muscle and reduces injury risk. To ensure proper form, it is recommended to work with a fitness trainer or use a mirror or camera to check posture and adjust as necessary. Additionally, it is imperative to keep the knee behind the toe line when squatting.
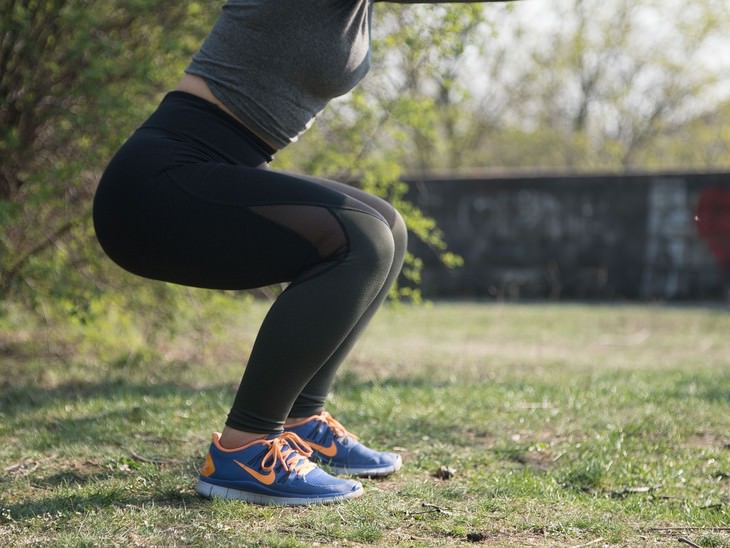
3. Leave your knee behind the toe line
When performing a squat, it is important to avoid letting your knee cross the toe line while lowering your pelvis and bending your legs back 90 degrees. This mistake can be detrimental to those with leg injuries or limited flexibility, as well as to those who want to maintain a stable position.
4. Never stop in the middle
It is crucial to complete the squat movement until the hips are parallel to the ground to fully reap its benefits and prevent injury. Keeping your back straight and your buttocks outward is also key to proper form during squats. Unless medical reasons prevent it, most people should be able to complete the full movement with determination and effort.
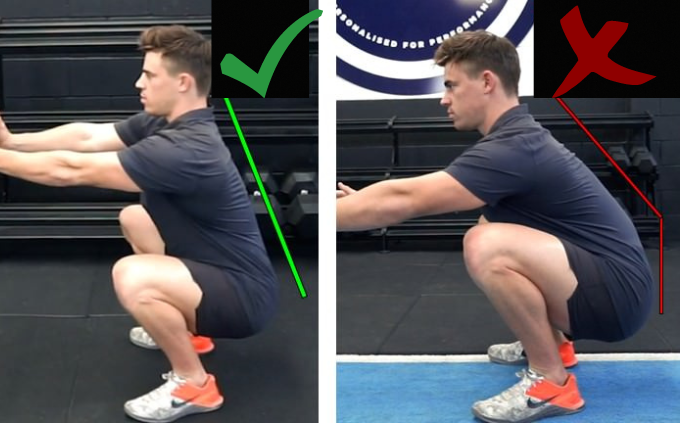
5. Keep your back straight and your rear pointing outwards
When we exercise, we often make assumptions that harm our posture and increase injury risk. It is critical to avoid arching your back and tucking into your buttocks when squatting. Instead, keep your back straight and your buttocks protruding outwards to maintain a healthy spinal position. Strengthening your hamstring muscles is key to a stable stance during squats. In fact, poor movement execution is often due to weakness in this muscle group. You can refer to the image or instructional video (available in English) at the provided link to learn how to maintain proper form during squats.
The basic steps for performing a true squat
A. The standing phase: place your feet on the line of your shoulders with them facing slightly outwards. Keep your chest upright and stable. Put your hands forward.
B. The downward movement phase: bend the pelvis downwards in a uniform movement and breathe. Maintain a straight back, make sure that the knees are behind the toe line and straight (not leaning in), and that at the end of the movement, the hips and pelvis are parallel to the ground.
C. The upward movement phase: raise the pelvis in a uniform movement, exhale, and move to a standing position - make sure at the end of the movement not to completely straighten the knees but to leave a slight bend, so as not to overload them.
Four techniques for better results
1. Maintaining a stable posture using a yoga ball
Sets: 3 | Repetitions: 15
A. Stand with your back to a wall with your lower part resting on a large yoga ball that separates you from the wall.
B. Place your feet in line with your shoulders and press your back into the ball.
C. Lower your pelvis and buttocks while pressing your back against the ball until your thighs are parallel to the ground.
D. Press your feet to the ground and lift your pelvis to return to a standing position.
This technique has the advantage of promoting good posture by keeping your chest up and back straight. Additionally, it strengthens your core muscles when you pull your arms forward.
2. Strengthening your gluteal and hip muscles by leaning against a wall:
Sets: 3 | Resting time: 30 seconds
A. Stand with your back against a straight wall with your feet shoulder-width apart.
B. Lower your pelvis and buttocks until your thighs are parallel to the ground while pressing your back against the wall.
C. Activate your core muscles and hold this position for about 30 seconds before carefully climbing back up.
The advantages of the technique: this method is an excellent way to strengthen the glutes and thighs, which are among the most important for performing the squat. As these muscles get stronger over time you can extend the time you stay in the pose from 30 seconds to 50 and so on. You can also add weight to challenge yourself.
3. Control the depth of movement using a box or chair
Sets: 3 | Repetitions: 15
A. Stand with your feet shoulder-width apart and a sturdy chair or box behind you.
B. Begin the squat movement by lowering your pelvis and buttocks in a steady motion until your butt lightly touches the chair or box behind you.
C. With the buttocks touching the item, raise your pelvis back in a steady motion until you're straight.
Advantages of the technique: using a chair or a box will give you maximum control over the depth of your movement and a correct stance when the chest is stretched and lifted. As you practice more you will eventually be able to use a lower box or chair to challenge yourself.
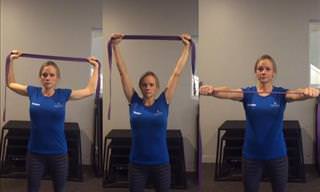
4. Maintaining a stable stance using a bar
Sets: 3 | Repetitions: 15
A. Begin by standing with your feet shoulder-width apart and holding a bar or stick above your head with both hands.
B. Lower your pelvis and buttocks, while maintaining a strong core and grip on the bar, until your thighs are parallel to the ground.
C. Raise your pelvis slightly to shift your weight to your heels, and carefully return to the starting position while keeping your chest lifted and body upright.