|
Are you having trouble viewing some of the photos on our site? Don’t fret if you are – it could be down to a minor DNS setting change that you need to add to your computer in order to see them. No matter which type of computer you use to access BabaMail, we’ve put a complete how-to guide together for you, so that you'll be able to change your DNS Settings quickly and easily. |
|
If you’re on a windows computer or laptop |
| 1. Go to your computer or laptop's Control Panel, either via the Start Menu, or by clicking My Computer on your desktop. |
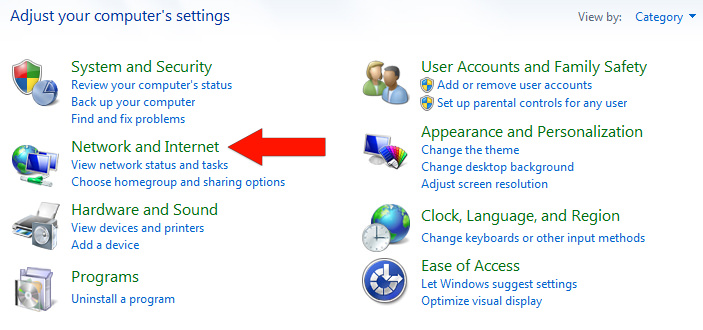 |
| 2. When you're in the Control Panel, click Network and Internet. |
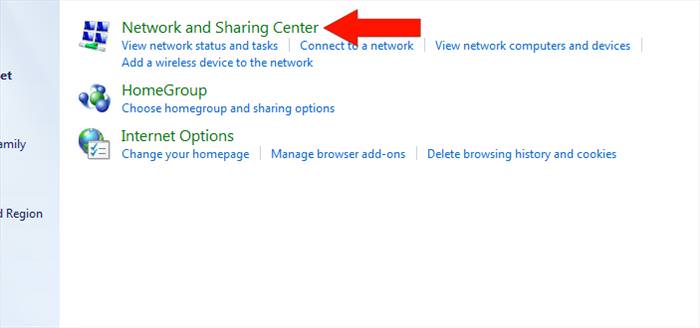 |
| 3. Click Network and Sharing Center. |
 |
| 4. Click Change Adapter Settings. |
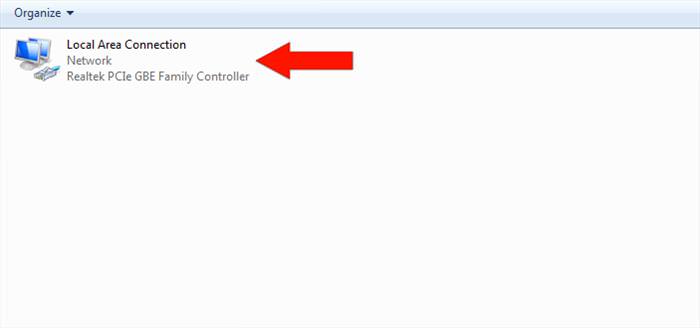 |
| 5. Select the connection that you want to change the DNS for. In this example, we will use Local Area Connection. Note that if you're using a home wireless connection, you will need to select Wireless Network Connection instead. |
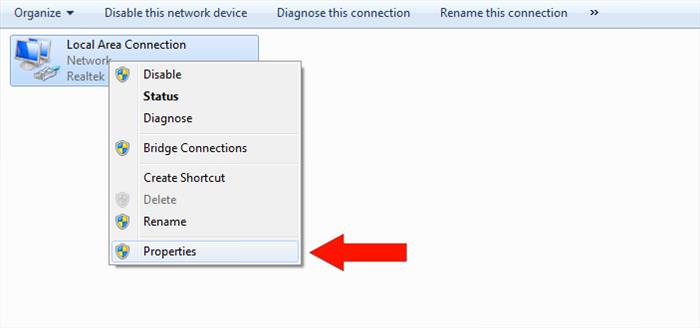 |
| 6. Right-click on the connection, then click Properties. |
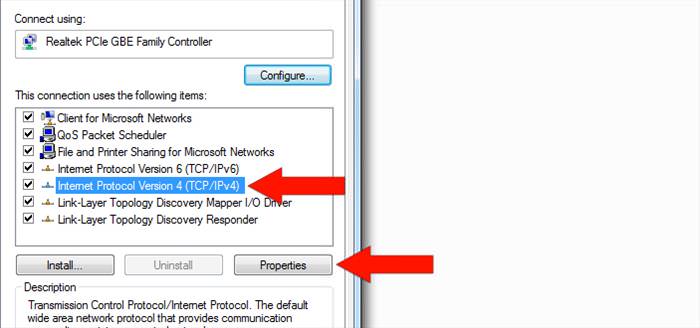 |
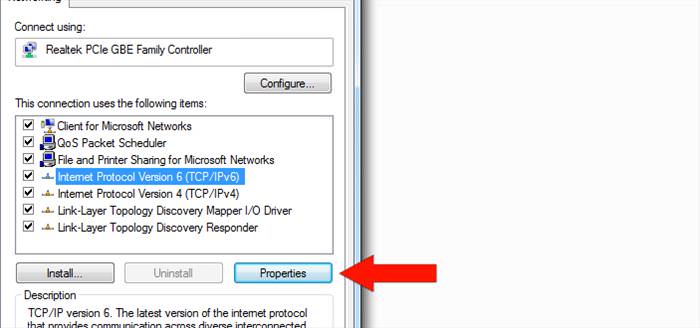
| 7. Select the Networking tab. Under This connection uses the following items, select Internet Protocol Version 4 (TCP/IPv4), then click Properties. |
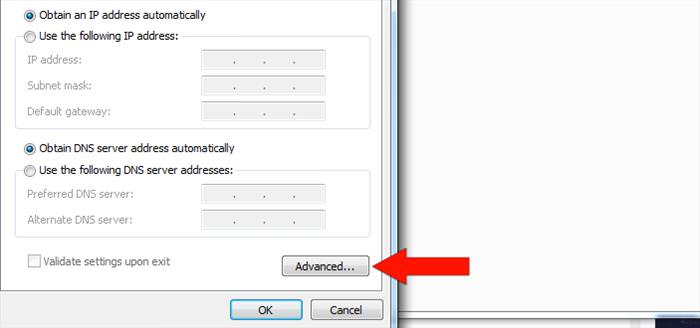 |
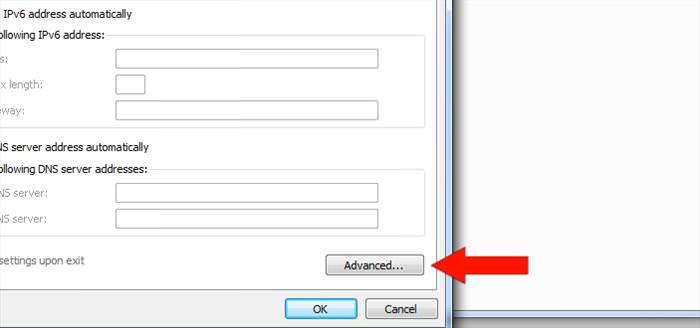
| 8. Click on Advanced. |
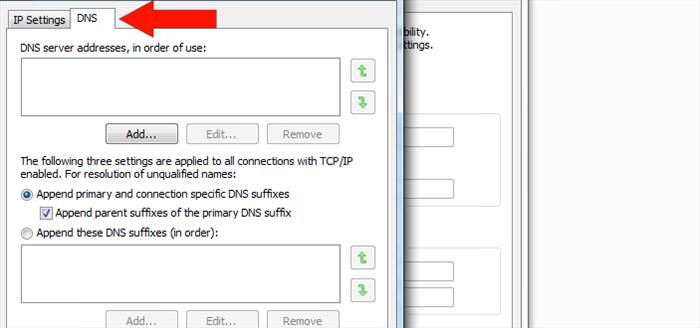 |
| 9. Select the DNS tab. |
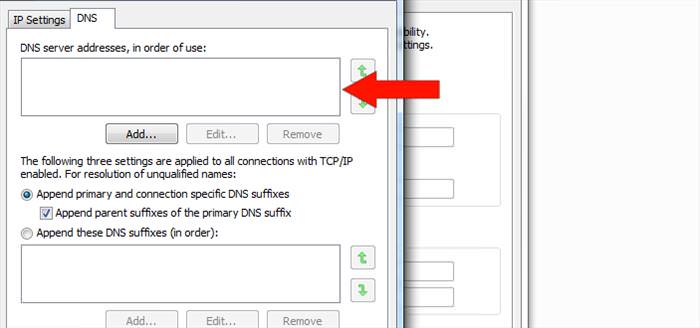 |
| 10. Take note of any addresses (if any) that are written in the indicated space, then clear them. |
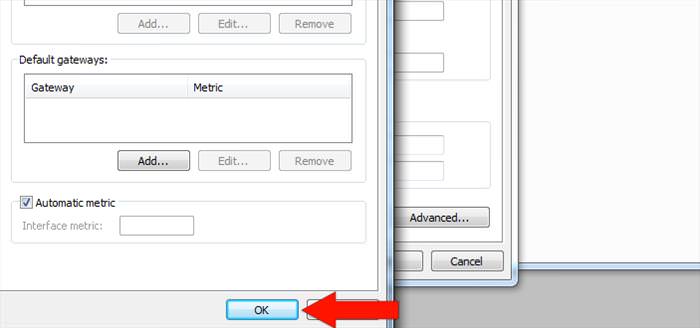 |
| 11. Click the OK button. |
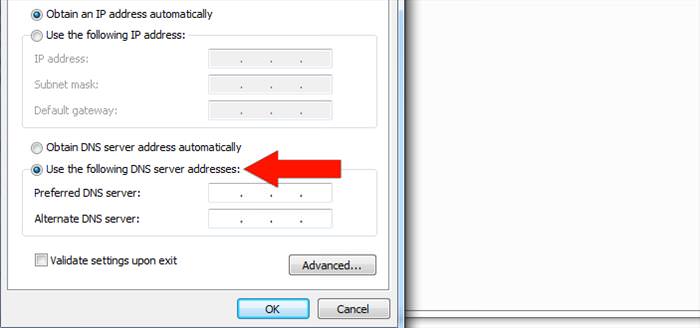 |
| 12. Select Use the following DNS server addresses. |
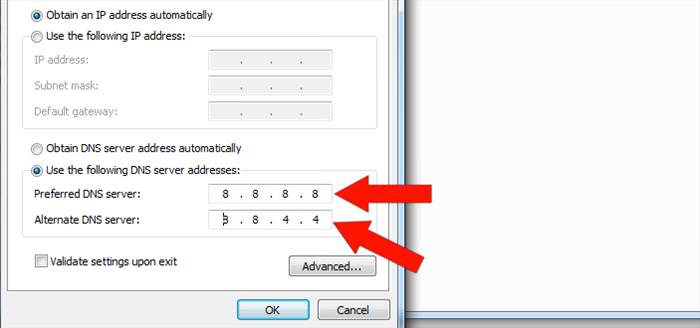 |
| 13. Replace those addresses with the IP addresses of the Google DNS servers. These are 8.8.8.8 and/or 8.8.4.4. |
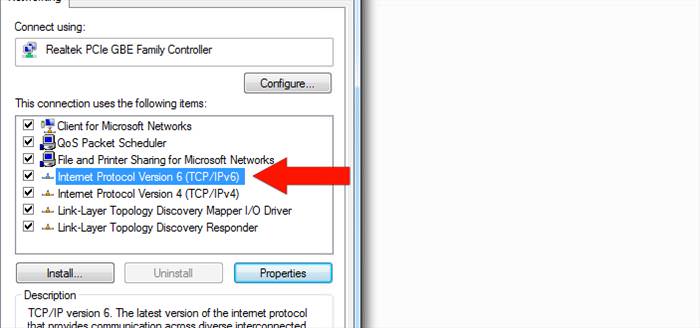 |
| 14. Repeat steps 6-12 for IPv6. The process looks like this: |
 |
 |
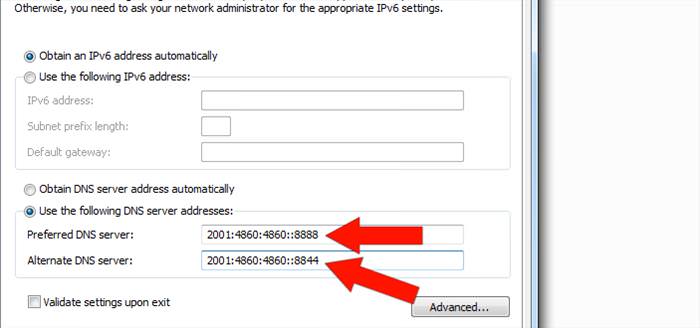 |
| 15. The IP addresses for IPv6 are 2001:4860:4860::8888, and/or 2001:4860:4860::8844. |
| 16. Turn your internet connection off, then back on again to reboot it. |
| 17. Check that your new settings are working correctly by visiting this link. |
|
For Windows 10, the process is slightly different: |
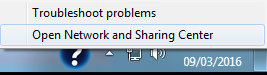 |
| 1. Open the Network and Sharing Center by right-clicking on the network connections symbol on the bottom-right-hand corner of your screen, then click on Open Network and Sharing Center. |
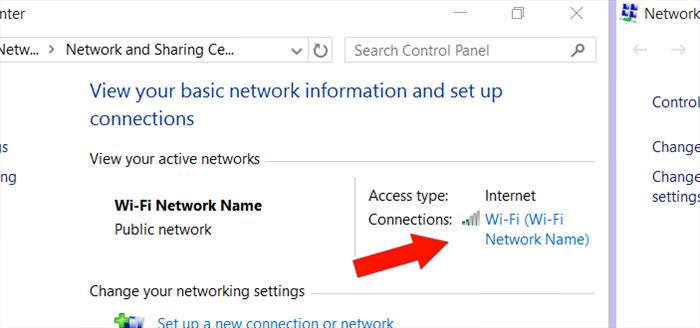 |
| 2. Click on the connection type. In this example, the connection is Wi-Fi. |
 |
|
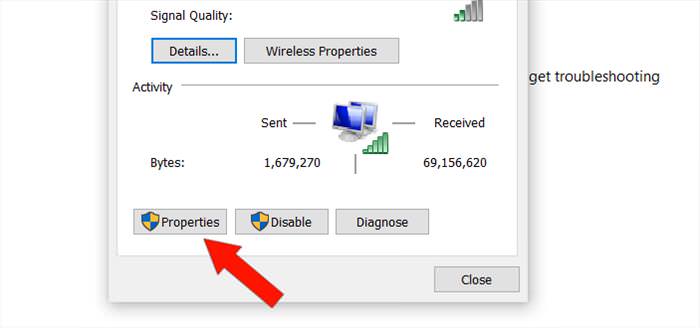
3. Click the Properties button on the next page to view your connection properties. |
 |
|
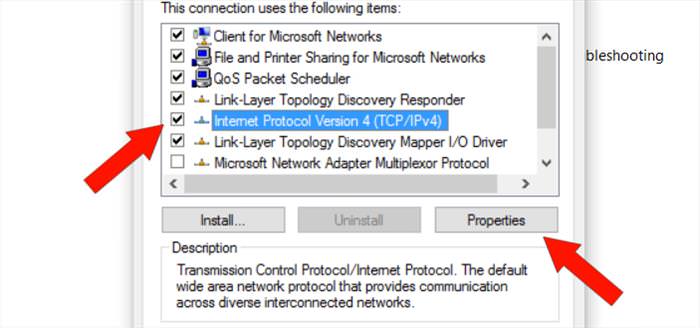
4. Click once on Internet Protocol Version 4 (TCP/IPv4) to highlight it, then click the Properties button. |
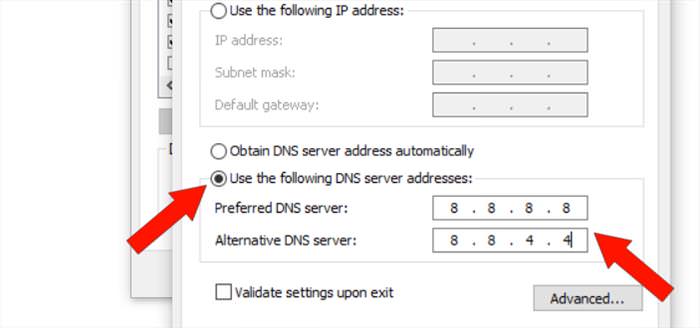 |
| 5. Select Use the following DNS server addresses. If there are any IP addresses listed in the Preferred DNS server or Alternate DNS server, write them down for future reference. Replace those addresses with the IP addresses of the Google DNS servers, which are 8.8.8.8 and/or 8.8.4.4. |
|
If you’re on a Mac computer or laptop |
 |
| 1. Click the Apple icon in the top-left-hand corner of your screen. |
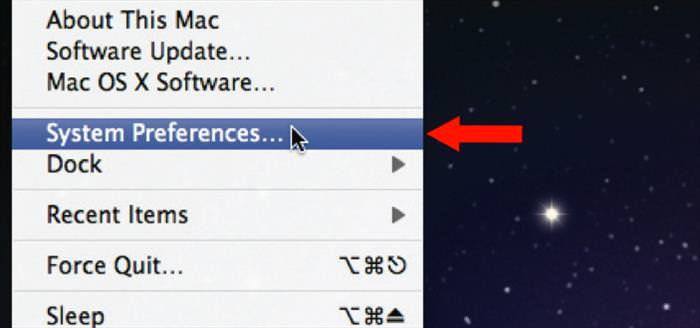 |
| 2. Click System Preferences. |
 |
| 3. Click Network. |
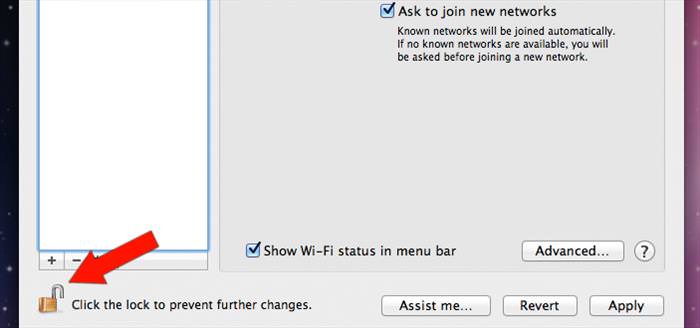 |
| 4. If the lock icon on the lower left-hand corner of the window is locked, click the icon to make changes, and put in your computer's password if you're asked to. |
 |
|
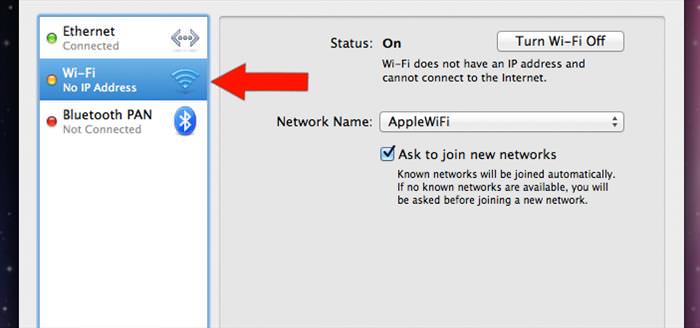
5. Select the connection for which you want to configure the DNS. It's likely that you need to select Wi-Fi if you're at home using a wireless internet connection. Select Ethernet if your Mac computer accesses the internet via an Ethernet cable. |
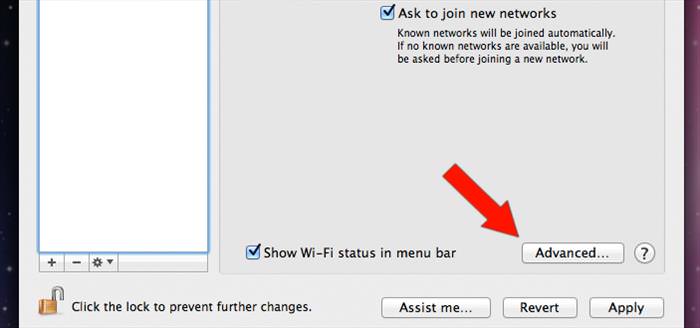 |
| 6. Click Advanced. |
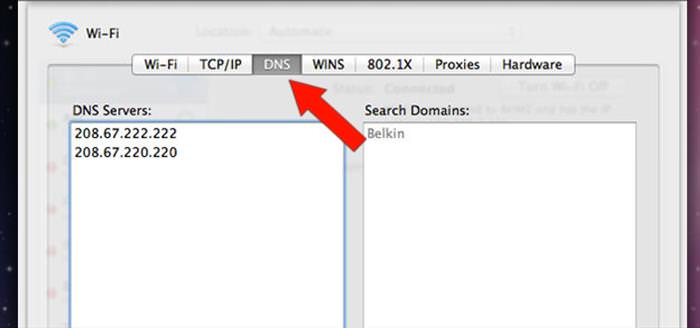 |
| 7. Select the DNS tab. |
 |
| 8. Click the + button to replace any listed DNS addresses. |
 |
|
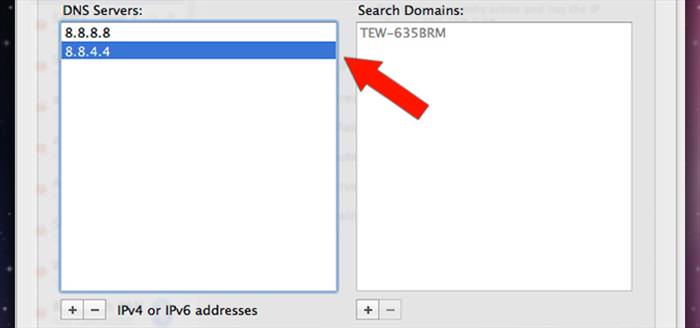
9. Add 8.8.8.8 and 8.8.4.4 as addresses. You can also add 2001:4860:4860::8888 and/or 2001:4860:4860::8844 for IPv6, but this isn't absolutely necessary. |
| 10. Click the Apply button, then click OK. |
| 11. Check that your new settings are working correctly by visiting this link. |
|
12. Repeat this procedure should you want to change the DNS settings for any additional networks you may use. |