|
Google Calendar has become the compass to my day. It effortlessly helps me know what I have to do, sends me reminders so that I will never forget a meeting or an appointment - and it does so to my choosing, via email or a notification. I find it extremely convenient because no matter what device I am using, my calendar is there, notifying me of my day-to-day plans on the go, be it from my desktop, my iPad or my mobile. It has really made life so much easier for me, and in this article, I'd like to share the benefits and functions of Google Calendar with you! |
|
|
|
Getting started |
|
To get started on Google Calendar, you first need to have a Google account, this will allow you to access Gmail, Youtube and other Google services with a single username and password. Creating a Google account is easy, all you need to do is fill in your details here. If you already have a Gmail account (learn more here) this step does not apply to you. |
|
|
|
Step 1: Accessing Google Calendar |
|
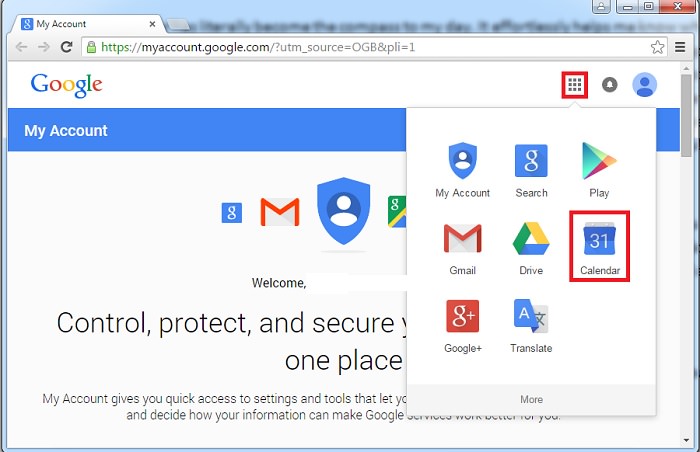
Now that your Google account has been set up, opening Google Calendar is pretty easy: Whenever you access your Google Account, on the top right corner, you will see your name and a couple of boxes right next to it, as indicated in the red box in the picture below: |
 |
|
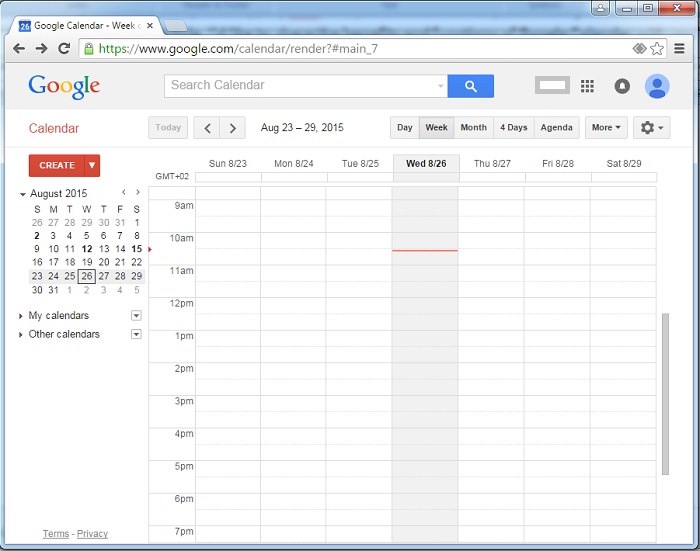
Clicking on the calendar icon will allow you to open any of Google's applications, your main ones being your email account: Gmail and your Calendar. Open your calendar by clicking on it. Upon doing so, you will be presented with the below interface. This is what Google Calendar looks like: |
 |
|
Step 2: Adding and editing events |
|
Your calendar won't be much use when empty. Filling it up with meetings, events and appointments is effortless. On the left side of your screen, you will see a Create button, in red. You have two choices:
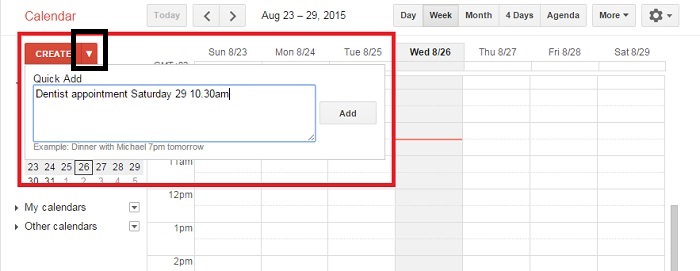
Option 1: Brief description Clicking on the ARROW by 'Create' will allow you to add an event quickly via 'Quick Add'. The following will appear: |
 |
|
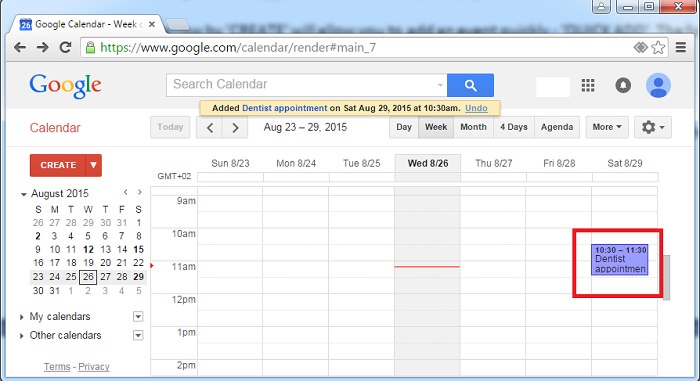
Fill in the field in the text box provided, as illustrated in the image above. It can be anything from a lunch date, to an appointment... anything that you would like to remember. Your description here will be brief. You can use words like 'today', 'tomorrow', or simply add the day/date and the time. Once you have created your reminder, click 'Add'. This event will automatically be added to your calendar. |
 |
|
If the event gets cancelled, you can delete it by clicking on the event, and selecting the 'Delete' option. You may also edit your event at any time. Clicking on my 'Dentist Appointment', for example, will take you to a more detailed form, allowing you to fill in a location, send notifications, so on and so forth. See option 2 for more details.
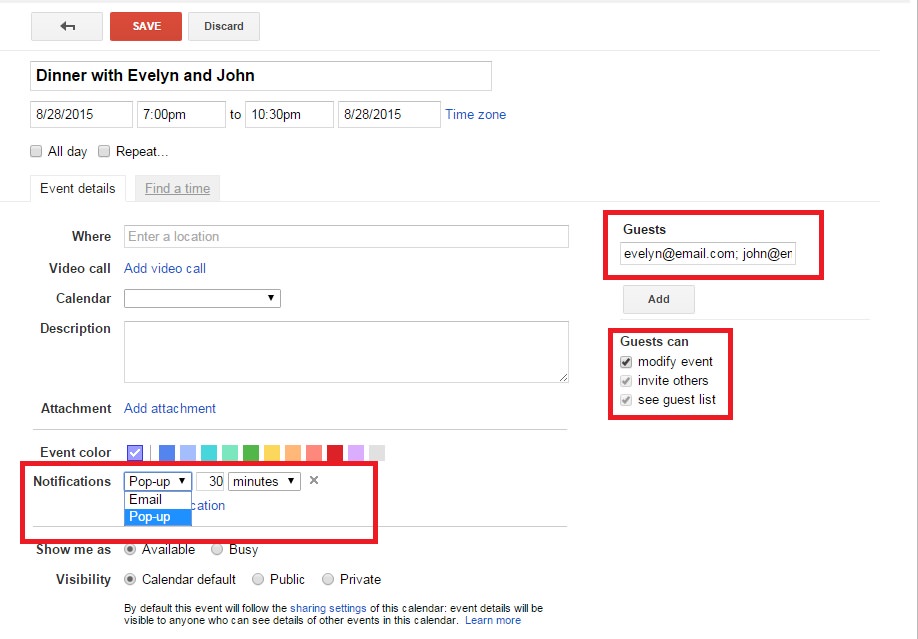
Option 2: Detailed description You can use this feature, if you'd like to remember a couple more details than the 'Quick Add' feature will enable you to provide. Click on the 'Create' button. The following will appear: |
 |
|
By using this feature, you can add a lot more detail to your plan. There are some other great features you should know about too:
When you are satisfied with the details in your event, click Save - located at the top of the page. The event will automatically be added to your calendar, and when clicking on it, you may view and adjust details at any time. You also have the option of deleting the event completely. |
|
Step 3: Viewing your calendar |
|
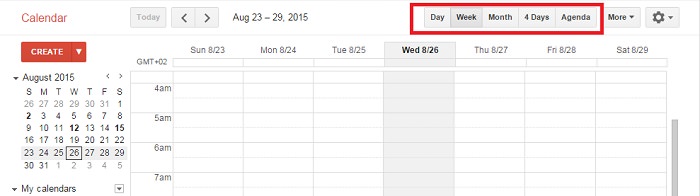
Once you've got the hang of adding events to your calendar, you may notice it getting a little cluttered. However, Google Calendar gives you the option of adjusting how you would like to view your calendar as follows: |
 |
|
The feature boxed in red, allows you to switch to 'day', 'week', 'month', '4 day' or 'agenda', to give you a clearer view of your schedule. |
|
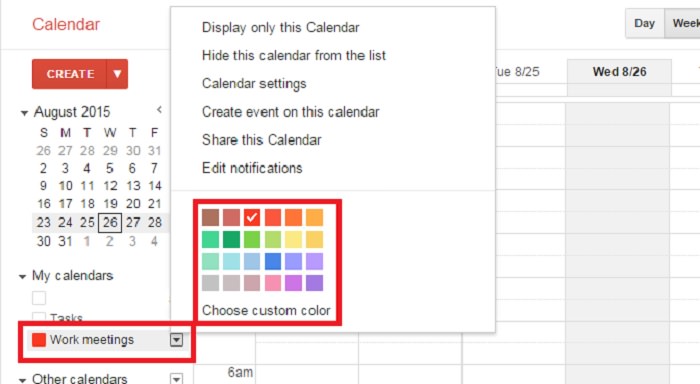
Step 4: Color code your calendar |
|
You also have the option of using the color code tool. On the left hand side, underneath 'My Calendars' you will notice your calendar listings, as illustrated here: |
|
|
 |
|
Select the calendar that you would like to color code, and choose your custom color. |
|
|
|
Step 5: Using the 'Search Calendar' function |
|
The 'Search' function at the top of the page is there for a reason. It makes things a lot quicker and easier. You can just type in the name of someone, a place and so forth. |
|
|
 |
|
Instead of browsing through your calendar for an important date or meeting, using the 'Search' tool will definitely save you time. |