Capturing screenshots can be a lifesaver when you need to preserve what you're seeing on your phone or computer screen. Luckily, mobile and desktop operating systems offer convenient screen-capture tools that allow you to capture specific portions or even grab a scrolling screenshot. It's important to know how to use these tools effectively, and this quick guide will show you how to get it done on all the major platforms.
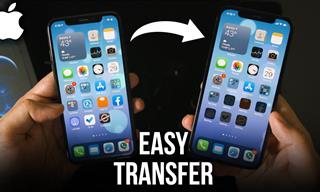
To capture a screenshot on an iPhone or iPad without a Home button, simultaneously press the side button (or the top button on an iPad) and the volume up button. If your Apple device has the Home button, press and hold the sleep/wake button while simultaneously pressing the Home button. Subsequently, the screenshot will be accessible in both your camera roll and the designated Screenshots album.
On iOS/iPadOS, annotating a screenshot is simple: just tap the thumbnail that pops up at the bottom of the screen after taking the image. This action prompts the device's markup tool to launch and allow you to take the screenshot. To capture a full web page, go to the Full Page tab, choose Done, and then Save PDF to Files. The screenshot will be stored and accessible through Apple's Files app.
You can also capture screenshots on your iPhone 8 or later models using the back tap feature. To enable this feature, click on Settings and then hit Accessibility. In the Physical and Motor section, select Touch. Scroll down to the bottom of the page to enable the back tap feature, which allows you to choose between two and three taps.
Related: iPhone Cluttered by Screenshots? Remove Them Automatically
To take a screenshot on an Android phone or tablet, simultaneously press the Power and Volume Down buttons. As soon as the capture is complete, you will hear a distinctive sound, and a preview of the screenshot will appear in the bottom left corner of the screen. Simply tap on the preview to access editing and sharing options.
Some Android smartphone brands provide users with a scrolling screenshot feature that can capture full webpages or lengthy message chats. While each manufacturer may refer to this feature by a different name, the process is essentially the same: take a screenshot and then hit a specific button during the preview. For example, Samsung users can use the Scroll Capture feature by pressing the button that shows two arrows within a box. Similarly, Huawei offers Scrollshot, LG provides Extended, and OnePlus users can get Expanded Screenshot for similar features.
Samsung smartphones also offer gesture support for capturing screenshots. Locate the desired screen image, position your hand as if preparing for a karate chop, and swipe the entire side of your hand across the screen from left to right. To enable or disable this feature, go to Settings > Advanced Features > Motion and gestures > Palm swipe to capture.
To take a screenshot on your Windows 10 laptop or desktop, press the Print Screen key (often abbreviated as Prt Scn or similar). If you prefer to capture only the active window, hold down the Alt key while pressing Print Screen. The screenshot will be copied to your clipboard. To edit and save it, open an image editing software like Microsoft Paint or Photoshop, and paste the screenshot into a new document.
To capture a specific area of the screen in Windows 10, simultaneously press the Windows, Shift, and S keys. This action allows you to select the desired portion by clicking and dragging, then releasing to capture it. Alternatively, in older Windows versions, use the Snipping Tool, which is found by clicking Start and putting "snipping tool" into the search box. After that, the screenshot is automatically copied to your clipboard for easy pasting.
To take screenshots and store them automatically, press the Windows and Print Screen buttons simultaneously. The screenshots are saved in a folder named Screenshots in your Pictures folder.
Windows 11 offers familiar screenshot options such as Print Screen and Alt + PrtSc, alongside a new shortcut: Windows Key + PrtSc. This latest shortcut efficiently saves your screenshots to both the Pictures > Screenshots folder and the Windows Photos app.
Microsoft has combined Snip and Sketch and Snipping Tool into one improved Snipping Tool to make screenshot capture easier. With the Shift + Windows Key + S shortcut, users can easily access various capture options, including fullscreen, custom, and window capture. If you open the app directly, instead of using the shortcut, you can capture with a delay.
Windows 11 also allows users to assign the Snipping Tool to the PrtSc key via Settings > Accessibility and Keyboard. Enabling the "Use the Print Screen Button to Open Screen Snipping" option activates the screen capture tool, rather than capturing the full screen with a single press of the PrtSc key.
Related: 6 Simple Tips for Taking Screenshots on Windows
With the rollout of macOS Mojave, Mac users got more control over taking screenshots. This update introduced a dedicated screenshot tool accessible via Command + Shift + 5 or by going through Launchpad > Other > Screenshot.When the screen-capture window appears, users can choose whether to capture the full screen, a part of it, or a specific window. In addition, the program allows for video recording of the entire screen or certain areas, as well as timed screenshot capture and configurable image storage places.
For those who prefer using keyboard shortcuts, you'll be pleased to know they're still available. To capture the entire screen, press Command + Shift + 3. If you need to capture a specific area, Command + Shift + 4 will activate a crosshair cursor for selection. For capturing specific windows, use Command + Shift + 5 and toggle between screen sections and windows by pressing the space bar. And if you have a Mac with a Touch Bar, use Command + Shift + 6 to capture it.
You can take a screenshot on a Chromebook by pressing the Control (Ctrl) and Show Windows keys. For capturing a specific section of the screen, hold down the Shift, Ctrl, and Show Windows keys, then drag your cursor to highlight the desired area before releasing to capture the screenshot.
The preview of the screenshot will appear in the lower-right corner, allowing you to copy or annotate it as needed. To locate saved screenshots later, click on the Launcher button (the circular icon located at the bottom-left corner of the screen), then go to Files and access the Downloads folder on the left-hand side.
If you're using an external keyboard, press Ctrl + F5 to capture the entire screen or Ctrl + Shift + F5 to capture a specific area of the screen. When using your Chromebook in tablet mode, press the power and volume down buttons to take a picture of the entire screen.
Related: Computer Guide: Windows 11 Shortcut Keys!
By default, your screenshot gets saved in the Downloads folder, but you have the option to customize this setting. Press Shift + Ctrl + Show Windows, then go to Settings > Select folder. Additionally, you can opt to upload your screenshots to Google Photos or back them up on Google Drive.