
With the passage of time, all of us experience a little loss of function in at least one of our senses. Some of us become hard-of-hearing, while others just aren’t able to see as well as they once were. This decline in sensory function can have various consequences, one of which is making using a computer quite a challenge. Luckily, there are various settings and other things that can be changed on computers to make them easier to use. Here are 7 of them:
1. Screen Resolution
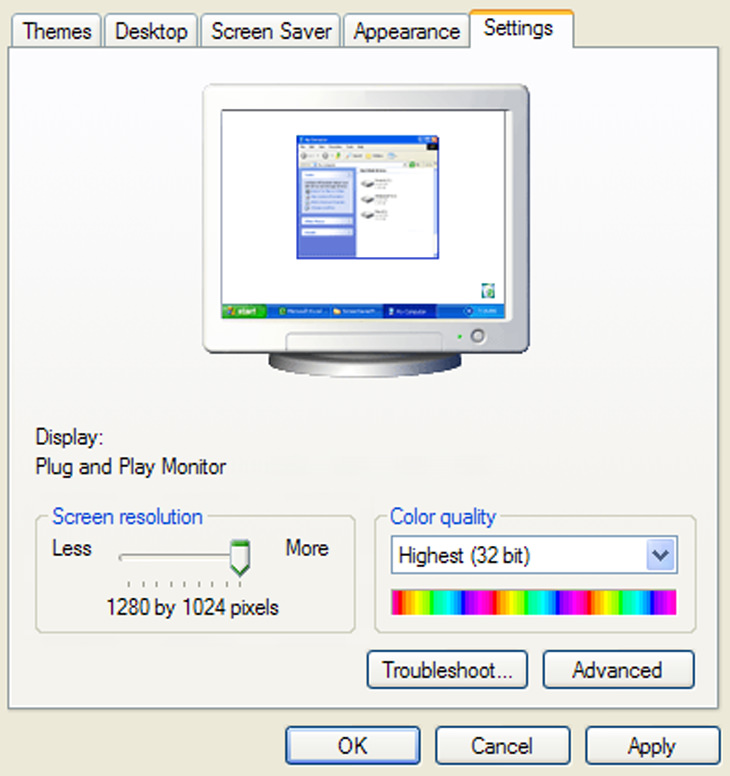
The screen resolution on your computer is, in layman’s terms, how many tiny little dots, known as pixels, display on your computer’s monitor (collectively, these dots allow you to see what you’re looking at on its screen). If you have a higher resolution, it allows you to fit more things on your desktop screen at once. With that being said, there is a downside. The higher a computer monitor’s resolution is, the smaller the icons appear on the desktop screen, making them harder to see. If your screen’s resolution is high to the point where you’re having trouble seeing what the icons actually are, here’s how to remedy it:
a. Right-click on a blank area of your desktop screen with your mouse, then click Properties in the menu that pops up as a result.
b. The Display Properties window will open. At the top, you’ll see a series of tabs. Click the Settings tab.
c. Try setting your resolution to either 1024x768 or 800x600 in the drop-down menu that appears in the settings tab.
Handy tip: The lower a computer screen’s resolution is, the less sharp the picture will be. You can try playing with the resolution settings a little to find the right setting that works for you. Another thing you can do in order to maintain good picture quality is increase your computer screen’s dot-per-inch setting. Refer back to the Settings tab, and click the Advanced button. Once you’ve done the latter, click on the General tab and under DPI, select “Large size (120 DPI)” from the drop-down menu. Note that you might need to reboot your computer in order for this setting to become active.
2. Contrast
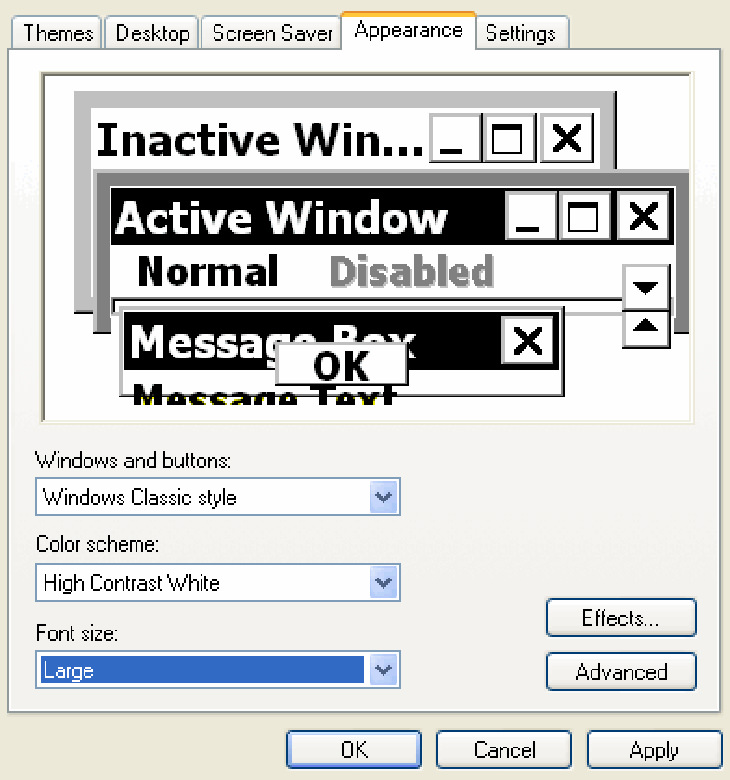
Although larger text and icons can always help you to see what’s displayed on a computer screen more clearly (more about that later), you can also change the contrast settings, allowing you to distinguish between one thing and another more easily. Here’s how to adjust your computer screen’s contrast:
a. Referring back to point 1, point to the Display Properties window.
b. Click on the Appearance tab.
c. Under Windows and buttons, select the Windows Classic style from the drop-down menu.
d. Once you complete step c, you can point to the drop-down menu that’s below. Select High Contrast White.
3. Sizes
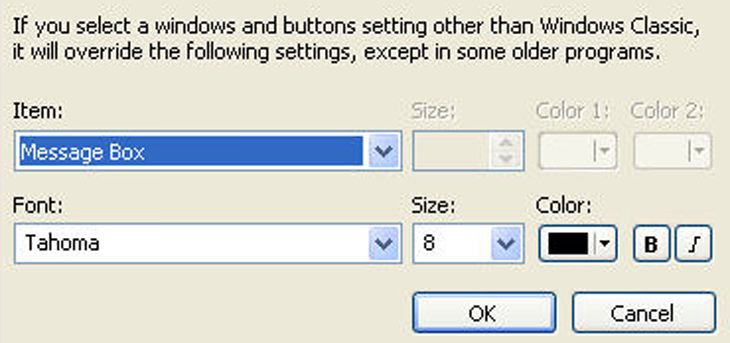
Another thing you can do, to ensure you can see everything clearly, is to increase the size of the text displayed on your computer screen (what’s known as the font size). Here's how to do it:
a. As in points 1 and 2, make sure you’ve got the Display Properties window open.
b. Increase the Font size from the drop-down menu.
c. Another thing you can do is click the Effects button and check the Use large icons box.
d. Also try clicking on the Advanced button in the Display Properties window to change further settings. Examples of these are menu font sizes, caption button sizes and message box text sizes. You can also use the Advanced button to modify font styles and colors.
4. Start Menu buttons

The Start Menu is a menu system that allows you to navigate around your computer’s files, folders, programs and applications more quickly and easily. Here’s how to customize it to make everything easier to see:
a. Right-click on the taskbar (the bar that runs along the bottom of your screen) with your mouse.
b. Left-click on Properties in the appearing menu.
c. A window will appear. Click the Start Menu tab.
d. Left-click on Customize, then select Large icons for programs.
5. Magnifier
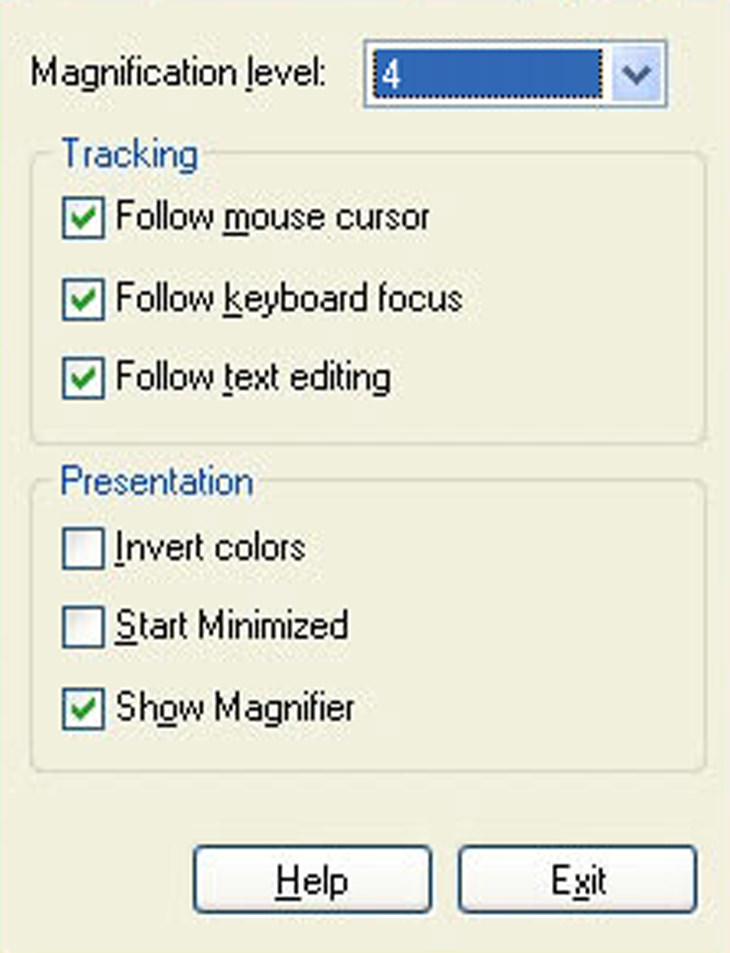
Windows also includes Magnifier features to allow you to see all the things that you still can’t in spite of all the display settings changes you’ve already made. Here’s how to use it:
a. Click on the Start button.
b. Point to All Programs in the Accessories folder.
c. Click on the Accessibility folder.
d. Click Magnifier. This will allow you to see an enlarged version of your screen, as well as adjust settings such as the amount of magnification being provided so you can see everything more clearly.
Handy Tip: In Accessibility, you will also find other useful tools to make using your computer easier. These include a Narrator and an On-Screen Keyboard.
6. Keystrokes
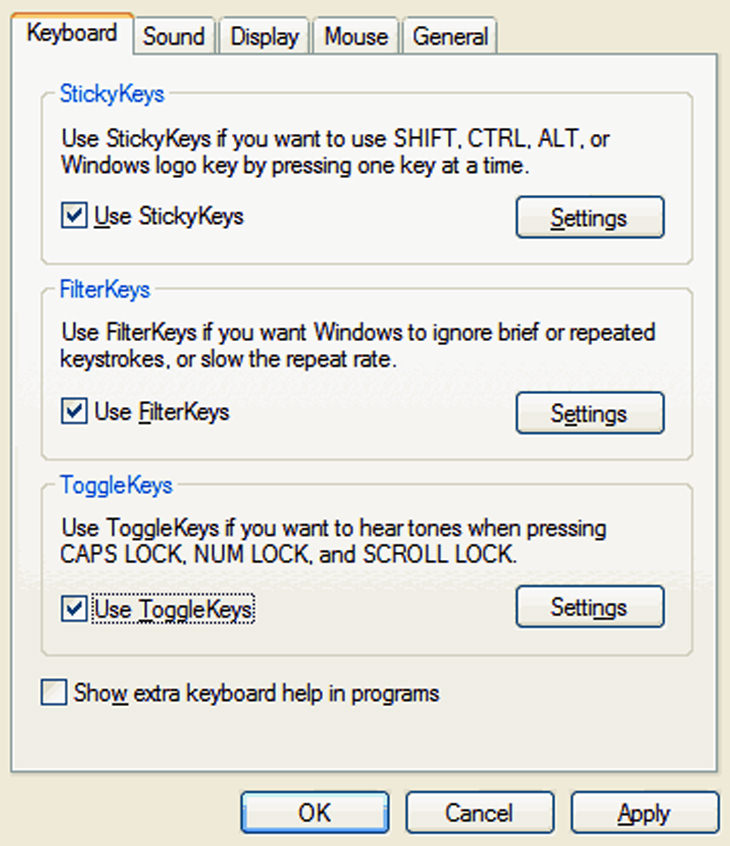
If you happen to have stiff fingers, you’ll know that hitting multiple keys at the same time can be very tricky. Luckily, Windows provides a solution for this too:
a. Click on the Start button, then Control Panel.
b. Click on Accessibility Options, then switch to the Keyboard tab once the window pops up.
c. After you’ve clicked the Keyboard tab, you’ll see three options, namely StickyKeys, FilterKeys and ToggleKeys.
7. Mouse
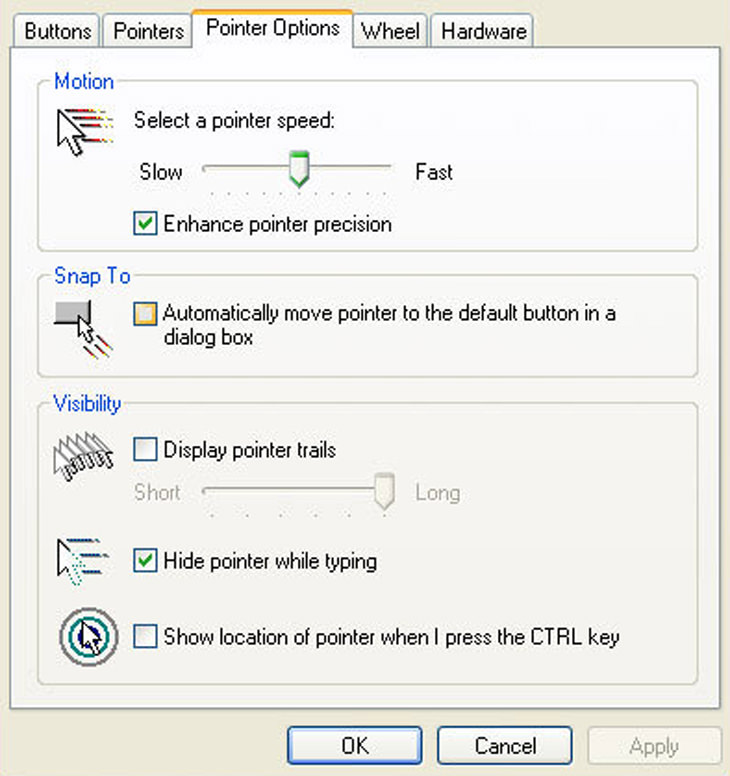
Should you have an unsteady hand, changing your mouse settings can work wonders for improving your computer’s ease of use. Here’s how to do it:
a. Click on the Start button, then Control Panel.
b. Click on Mouse in the Control Panel.
c. In the window that appears, select the Pointers tab.
d. In Pointers, you’ll be able to adjust your mouse pointer’s size, as well as adjust the speed it moves at, and whether it leaves visible “trails” behind it or not. You can also tweak the speed and feel of the wheel on your mouse here.
Content Source: Make Use Of