Start by inspecting the entire length of the Christmas light strand. Examine each string for signs of wear and strain, such as frayed wires, cuts, or fractures in the wire covering. In addition, look for broken sockets, damaged bulbs, and any missing lights. If you come across frayed wires, compromised covering, or cracked sockets, it's essential to replace the complete string for safety, regardless of the lights' operating status.
2. Plug in the strands
After thoroughly inspecting and confirming the quality of your light strands, turn on each one individually. Every light should, ideally, shine brightly and spread joy. Reality, on the other hand, may reveal a few bulbs in the shadows or an entire piece of the strand that refuses to light up. This is the time to do more extensive testing.
3. Inspect the fuses
Modern Christmas light strands are equipped with one or two fuses inside a small chamber located in the male plug at the beginning of the strand. Disconnect the strand, locate the small sliding door, and open it carefully using a flat screwdriver or your fingernail. Remove each fuse and look for a black patch on the glass surface, which indicates a blown fuse. If in doubt, replace the fuses and connect the strands.
If the lights come on, your job is complete. If not, use an ohms (Ω) multimeter to check for continuity across the fuse. A non-zero reading indicates a working fuse, whereas an infinite, open, or zero reading indicates a blown fuse that must be replaced.
4. Use a light tester
Light testers are available in several varieties, and some have functions to help repair broken light strings. You should choose the right Christmas light tester based on the type of light strand you have. It is common to require more than one tester to complete a full collection. These tools come in different forms, ranging from contactless electrical proximity testers to those that directly connect to the strand to identify and potentially fix issues. Be sure to follow the manufacturer's instructions about your chosen model and the specific type of lights you intend to use.
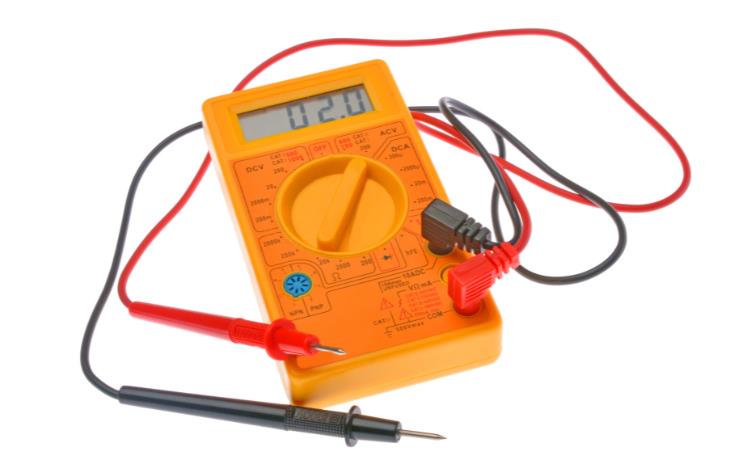
5. Try a multimeter
As the name suggests, a multimeter proves invaluable for various electrical tests and diagnostics. When troubleshooting a non-functional Christmas light strand, using a multimeter becomes the most effective way because it allows you to rule out likely problems in a systematic manner.
The multimeter is utilized to verify continuity, with the point of the continuity break pinpointing the burnt-out bulb's location. To test continuity across the entire strand, insert one multimeter probe into a hole on the female plug side and the other into a male prong. An infinite, open, or zero reading on the meter indicates the presence of at least one faulty bulb.
Now, you must check multiple bulbs at a time. Remove two bulbs located some way apart along the strand. Insert one multimeter probe into one socket and the other into the adjacent open socket. Conduct a continuity check as described earlier. If the circuit remains open, it indicates the faulty bulb is likely situated between the two removed bulbs. If the inspected section is in good working order, move on to the next area and repeat the process until you find the faulty bulb section. Continue to focus your search by trying smaller pieces until you find the culprit.
6. Test the lights manually
You can still test your lights even if you don't have a multimeter or a Christmas light tester. First, take an extra replacement bulb and test it on a known working light strand. Replace each bulb on the strand one at a time with that excellent bulb, plugging the strand in between swaps to test whether it works.
Check each bulb carefully as you remove it. Look for signs of discoloration or a missing filament. Pay close attention because distinguishing between working and malfunctioning lights might be difficult. When only one bulb is creating the problem, this method works well. When dealing with several burnt-out bulbs, however, a thorough investigation and a dash of luck become your key strategies.
7. Upgrade your lights
If your old lights are causing too many problems, it may be better to replace them for the holidays. Consider switching from incandescent to LED Christmas lights. Choosing LEDs has various benefits over incandescent bulbs. They have improved energy efficiency, a longer lifespan, and the capacity to display different colors and patterns via programming. Furthermore, compared to traditional bulbs, LED lights are more durable and less prone to breaking.