Google’s Gmail is one of the most popular webmail services available. It was originally created in 2004, but it didn’t become accessible to the public until 2007. Gmail was one of the first web-based email products to offer its users a gigabyte of storage, trumping the majority of other popular webmail services at the time, which typically offered just 2-4 megabytes. Since 2007, Google has increased the storage capacity to a whopping 15 gigabytes.
With Gmail, your emails are stored safely in the cloud and are accessible from any computer or device with internet access. You can also quickly organize and find important emails, add professional signatures to any emails you send, and read and draft emails when there is no internet connection.
So, if you want to set up a Gmail account but don’t know how, if you need some help with your new Gmail account, or if you’re still trying to figure out the different settings, you’ve come to the right place.
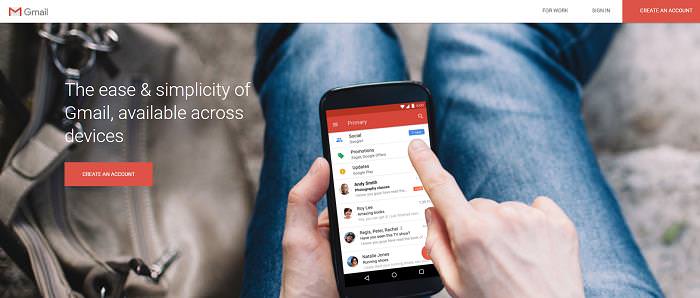
When you first visit the Google Gmail page, in the top right corner you’ll see a large red box where you can Create an Account. Click on it.
On the very next page, you’ll see a simple form where you have to enter personal details such as your name, username, preferred password, birthday, gender, phone numbers, and email address. Bear in mind that there are thousands of users on Gmail, so it might not be possible to get an account that matches your real name. To get around this, many people use their full name, followed by a meaningful or random sequence of numbers.
Adding your phone number and another email address is optional, but it’s a good idea to add them as these will be the only way Google will be able to confirm your account should you ever get locked out.
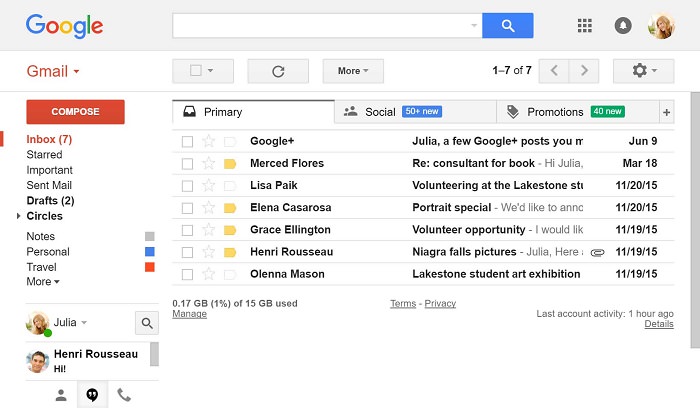
Once you have accepted the terms and conditions, click Continue to Gmail. You’ll now be looking at your brand new, empty inbox.
The Huge Advantages of Gmail
When you sign up for the very first time, you’ll gain access to a long list of Google services, not just email. The most commonly used services include:
Google Drive – Here you can create spreadsheets, documents, and even slideshow presentations using a free library of cloud-based office applications. You also get lots of space to store files.
Google Maps – This is a web and mobile-based app that helps you find directions and navigate traffic, view satellite imagery, user photos of places, and more. You can even use this app to find parking spaces or explore the solar system.
YouTube – Now that Google has bought YouTube, your new Google account gives you access to all free features that are available.
Google Calendar – This is a cloud-based calendar system that allows you to organize your day in a very intuitive, easy-to-use graphical interface, both on the web and on your phone.
Google Keep – These are basically sticky-notes for your computer and phone.
Google Contacts - Sync all your contacts across your email, all Google services, and your phone.
Composing an Email
To send an email:
1. Click the red Compose box in the upper left corner of the inbox. A new email will open near the bottom corner of your Gmail window.
2. Choose a window size that suits you by using the arrow button in the upper corner of the compose window.
3. Start typing to compose your email. Emails that you have started writing, but haven’t sent yet, are automatically saved in Drafts, on the sidebar.
The email composer window is one of the most feature-filled, powerful sections of the entire Gmail interface, so it’s worth spending a bit of time exploring all the things you can do in this view.
Format Email Text
The top of the email window has the usual To, Cc, Bcc, and subject fields that you’re probably familiar with already if you've used any other webmail services. However, unlike most other email services, the text formatting menu is at the bottom instead of at the top.
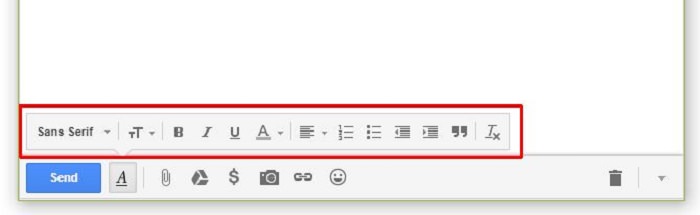
This formatting menu enables you to format your email text just like you would in a document editor such as Microsoft Word. Here you can change font size, style, and formatting, create numbered or bullet lists, indent text, or even include block quotes.
The menu under this includes other top-level menu items. By default, the formatting menu is selected, but from left to right you can:
• Include an attachment (paperclip icon)
• Insert files from Google Drive (Google Drive icon)
• Send or request money with Google Wallet (dollar icon)
• Insert a photo (camera icon)
• Insert a hyperlink (chain icon)
• Insert an emoticon (smiley icon)
• Delete things (rubbish bin icon)
• More options which include switching to full-screen editing mode, choosing a label for outgoing email, switching to plain text, printing the email, or checking the spelling (down arrow)

If you install the Gmail Offline app, your messages will sync with your browser’s storage on your computer. Therefore, any messages that you write, archive, label, or delete while you’re offline will be sent or moved when you’re back online.
Installing the Gmail Offline app:
1. In the top right, click the cog, and select Settings.
2. Go to the Offline tab and click Install Gmail Offline.
3. In the Gmail Offline page, click Add to Chrome > Add app.
4. In Chrome, visit chrome://apps/
5. Click the Gmail Offline app.
Using the Gmail Offline app:
1. When offline, go to chrome://apps/ and click the Gmail Offline app.
Viewing New Email
Unread emails are marked in bold. To read an email, simply click on it.
By default, replies to the same recipient are grouped into conversations. It may take some time to get used to this, but keeping all the emails in a thread makes it easier to keep track of them and significantly reduces inbox clutter.
However, if you’d prefer to separate all your existing and future emails, you can unthread them:
1. click on the cog on the top right and select Settings.
2. In the General tab, scroll to Conversation View and select Conversation View Off.
3. At the bottom, click save changes.
Replying to Emails
To reply to an email, just click on the box below the email you received and type away. Or else, you can choose exactly how you want to respond:
• Reply or forward: To respond to an email, open it and in the box under it, click Reply, Reply to All, or Forward.
• Respond inline: To see the previous email within your replies, scroll down and click Show Trimmed Content.
• Respond to an earlier email in the thread: Select the email you’d like to reply to. Then, click the Down arrow to choose how to reply.
• Forward an entire conversation: In the menu bar above the conversation, click More > Forward all.
Organizing Your Inbox
Switch to Labels from Folders
In your previous email program, you might have stored the emails you wanted to keep in folders. However, in Gmail, you can use labels to categorize your emails. Labels are like folders, but with a nice twist: you can apply multiple labels to an email, then later find the email by looking in any of its labels.
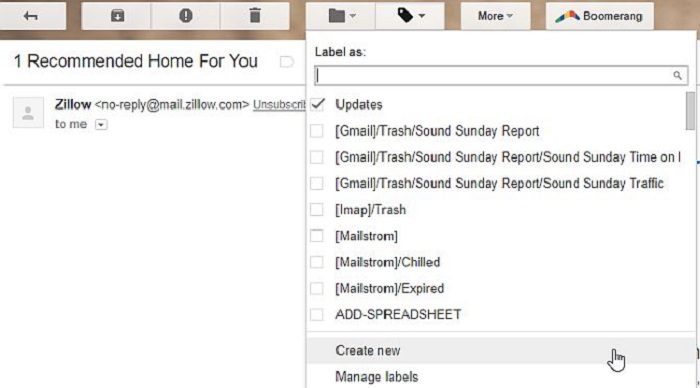
To create a new label, simply click on the label icon at the top menu, and choose Create new from the list.
When you have an email open, you can sort it into any of your labels by clicking on the same label icon and clicking the checkbox next to the label where you’d like to store the email. This will sort the email under that particular label in the left navigation bar. Labels give you the option of keeping your inbox more organized than ever before.
Star Important Email
Want to flag an important email? Click the star next to an email in your inbox or an email within a conversation. To list all your starred emails, just click starred in the left sidebar.
Delete or Archive Unwanted Emails
If you no longer need an email, it can be deleted by selecting it and clicking the bin icon. Deleted emails are moved to the Trash and then permanently deleted after 30 days. However, with all the storage available to you, you don’t need to delete your emails to save space, so we recommend you archive them instead.
This removes the emails from your inbox, helping to keep it clutter-free, but the emails stay in your account, so you can find them later if need be. It’s basically like moving emails into a filing cabinet for safekeeping.
1. Select the email you’d like to archive.
2. At the top of the inbox, click the folder icon with a downward pointing arrow on it.
Finding Emails
Search Your Inbox
You can search for one or more keywords that appear anywhere in an email – in the subject, body, or sender name. At the top of the Gmail screen, simply type the word/s you’re looking for in the search box.
To help your search, Gmail suggests using search terms based on your email, contacts, labels, or past searches.
Narrow Your Search with Advanced Options
To narrow down your search even further, click the down arrow to the left of the magnifying glass. This will open up more search options. Here you can enter specific criteria. For example, you can find an email from 'Chloe' that has an attachment and was sent within a particular time frame.
Create a Signature
You can automatically add a professional email signature to any email you send. This might include your name, title, and contact information.
1. Click the cog in the top right, and select Settings.
2. On the General page, scroll down to the Signature section and compose your signature. Use the format bar to add text, colors, styles, links, and even a picture.
3. At the bottom, click save changes.