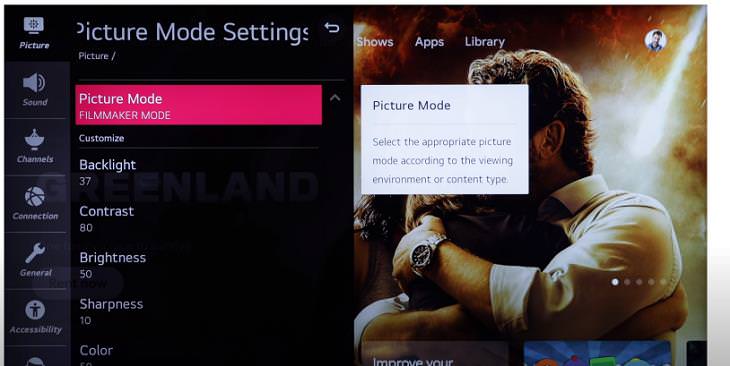
The first step to getting the best picture on your TV is to choose the right picture mode. This setting has the biggest effect on the overall picture quality of your television. Setting this correctly will automatically adjust several aspects of your TV’s image. If you've never changed this setting, it’s probably in the default mode, which is likely to be labeled Standard, Dynamic, Vivid, Bright, or something similar. The default mode typically has blown-out colors and image "enhancing" features that look too bright inside a home.
The best way to get the accurate color for your TV is to put it in Movie or Cinema mode. This might also be labeled Calibrated on some sets. This mode usually gets your TV’s colors as close as possible to what the filmmakers and TV directors intended. It will also fix some of the picture's more gaudy aspects.
2. Make sure the colors are warm
Choosing the right picture mode should also adjust your TV’s color temperature, but it’s always best to double-check. A TV’s color temperature refers to how warm (usually red) or cool (usually blue) the image is.
Now, remember that after you first switch to the Movie or Cinema mode, the image might look a little reddish. That’s nothing to be alarmed about. This is actually the most accurate color for your TV. Most TVs come with a default cool mode these days. In case yours still has a bluer tint after switching to picture mode, change the color temperature setting to warm. Give your eyes a few days to adjust to this mode, and you will never look back.
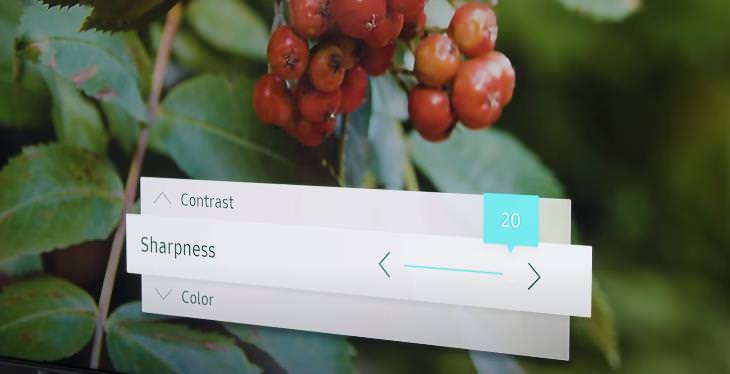
3. Balance the sharpness
You will be surprised to know, perhaps, that sharpness on most modern TVs doesn’t improve the sharpness of the image. Instead, it controls artificial edge enhancement. In other words, it accentuates the edges of images with an outline. Doing this, however, hides the actual detail in the image. So, increasing the sharpness of your TV may make the picture appear artificial.
Therefore, turn the TV’s sharpness control all the way down. Some TVs look better with the control at 3 or 4. Some may even look best at 0. Keep adjusting the button until you’re happy with the picture. If you're used to watching your TV with the sharpness way up, bringing it down may make it appear soft at first. Play some high-quality 4K videos, and you will start noticing the finest of details in them.
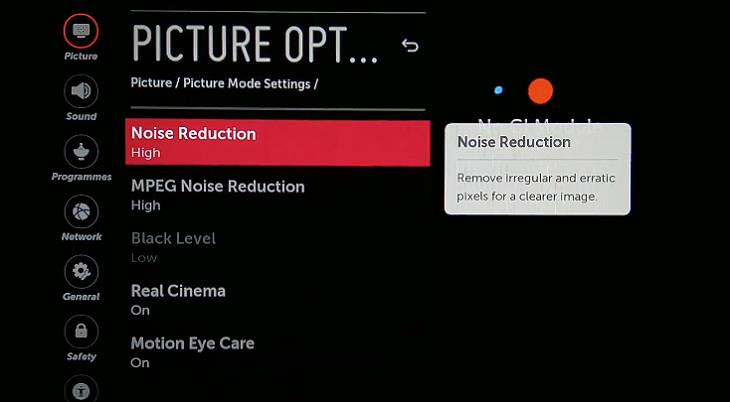
4. Reduce the noise
Noise in your TV refers to film grain, compression artifacts, pixelation, etc. Reducing the noise can help produce a clearer picture, but it also tends to wash out details. This means that everything on the screen will look a little unnatural and soft. Disable noise reduction to enjoy HD content on your TV without losing out on finer details and textures.
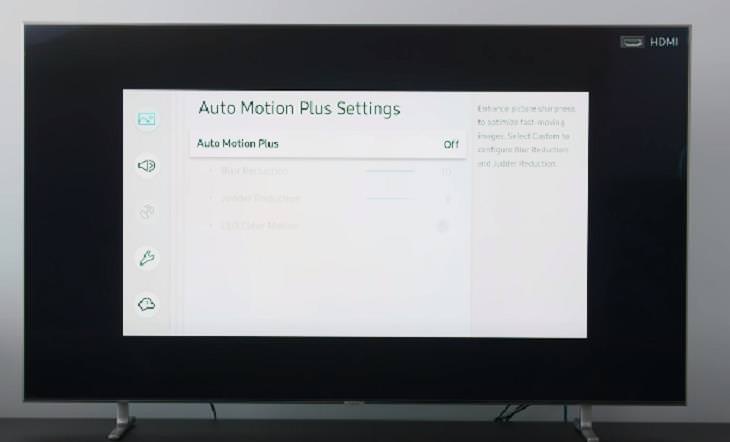
5. Disable motion smoothing
Most modern TVs have a motion smoothing feature, aka the "soap opera effect.” This setting may be named differently on different sets, depending on which company made your TV, but its main purpose is to smooth out moving images by artificially creating new frames of video. While it may make what you’re watching appear smooth, the video might also feel too real or unnatural. Moreover, you can lose detail in fast-motion scenes. For instance, say you’re watching a basketball game. As the ball moves across the screen, the algorithm may not be able to keep up with it. More frames will be added to balance this, but it will result in the image looking too artificial.
Most new TVs have the motion smoothing feature turned on in non-Cinema or Movie modes. It’s best to turn it off for good.
6. Fine-tune contrast and brightness by watching specific content
The contrast and brightness settings on your TV generally don’t need to be altered much. The contrast setting adjusts the bright parts of the image. Brightness, meanwhile, adjusts the dark parts. You can fine-tune both the settings by watching specific content.
Turn the contrast up in a light scene (maybe something with clouds) so that the image has depth and looks more natural. Setting the contrast too high will make it lose fine details in bright images. Setting it too low will make the image look almost lifeless.
Next, find some video with a dark scene and then turn the brightness control down so that the scene looks sufficiently dark. Make sure that you don’t bring it so far down that the details completely fade into the darkness. Test your settings with a few more videos until you get your desired look.
Share this post with friends and family...