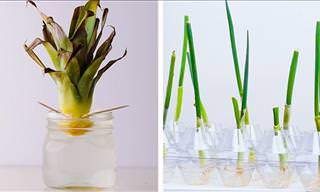
Many of us want a beautiful blooming garden, but we don’t always have the space for it. In such cases, quite a few will give up the dream, but this does not have to be the case. Whether you want to grow many plants at home or in your yard, you can build a charming vertical garden with one of the 5 guides that don’t require too much work and will cost you almost nothing. Ready? Then put on your gardening gloves and get to making yourself a new vertical garden!
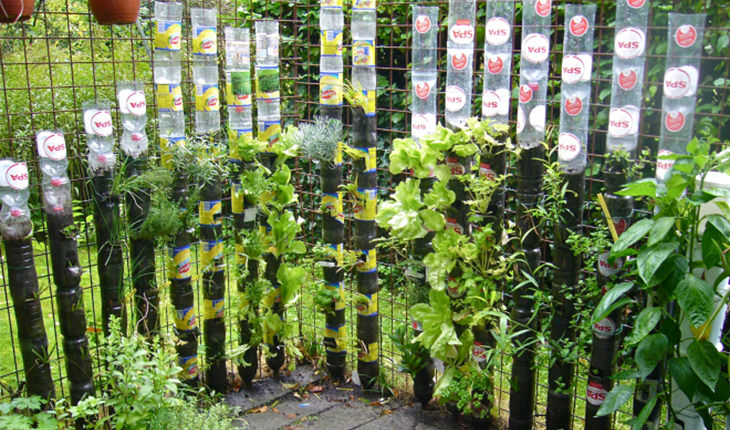
The first trick you'll learn for building a vertical garden involves using simple plastic bottles. You can use more bottles than listed in the materials if you want a taller garden.
Materials:
How to:
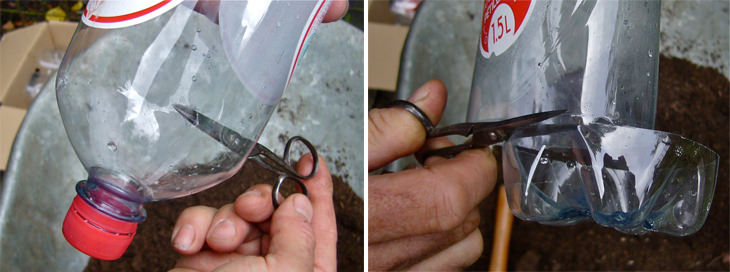
1. Cut the bottom of one of the bottles, and make 2 holes opposite each other 2-4 inches (5-10cm) below the cap - these will be the drainage holes.
2. Fill the bottle with a fertilizer soil and leave a gap of 1-2 inches (2.5-5cm) from the open end - this will be the base of the tower
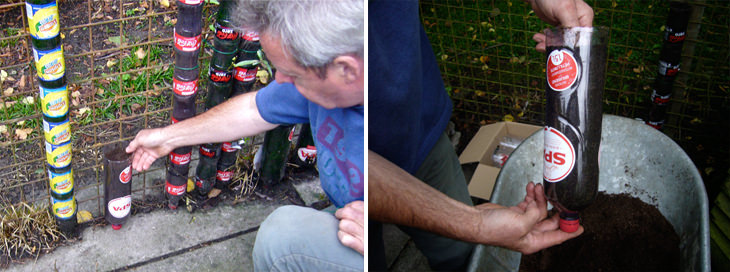
3. For the next 3 bottles, remove the cap and cut the bottom, as in the first bottle, but don’t make drainage holes. After you’ve filled the three bottles with planting soil, as you did with the first bottle, place them on top of each other so that the mouth of one bottle will poke into the soil of the bottle under it. Then place the three bottles on the first bottle.
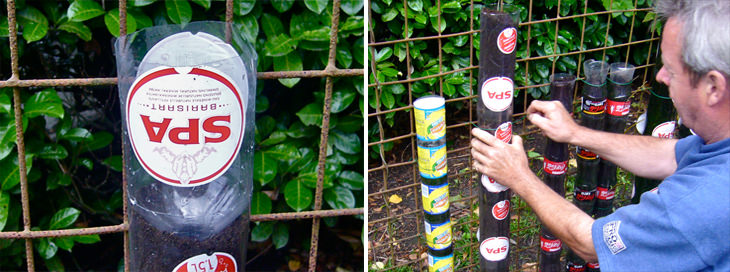
4. Place the bottle tower on a fence in your yard with iron wire. Cut the fifth bottle in half and place its top half on your tower, leave this bottle empty.
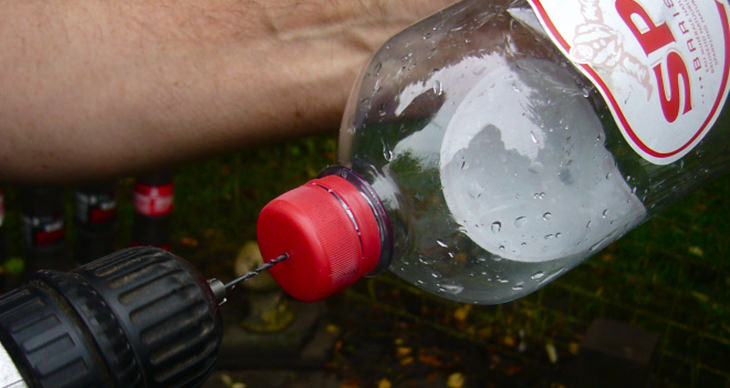
5. The sixth bottle will be used to water the tower. Cut the bottom part, and with the help of a drill, create a hole the size of one mm in the bottleneck, placing it, without planting soil, inside the fifth bottle.
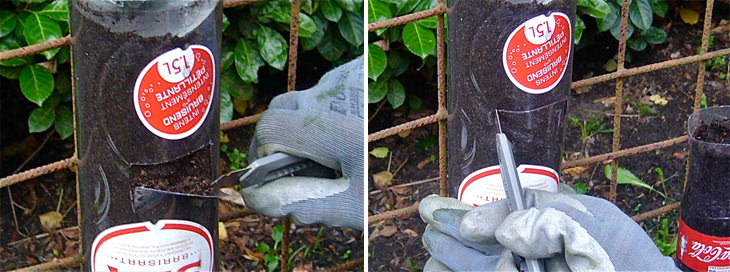
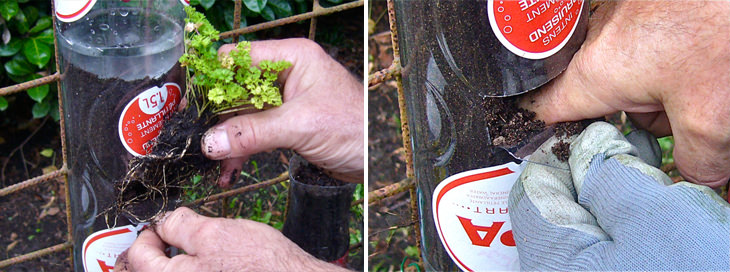
6. The tower is almost ready, and now all that’s left to do is fill the last bottle with water, with the small hole you created in it will make sure to keep the rest of the bottles watered enough. Now, take a box cutter and cut 2 vertical slits in bottles 2, 3 and 4. Create a horizontal cut between the 2 slits you have made and open the resulting "window".
7. Create a small hole in the soil inside each window with your finger, and plant your seeds. Do this in all of the openings you created, and after a few weeks, you will already have a blossoming, charming garden.
You can put this lovely planter on a fence or any other wooden surface in your yard, and what is certain is that no one in your area will have something like it!

Materials:
How to:
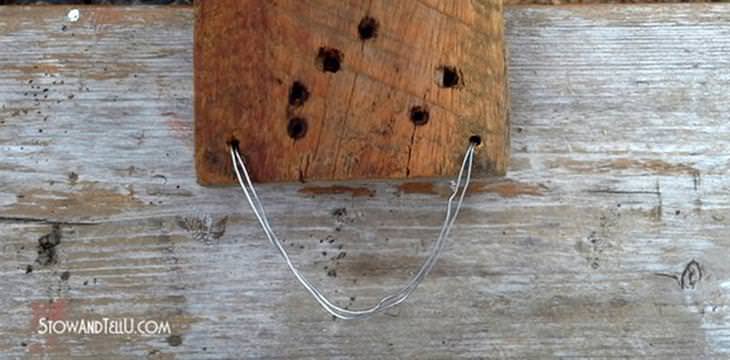
1. Drill two holes in the bottom of the wooden board which will be threaded with the metal wire that will be used to hang it on your fence. If you’d like, you can skip this step and simply drill the board directly to the fence, but you should do so only after you’ve finished preparing the planter.
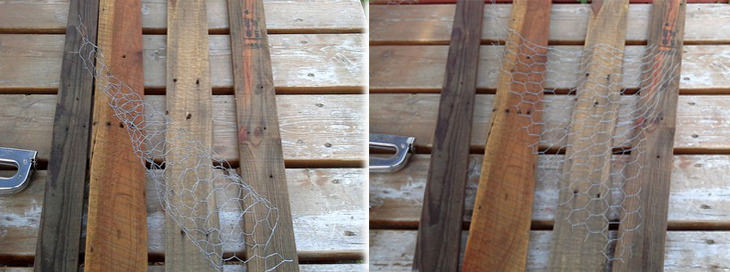
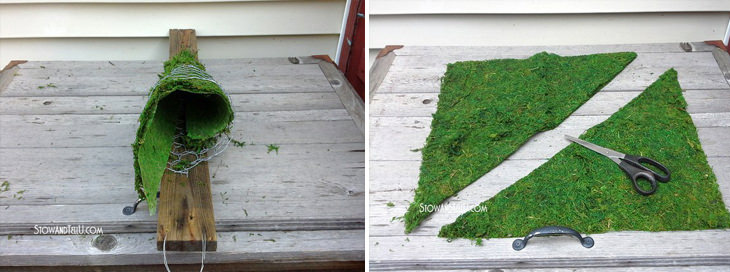
2. Place a terracotta planter on the wire to flatten it and make it easier to work with, and draw a triangle shape, as shown in the picture below. Then roll the wire into a cone shape, as seen in the left picture. Do this with another piece of chicken netting, if you want 2 vertical planters one above the other.
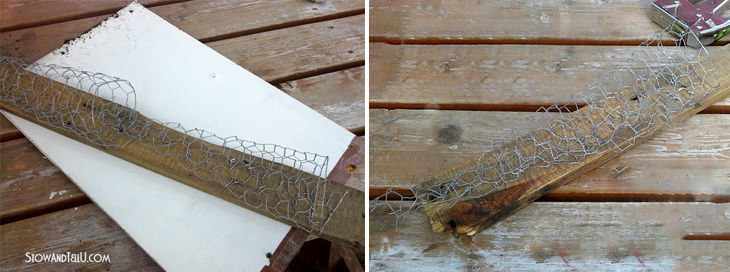
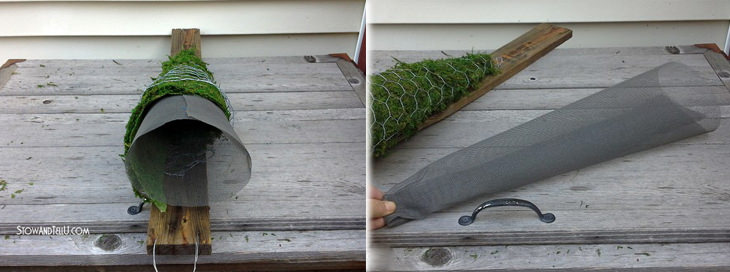
3. Place the cut netting on the wooden board, slightly squeeze the bottom, and fasten it to the board using a stapler. Fasten the top part to the board as well, but only through one layer of wire, so that the cone shape is preserved. Use a few staples and pull at the netting to make sure it is properly fastened to the board. If you chose to create 2 planters, hang another cone over the first so that the bottom of it will enter the first cone, as shown in the picture.
4. Take your patch of synthetic grass and cut it diagonally from one corner to the other. Roll the synthetic grass triangles into a cone shape and place them in wire cone you’ve hung. Make sure that the grass part is facing outward.
5. Cut a plastic sheet as you cut the chicken wire, make a cone and put it into the wire and synthetic grass cone. You can cut whatever excess pieces of plastic sheet jut out the top.
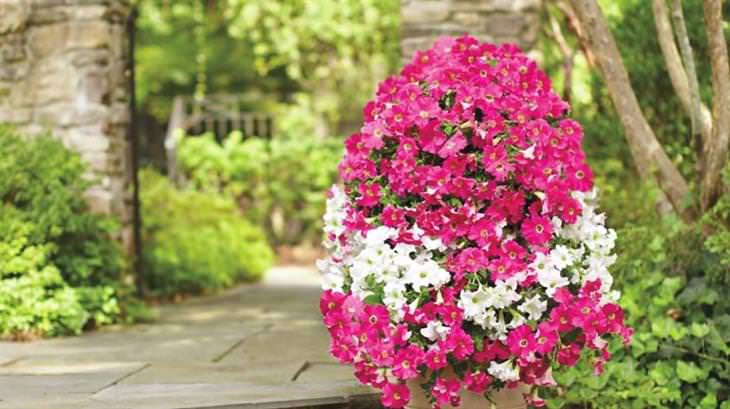
6. Thread the metal wire through the holes you created in the wooden board, and use it to hang it on your fence. As mentioned above, you can drill the wooden plank directly to your fence. Fill the cones with planting soil and plants, and you have beautiful hanging planters.

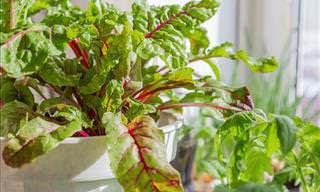
This tower can be used to grow flowers on top of each other, and you can give any space an upgrade with it.
Materials:
How to:
1. Make a cylinder that fits into the planter from the galvanized wire fencing, and make sure that squares line up.
2. Tighten the edges of the cylinder that you created with the zip ties along the length of it, cut the unnecessary ends and place the cylinder into the planter - the cylinder should sit at a depth of half to 3/4 of the planter.
3. Wrap the cylinder with the landscape fabric to measure the size you need, cut it slightly larger than the cylinder, and insert it into the cylinder, leaving some extra on top and folding it over.
4. Using a box cuter make a slit at the top of the fabric, through which the zip ties will be inserted to tighten the fabric to the mesh.
5. Fill one-third of the cylinder with planting soil, add water, fill another third, add more water, fill again, leave a space of 1 inch (2.5 cm) from the top and add water again.
6. Fill the flowerpot itself with planting soil, around the cylinder.
7. Create openings along the fabric from the top, down, and around, by cutting a plus shape in the boxes.
8. Make a small hole in the soil with your finger, and place the seeds or plants inside it, without applying pressure.
9. Place plants at the top of the tower, water it as necessary, and when everything starts to bloom you’ll have a lovely vertical garden that you can place anywhere in the house.
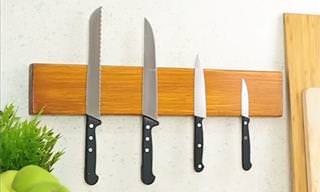
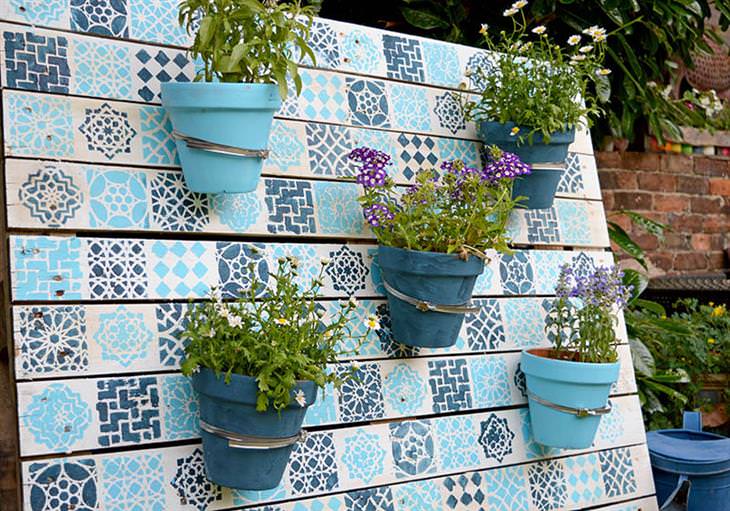
4. Planters for hanging on a wooden surface
If you have a few extra planters around the house, you can make use of them now by fastening them to wooden pallets!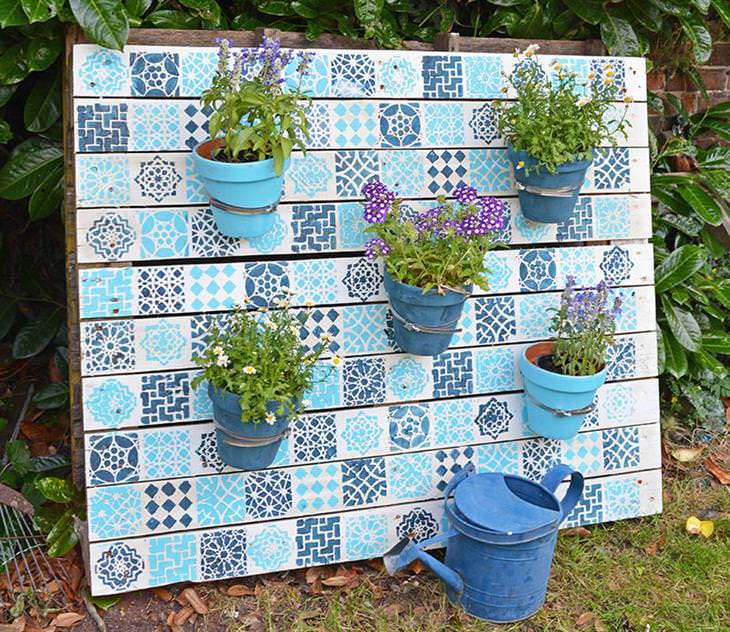
Materials:
How to:
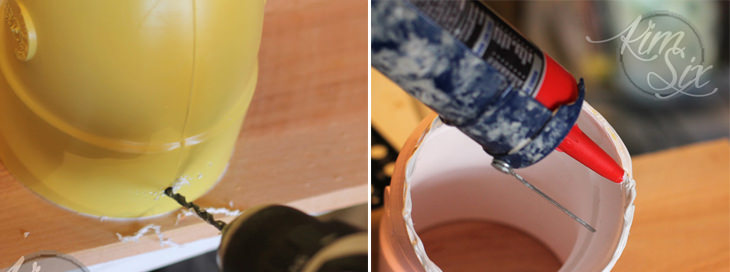
1. Drill a hole in the center of each tie for the screw, and screw them into the pallet where you want to place the planters.

2. Now just fasten the planters to the pallet with the zip ties, and tighten.
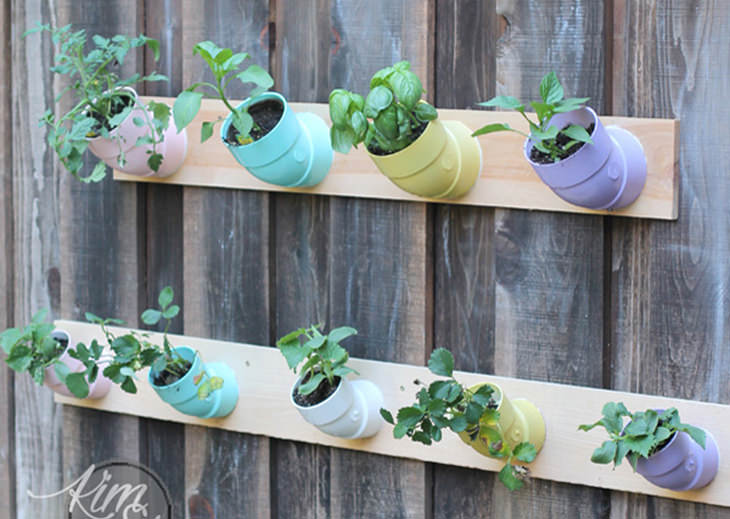
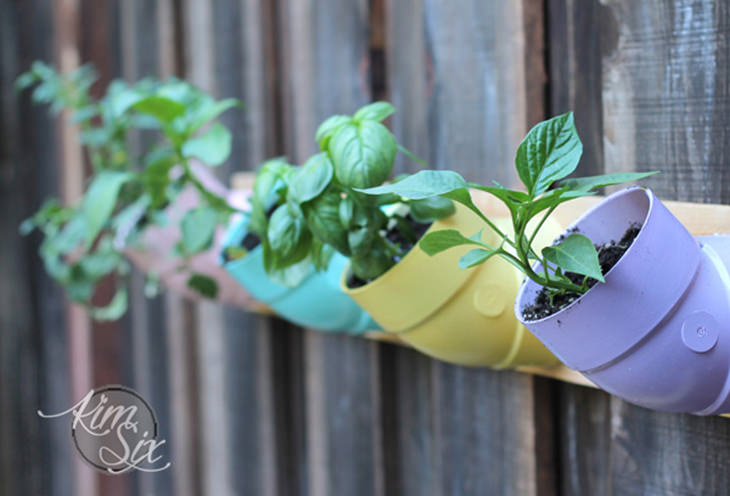
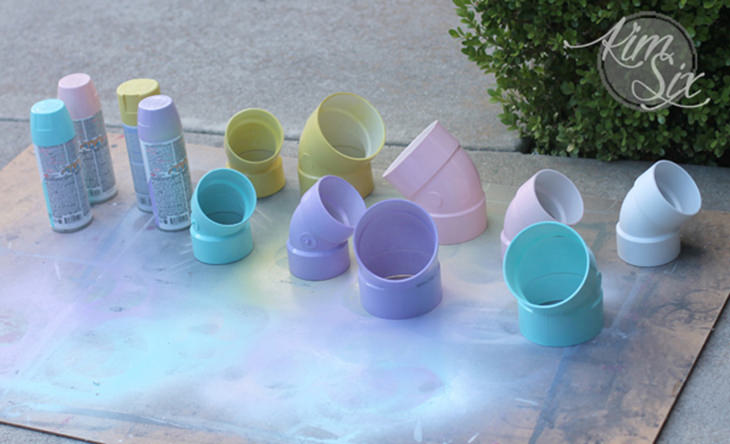
Another wonderful and unique planter idea is using PVC pipes which are great to grow plants in.
Materials:
How to:
1. Paint the PVC pipes with the spray paint – we recommend using a few different colors
2. Apply industrial glue around the openings of the pipes, and glue them to the wooden plank. Then drill a hole at the bottom of each tube for drainage.