When the lockdown first began, board games and playing cards eventually made the list of things to stockpile. Two packs were purchased then and there, along with hand sanitizer and microwavable food. After two weeks at home, a session of vigorous spring cleaning revealed two more decks hiding in a long-unopened drawer. Each of the kids or your friends also brought one over during the last game night and those have been discarded in a box somewhere as well. Here you are drowning in a sea of playing cards with no inclination to play any further card games, which may be fun but can only be played so many times! Besides, one deck is usually enough per household. The good news is with all this time and all those playing cards, you can make some easy, fun, and useful crafts for the house, that add a little beauty and utility to everything around. Take a look at these 5 super-fun DIY Crafts that you can make with a few extra playing cards.
(Source)
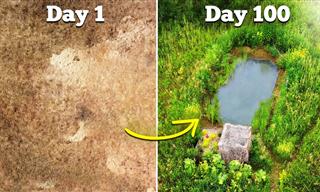
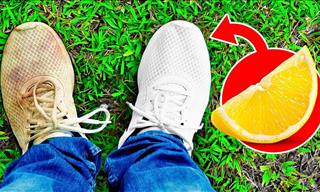
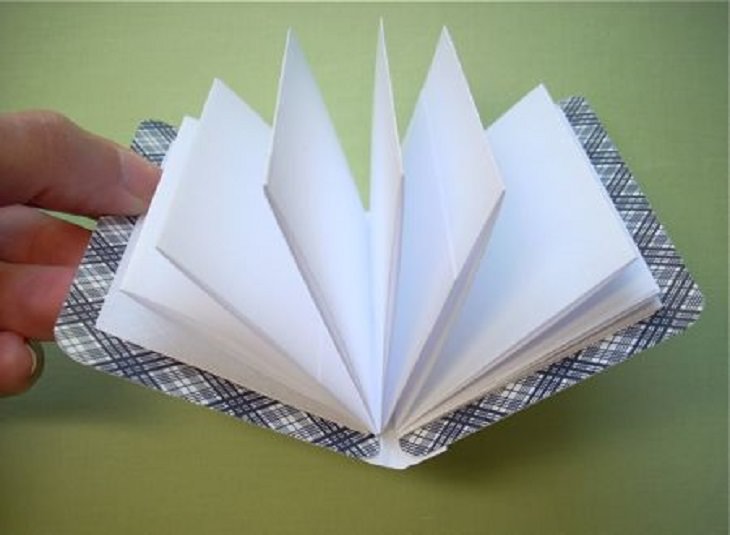
These are very simple and fun little crafts to make. You only need two playing cards to make the front and back covers of the notebook, and a long piece of paper for the pages. You can decorate the cards any way you like, or even leave them untouched (as part of a natural decor). Measure the sheet of paper so that the width is slightly smaller than that of the playing cards as it should be able to fit comfortably within the bounds of both cards. The length can be in accordance with what you think is necessary, but keep in mind that with accordion notebooks, if you intend to glue down the first page, only half of the full length of the paper will be usable.
To complete the inside of the notebook, you simply take your long sheet and fold it accordion-style, which is also similar to how one folds paper for a fan. You can fold it freely and cut out any excess paper at the end. Alternatively, you can simply fold the paper in half by length, and in half again and again until the length and width of the final single folded piece is the optimum size for your notebook. Then you unfold the sheet and fold it accordion-style, this time using your newly-made creases to create each mountain fold.
Finally, stick either end of the sheet on the respective back and front card covers, and then seal together your notebook with some painted duct tape on the two cards to make up the spine of the notebook. This notebook can have multiple purposes, from keeping track of your grocery list or contacts to keeping score on game night!
(Source)
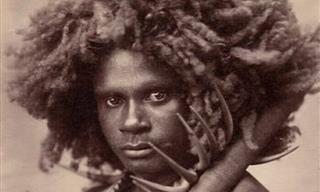
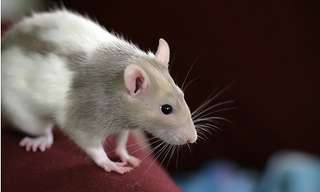
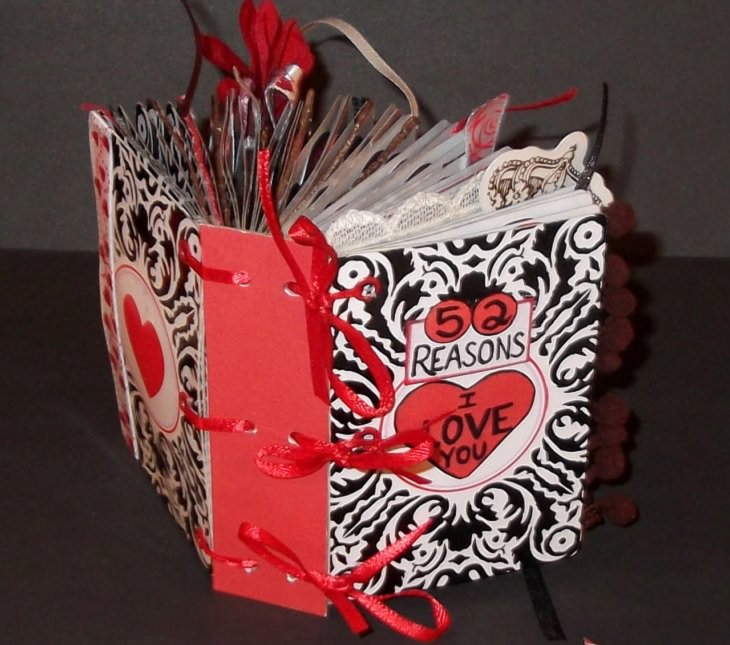
Brought to you by Lisa’s Craft Blog is this ingenious, inventive, and unique way of showing your affection and love to your partner, your kids, or any loved one. All you need is a full deck of cards, two cardboard cut-outs roughly the size of the playing cards, perhaps slightly larger, 1 long and thin cardboard cut out of the same length and smaller width, a hole-puncher, and some brightly colored ribbon. You may also want to use colored paper, stencils, markers, and other decorative items.
First adorn the two cardboard cut-outs with all the accompaniments, decorations, and patterns that you want, as well as whatever title you wish to give your Book of Love. Using the hole-puncher, put identical holes in both the cardboard cut-outs. Paint, color or stick colored paper of your choice on the 3rd cardboard cut-out, and punch identical holes on either side of it. This will be the spine of your book. Then you can move on to the cards. Holes will first have to be punched in the sides of all the cards, on the side that will be closest to the spine of the book.
Once this is done, the cards can be prepared. Now, this part really forces you to dig deep into your heart. On each card write one different thing that you love about the person to whom you are gifting the book. That means you have to write a total of 52 things on the whole pack. You can embellish each card with stickers, traced or cut-out patterns, and even small pictures. The choice is entirely yours, whether you wish to overflow the book with aesthetically pleasing ornaments or keep it simple and elegant.
The last step is to tie your book together. Split the deck in half. For the first half of the deck, loop the colored lace through the top hole of front cover, then through each top hole of the cards, and finally to the top hole of the spine of the book, closest to the front cover. Do the same for the other holes of the front cover and the first half of the deck. Then repeat the process again with the other half of the deck and the back cover, attaching them to the spine with the same colored lace. Once all of your cards have been looped together, and you’ve double-checked that all cards are in the right place, tie the laces into simple delicate double knots. Once you’re sure the book is held carefully in place, your book will be complete!
(Source)
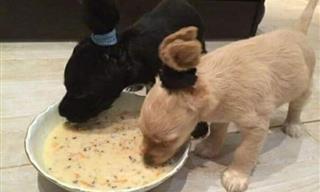
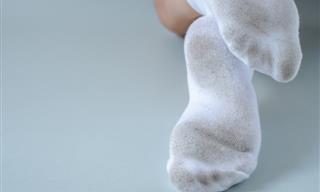
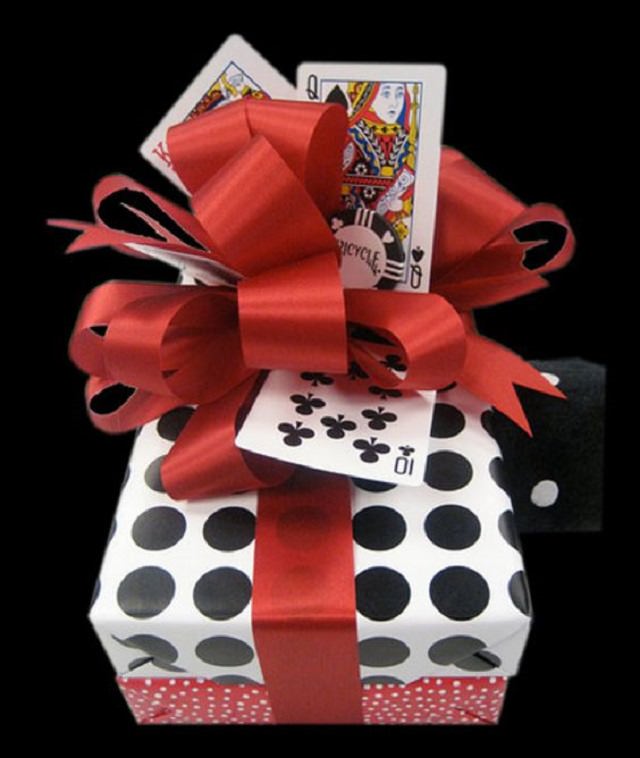
This is a great use for those random one-off cards you find lying around the house, that you just can’t find the original deck for. There are always a few of those buried in the midst of completed decks or lying in corners of boxes. You can get rid of those odd-man-out cards and give your friend or relative a gorgeous themed present at the same time. Talk about two birds with one stone. You’ll need some additional items to really bring clarity to your theme.
The most important items you’ll need for this are red, black, and white wrapping paper. You can make do with leftover wrapping paper you have at home, so long as you find a way to get this combination of colors wrapped around the gift. This is a great way to make use of that remaining wrapping paper from Christmas, and even old newspapers (provided you add a splash more white to the mix). Once your gift is sufficiently wrapped in red, white and black, put a pretty red bow atop it, to really bring the array of colors together. This sets the base for our playing card theme.
All you need to do now is glue those few stray playing cards to the bow on top of the gift, or to different parts of the gift where you think it will look nice. The discretion is yours entirely on where you wish to place the cards. You can also use a card to write the “To-From” note. The theme can also be slightly varied in the field of playing card related activities. For example, you can have a Poker theme, or a Las Vegas theme and add casino chips, either real or made of cardboard, to the adornments of the gift wrap.
(Source)
You can take your playing-card-craftsmanship to the next level by making not only the box for the gift but the gift inside the box itself. There are a few simple things you can make to accessorize yourself with just playing cards (and some glue and a paintbrush). The easiest thing to make is a bracelet. Just fold your playing cards in half and place the outer fold of one playing card through the middle of the other, placed halfway along the length of the folded card. Fit another folded playing card in the other half.
Continue this process with the folded cards on either side, gluing the cards in place, and at the same time bend the card into a circular shape. As the shape of the bracelet becomes clearer, you can use your own wrist to roughly measure the size of the bracelet, and determine how many more cards are required. The last half of the folded card should fit easily into the opening of the folded card at the end. Glue them together, and when it dries, your bracelet will be ready.
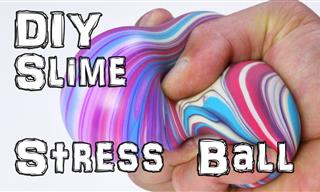
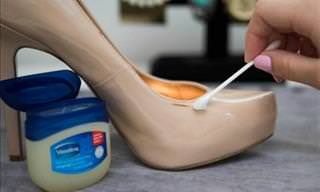
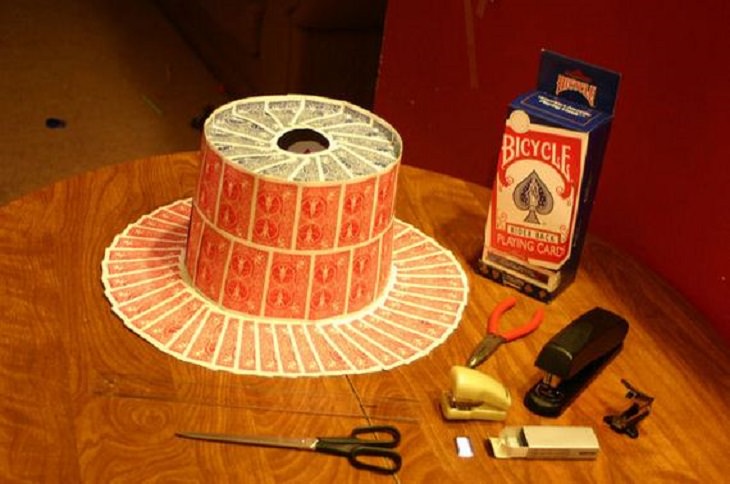
The next thing we can make (as seen in the picture) is a top hat. This is relatively simple as well but requires an immense amount of playing cards and just as many staples, so make sure you have a stapler handy. Using about 13-15 playing cards stapled together vertically at equal distances from each other in a circular shape, you can create the rim of your hat and check it for size on your own head or your relatives. Make the base by similarly stapling together 10-15 cards, these ones flat on the surface and leaving a circular gap in the center. Fold up the edges of these cards. Then begin to add more cards vertically to create the height of the hat, the first layer of which must be stapled to the folded edges of the top.
You can change up the patterns of the cards or even the direction in which the 2 or 3 levels are stapled. The base should be stapled to the bottom of these levels, about halfway through their length. The other half of the cards hanging below the level need to be folded up and outwards. These will be used as the holders for the brim of the hat. The brim will be made up of two layers of cards attached one on top of the other around the circumference of the hat, stapled to the holder cards. It is advisable to use a pair of pliers to flatten out the staple pins on the brim of the hat so they do not cause any discomfort when being worn.
This is the best craft for people who are already somewhat familiar with the art of jewelry making, but even for those who aren’t, the process is extremely simple and a great way to jump-start a new hobby! You will need a single playing card, 2 pliers, a paintbrush, a pin/needle, finishing glue, a chain, 9 jump rings, and 1 clasp.
First things first, it’s time to assemble your pendant, which shall essentially be a bow made from a playing card. The card must be folded into 8 vertical folds of equal size. You can do this by first folding the card in half, then folding either side to the center, and then folding them again to the point where the new fold was just made. These 8 vertical creases can then be used as the base for doing a fan fold, also known as an accordion fold. Pinch the center parts of the folds together, and spread the outer folds out until your card resembles very clearly a bow.
Glue the center pinched portion together and then glue a long thin colorful strip over this pinched portion to hold it together as well as add a hint of color to the pendant. Once the glue dries, use your fingers to properly spread either end of the bow and then coat the same very carefully in finishing glue with the paintbrush to add shine and luster to the pendant.
The next thing that needs to be done is turning this pendant into a full piece. Use the needle to poke a hole on either end of the bow, and using the pliers, attach a jump ring to both sides through the holes. Then loop the chain through these jump rings. Use the pliers to firmly close the jump rings and then to split the chain at the center. The only step left now is to attach the remaining 7 jump rings consecutively to one end of the chain and seal them firmly into place using the pliers, and then attach the clasp to the other end of the chain. Voila, your necklace is ready to be shown to the public!