|
When I was a kid I loved to play with coloring books - even the memory of it excites me thinking of the bright colors, the waxy touch and distinctive smell of my crayon sets. But did you know know that these days homemade coloring books are being made and used by adults too? They find the experience of coloring in outlines of their own family snaps soothing and fun. This will make a lovely, relaxing activity for you too. You won’t believe how much joy it will give you to revisit this wonderful childhood activity, courtesy of photo editor, BeFunky.com. Alternatively, it’ll make a great simple gift for someone you love. Follow our easy-to-follow instructional guide and you too can start to make your very own coloring books using images from your treasured photo collection.
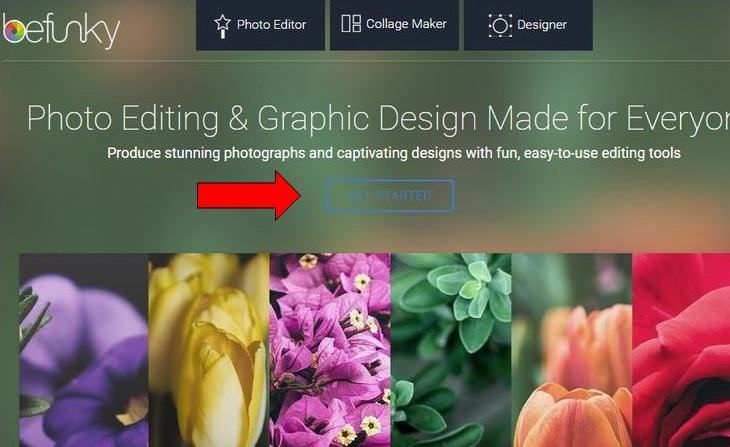
Log into befunky.com and select the option in the middle of the screen, 'GET STARTED.' Step 2
|
|
You will be presented with a screen asking you to select your preferred language. If you click on ‘GET STARTED’ again, English will automatically be selected. Step 3
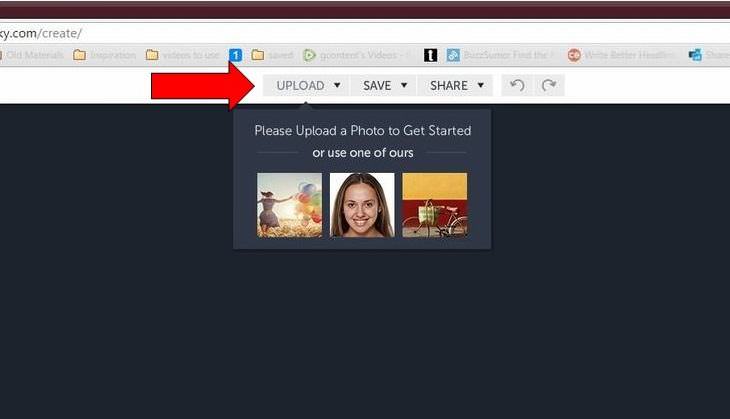
Next click on ‘UPLOAD’, which is located at the top of the screen. Or if you want to have a bit of a practice, instead select one of the three stock images that you can see. Step 4
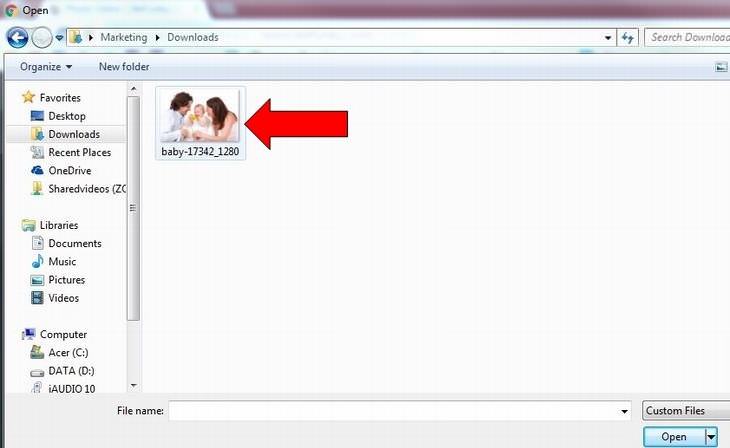
Select the location where your photo is. Perhaps you are taking one directly from Facebook, or you have your images saved in a folder on Google Drive or Dropbox. In my case my photo was saved on the computer. Step 5
Find the folder in which your photo is residing. In my case the image is in Downloads. Then click on the photo with your mouse. Step 6
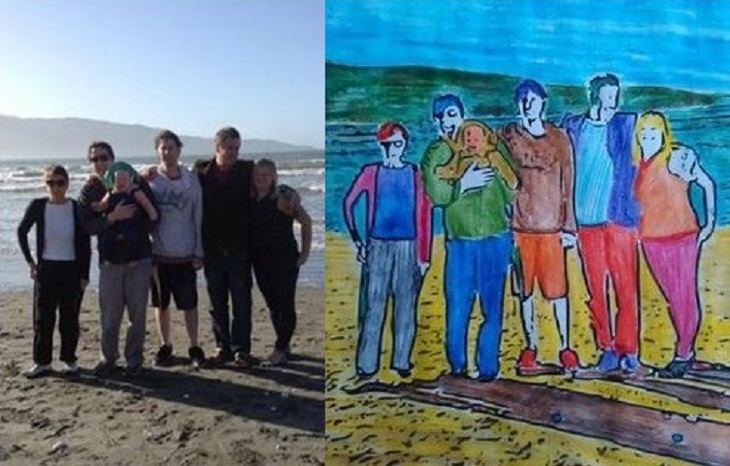
Now your family snap will be uploaded into the photo editor where you can see it and begin to alter it. Step 7
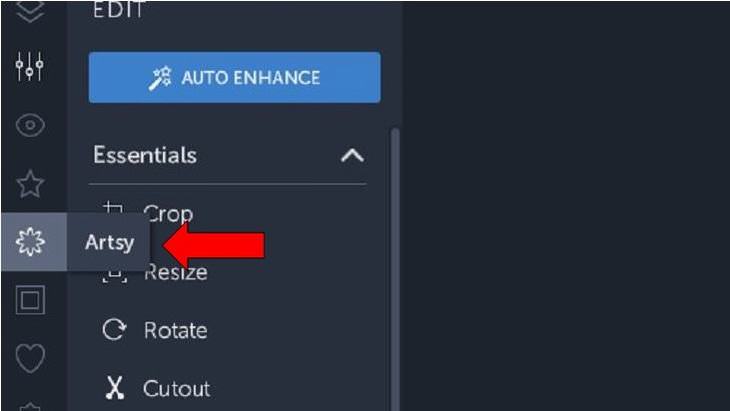
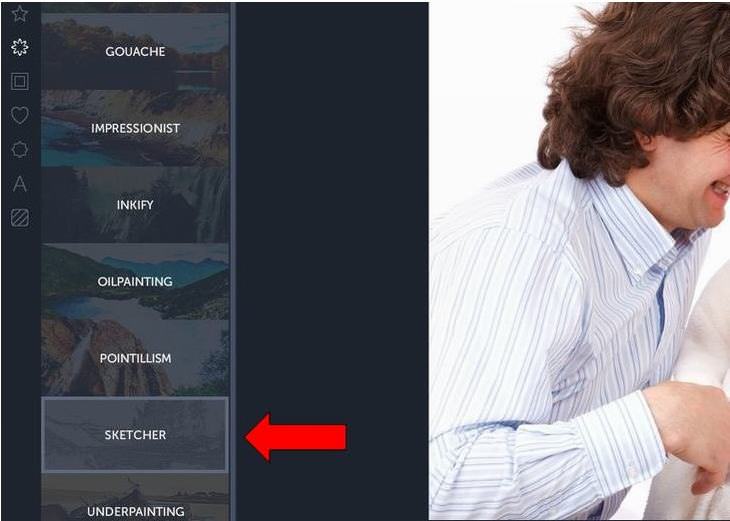
On the far left there is a row of gray icons; select the one located immediately below the star, which is called ‘Artsy.’ Step 8
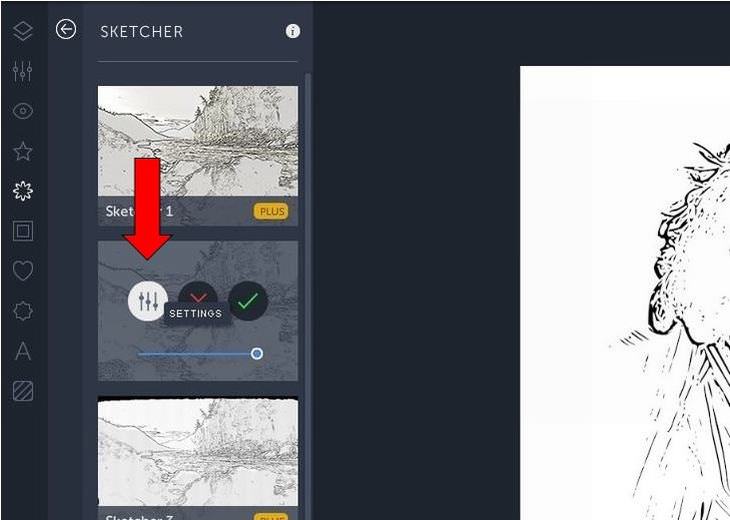
This menu will present you with several options. In order to make a coloring book page, select ‘SKETCHER.’ Step 9
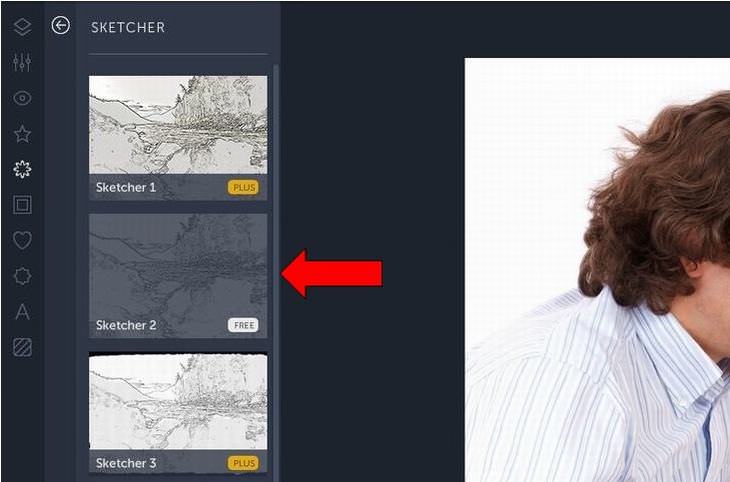
Sketcher 1 and Sketcher 3 both require a subscription. So instead try out the FREE option, sketcher 2. This is located on the left hand side of your photo. Click here. Step 10
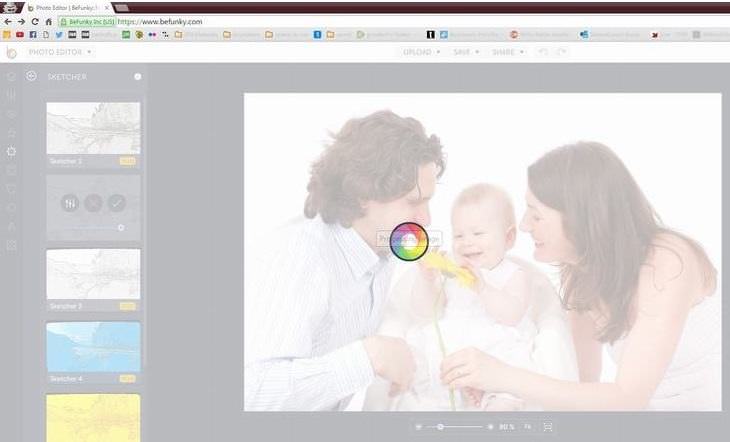
Wait a few moments while the editor processes your photograph. Step 11
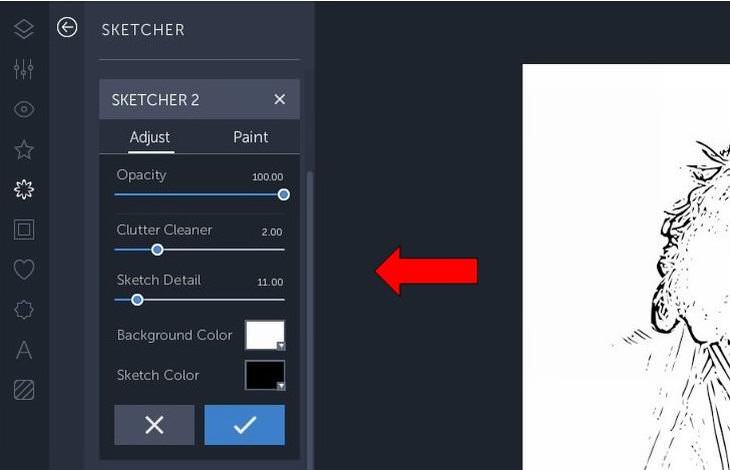
The photo has now been changed. On the left you have 3 options. The first is settings. Click here if you want to make any adjustments. Step 12
Here you can change how the sketch book might look, altering the opacity and detail etc. When you are finished click on the check. Step 13
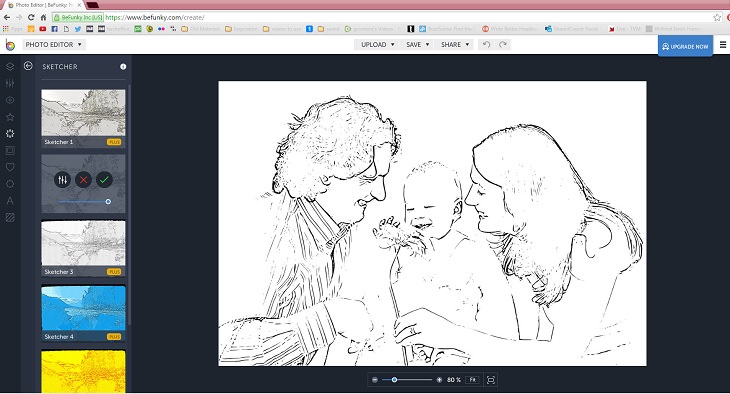
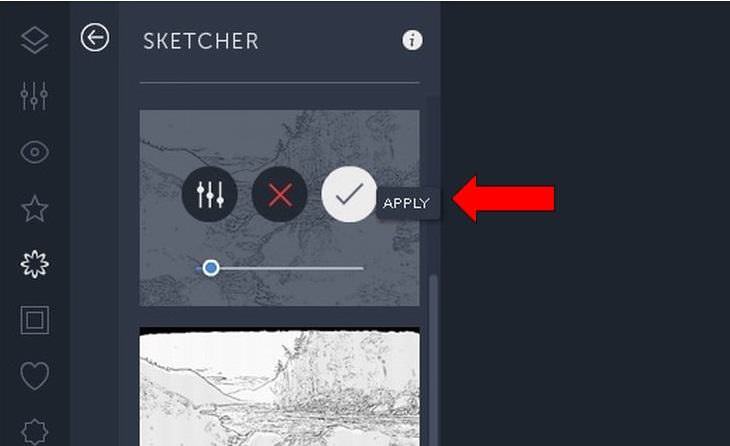
The red 'X' means cancel, allowing you to start again if you wish. The green check means apply. If you are happy with how it looks, click apply. Step 14
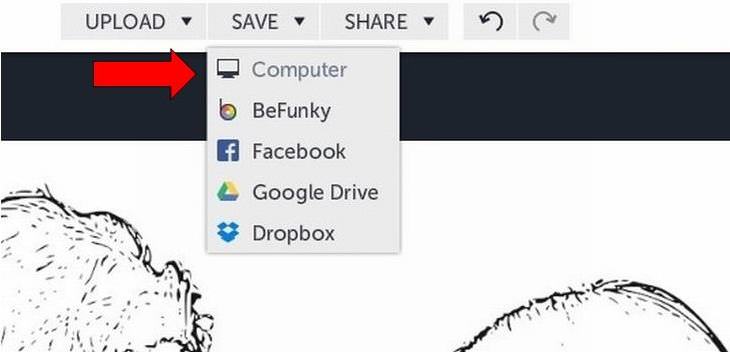
Save your new coloring page where you wish by going to the save option above the photo. From here choose the location. Step 15
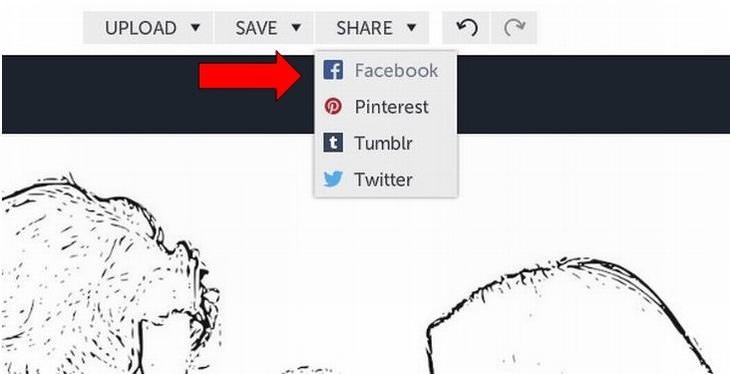
Then you might wish to share your image with other people, perhaps those included in your photo. You can choose to share on Facebook, Pinterest, Tumblr or Twitter. Step 16
Print off your new easy-to-fill canvas. Then you are free to go about your coloring fun. |