1. Snipping Tool
The snipping tool is a useful Windows utility that allows you to 'cut out' a portion of your screen display to be saved as a picture. A 'snip' is similar to a screenshot, but while you can only capture your whole screen when you take a screenshot, the snipping tool allows you to capture part of your screen, no matter how big or small.
How Do I Find It?
• In all Windows versions, the snipping tool is found by going to Start > All Programs > Accessories > Snipping Tool
What Can I Use It For?
• Crop a photo easily.
• Capture a shot of a conversation on Skype or similar.
• Capture a web page, such as a recipe, so you have a copy offline.
How Do I Use It?
When you open the tool, your screen will fade slightly and a small box appears that looks like this:
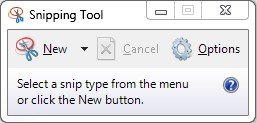
You will see that there is a small arrow next to the 'New' button. Click to choose what type of snip you want to perform. Your options are:
• Free Form Snip - Allows you to draw a shape around any part of display you wish to capture.
• Rectangular Snip - The simplest to use, you can capture a rectangular portion of your image.
• Window Snip - Allows you to capture an entire window or dialog box.
• Full-Screen Snip - Exactly the same as a screenshot, this will capture your whole screen.
We will concentrate on the rectangular snip in this guide because it's the most commonly used. If you select this option, you will see a crossbow cursor appear. Hold down the left button of your mouse and drag the cursor around the area you want to snip. You will be left with the portion of your display surrounded by a menu as follows
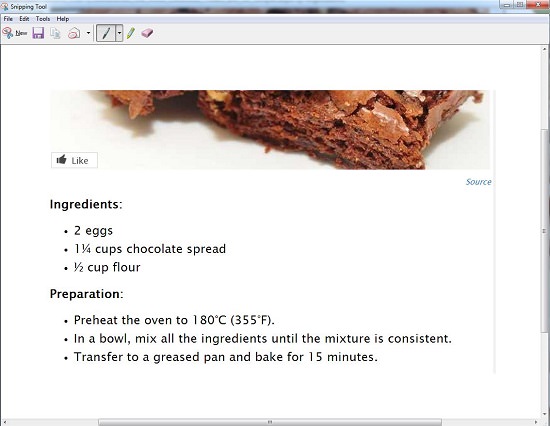
Either click FILE > SAVE AS to save your image or alternatively you can edit it using the highlighter, pen and eraser features.
2. Disk Clean Up Wizard
Windows comes with a utility called Disk Cleanup, which helps you delete small and temporary files that are collected on your computer. These files can take up valuable disk space and by doing so, make your computer run slower. It's a good idea to run the wizard regularly to prevent problems from developing.
How Do I Find It?
You can open the wizard in a couple of ways:
• Click Start > Control Panel > System & Security > Administrative Tools > Free Up Disk Space
• Click Start and type 'disk cleanup' into the search box. Click on the 'disk cleanup' icon that appears in the search list.
What Can I Use It For?
• To rid your computer of temporary files that accumulate over time, particularly when you use the internet.
• To help your computer run more quickly.
How Do I Use It?
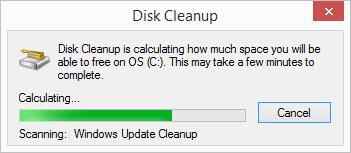
When you open the tool you will be presented with a screen that looks like this:
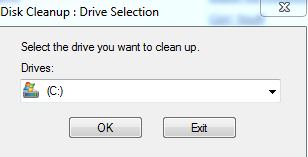
This is asking you to specify the disk you want to clean up. This is nothing to worry about, it's just a way of pointing the tool to the area of the computer that needs cleaning (i.e. the area which contains all the temporary files). On most computers, this will be the 'C' Disk, but some computers may have two disks 'C' and 'D'. If your computer has both, then clean both, although you can only use the wizard on one at a time.
After making your selection, you will next see a scrolling, green bar as the tool scans your computer to find files that can be deleted:
When it has finished scanning, Cleanup will open a dialog box and ask you to select the type of files you want to delete. You can scroll through and tick the boxes next to types you want to get rid of, and the tool will show you how much disk space you will free up by deleting them:
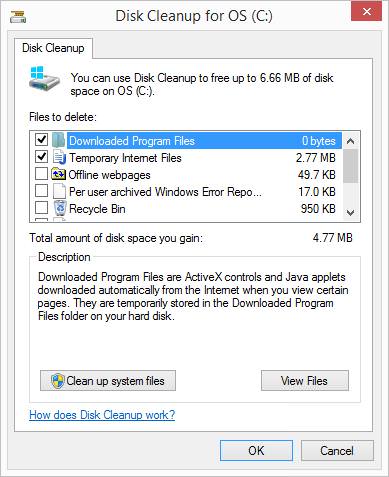
Most of the file types can safely be deleted. The only option we would suggest you always leave unticked is 'Compress Old Files' (this will appear on some versions of Windows but not others). Ticking this option can cause some issues with your computer.
You should also be careful when permanently deleting items from your Recycle Bin. This is where programs and files you have removed from your computer using the 'delete' button on your keyboard sit. Make sure that you are happy to permanently delete all the items in there before ticking the box. You can access your Recycle Bin to check what's in it via an icon on your Desktop,
Click OK when you are satisfied with your selections. This will start the clean-up.
3. Notepad
Notepad is a small text writing program that has been included with Windows for years. It allows you to read, write and edit plain text files and can be viewed as a very simple version of Microsoft Word.
How Do I Find It?
On some computers, there will be a shortcut to Notepad on your desktop or taskbar. If there isn't on yours, it's still easy to find:
• Click Start > All Programs > Accessories > Notepad
What Can I Use It For?
• If you don't have a program like MS Word, use it to write and edit texts.
• If you do have Word, Notepad can still be a simpler way of jotting down information you need to retain.
• It is a great copy and paste tool. If you find text on the internet you want to keep, copy it onto Notepad. If you copy it back onto another program, it will be formatted correctly. A program like Word on the other hand often changes the format, so the text looks odd when pasted.
• If you want to copy the text of a page you find on the internet, but don't want all the photos that come with it - you can highlight everything on the page (Ctrl + A) and just copy it all into notepad (Ctrl + V). Only the text will be copied. In Word, you'll have to copy all the photos as well.
How Do I Use It?
When you open Notepad, you will first see a very simple menu that looks like this:
This menu looks familiar as it is used in many Windows files.
The File Menu contains: New (create a new file); Open (open a pre-existing file); Save (save the current file to where it currently sits on your computer); Save As (save a file while specifying its name and where to save it); Page Setup (modify the page for printing); Print (print the current file); and Exit (quit Notepad).
You can begin typing on the blank page and create a new document. However, if you want to copy and paste to Notepad, you will need the edit menu. Should you find a piece of text on the Internet that you want to keep, follow these instructions to bring it into Notepad:
• First go to the webpage and hold down the left button of your mouse and drag your cursor over the text you want to copy:
• When the text is highlighted, click the right mouse button and from the option menu, left click on 'Copy':
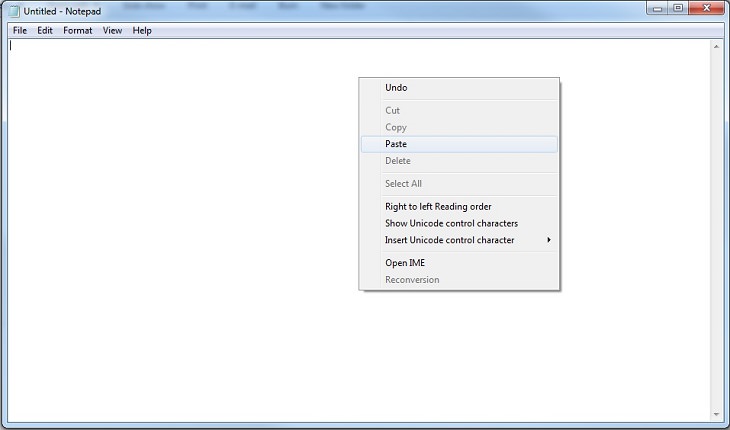
• Open Notepad and click anywhere on the page. Select Edit > Paste (or simply click on the right-hand button of your mouse and select 'Paste' from the menu):
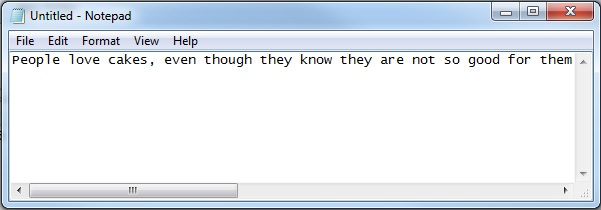
• The text may well sit solely on one line of Notepad and stretch off the edge of the page like this:
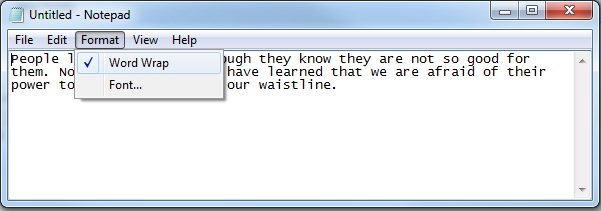
• If this happens, select 'Format' and click 'Word Wrap' to make the text fit to the window like this:
4. Paint
Paint is a simple piece of software that allows you to open pictures and photos, and perform some basic edits on them.
How Do I Find It?
As with the other Accessories, it is easily accessible through your 'Start Menu':
• Click Start > All Programs > Accessories > Paint
What Can I Use It For?
• Open your photos in a way that allows you to edit them.
• Add text to photos. For example, add a birthday message.
• Make photos bigger or smaller so they fit a document you are writing, or are small enough to be sent by email.
How Do I Use It?
Paint is a basic program but still offers numerous options for users. Here, we will concentrate only on resizing photos and adding some simple text, but you can find a more complete guide to these functions and more by clicking here and seeing our detailed guide to using Paint.
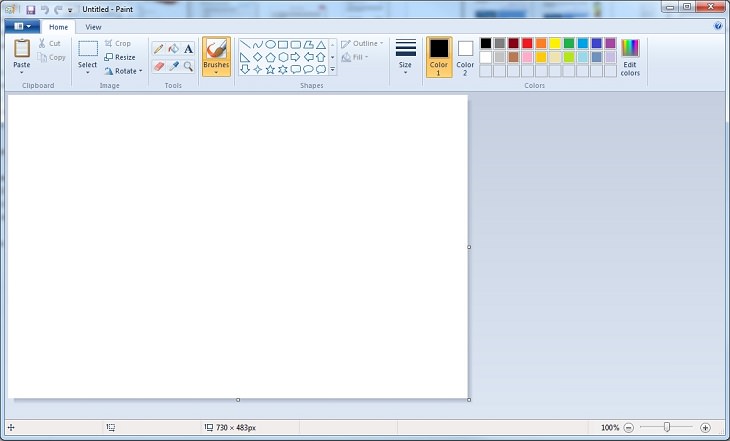
When you open Paint you will first see the following screen:
Paint provides two quick and easy ways of changing the size of a photo: crop and resize:
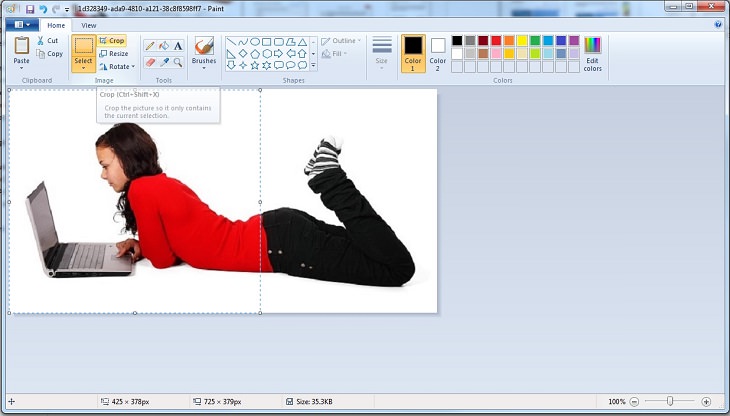
• Cropping lets you select a specific area of an image and keep it, while discarding the rest. To crop an image, you first need to click on the dotted rectangle marked 'Select'. This will open a tool that lets you draw a rectangle around the part of the photo you want to keep. When you are happy, click the 'Crop' button which sits next to the dotted rectangle to create your new image:
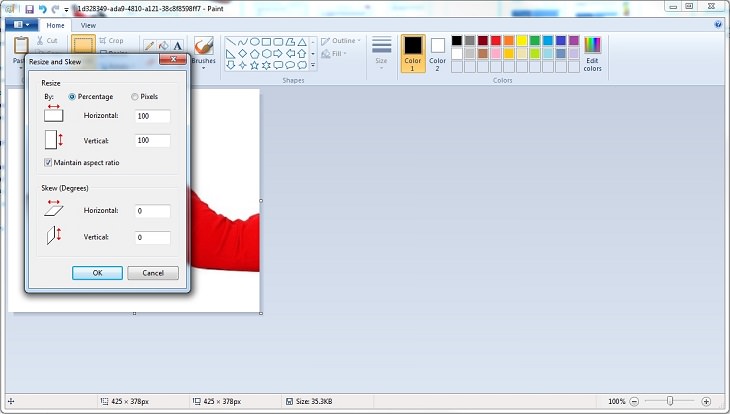
• Resizing your image allows you to increase or decrease the size of a picture without cropping off parts of it. Simply click on the 'Resize' button in Paint (it sits beneath the crop button) and a menu will open. From this menu, you can change the size of your photo by either a percentage of the original size; or by selecting a specific size in pixels. (Decrease the number of pixels to make an image smaller and increase them to make the image larger.)
Be aware that if an original image is very small, you may find that it appears blurry if you try and make it too big:
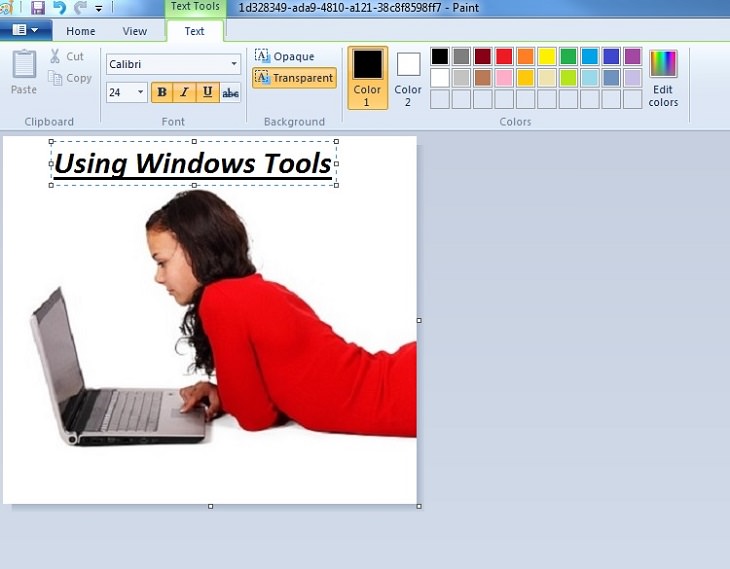
You can also add some basic text to photos using Paint. There are three ways to do so and they all have shortcuts from your toolbar:
• The pencil allows you to draw freely on an image.
• The bucket allows you to replace one color with another.
• The letter A allows you to add typed text in a text box.
To draw neat text, select the Letter A and then click on your image, holding the left mouse button down while you define the area where your text should be. This opens a text box. You can now click in this text box and write your message:
5. Multi-Purpose Calculator
If you didn't know already, your Windows operating system also comes with a built-in calculator that can be as simple or as complicated as you need it to be.
How Do I Find It?
Follow the same route as the one you have used to find the other tools:
• Start > All Programs > Accessories > Calculator
What Can I Use It For?
No need for any bullet points with this one, it works exactly like the real-life calculators you have been using since you were in school!
How Do I Use It?
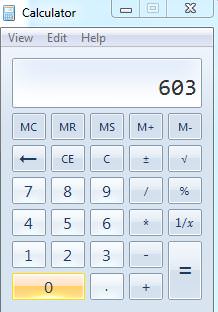
When you click to open the calculator, you will see this:
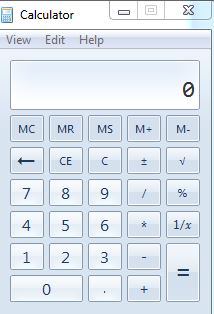
As you can see in the picture, the calculator features the following standard features:
• Numbers from 0 to 9, plus a decimal point.
• Operations: add, subtract, multiply, divide, percentage and square root.
• A large equals sign.
• Clear, clear last entry, and backspace buttons.
• Various memory functions.
These should be familiar as they replicate the buttons on most standard, real-life calculators. You can use your mouse to click on the buttons and punch in numbers and operations, or alternatively use the corresponding buttons on your keyboard. Click equals to complete your sum:
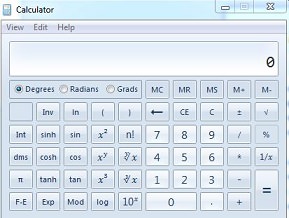
If you are a particularly enthusiastic numbers person, you can even turn the simple calculator into a more advanced version. Click the 'View' button in the top left corner, then select whether you want to use a Scientific, Statistics or Programmer calculator. The Scientific Calculator is pictured below: