|
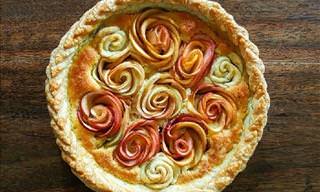
When it comes to food, there is one dish that tops my list - pie. Due to my love of pie, I have discovered that while there are plenty of delicious fillings, from savory to sweet, there are also tons of ways to take your pie up a notch further. So, without straying too far from the basics, here are 6 fancy pie tips and tricks that your dinner guests (and you) will surely love! |
||
|
Decorative Edges |
||
 |
||
|
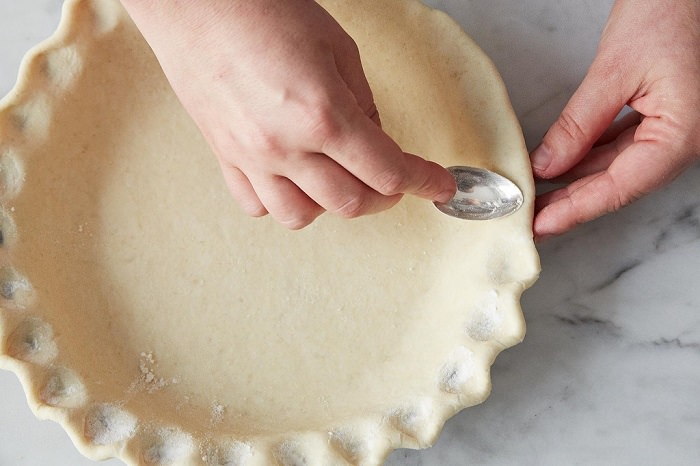
1. Rounded Crimpled Edge: Most pie crusts tend to be decorated with the age-old crimpled edge, which makes a fluted edge with points. But have you ever thought about using a spoon instead? The bowl of a spoon, as seen in the picture below, gives a slightly rounded and more fluid edge. And the larger the bowl of the spoon, the bigger the waves. |
||
 |
||
|
Here's How: Lightly dip the spoon into some flour. Using your fingers to guide the outer edge, gently press the spoon into the crust, moving outward. Repeat all the way around the crust. |
||
|
2. Dotted Edge: Here's a relatively easy and innovative way to showcase your pie crust-making skills. You can decorate your pie crust using any shape - just bear in mind to keep your shapes small, so that they don't become distorted when heated. |
||
 |
||
|
Here's How: Gather up all your pie dough scraps and roll out to an eighth of an inch thick. Lightly flour and using a small circular cookie cutter (you can use a shot glass or a bottle cap if you don't have a circular cookie cutter). Once you've cut all your circles, brush the edge of the crust with water and lay the circles around the edge, slightly overlapping each one. |
||
|
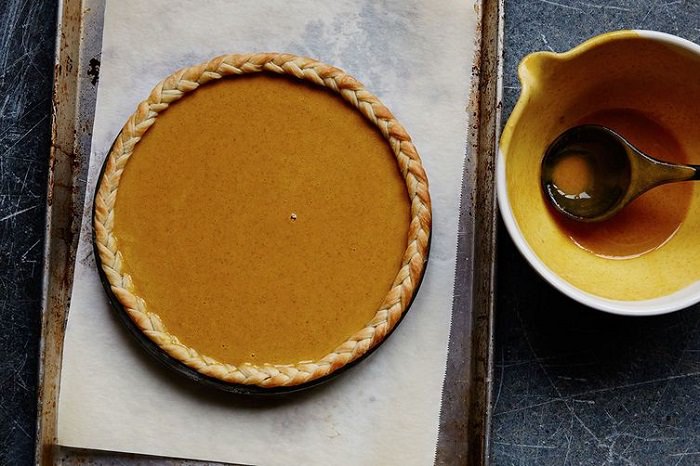
3. Braided Edge: Personally, I cannot think of a prettier way to serve pie! In the technique below, three strands of dough are used to create this braided look, but two should work just as well. You could also add to the look by preparing two braids instead of one. |
||
 |
||
|
Here's How: Gather up your pie dough scraps and roll them out to an eighth of an inch thick. While rolling, aim to keep the piece of dough as long as possible. Aim to roll your dough to about 29 inches long for the best results. Cut three long, thin strips (about a quarter of an inch wide) using a chef's knife or a pastry wheel. Pinch the three strips together at the top and braid them. At the end, pinch and seal the braids together. Hold the ends gently and stretch, then brush the edge of the crust with a little water and press the braid into the edge. |
||
|
Creative Crusts and Toppings |
||
 |
||
|
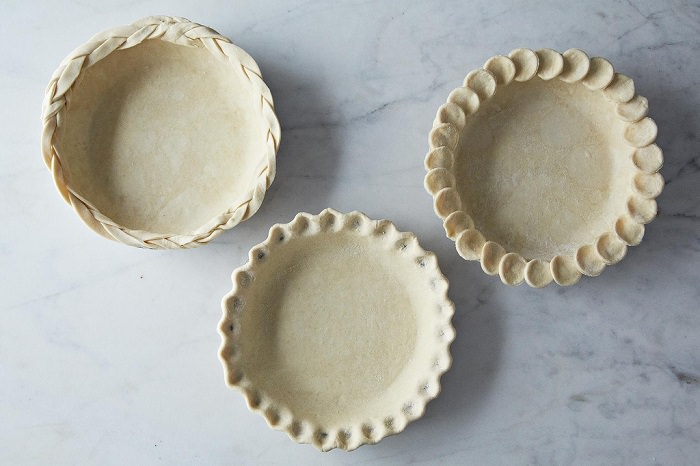
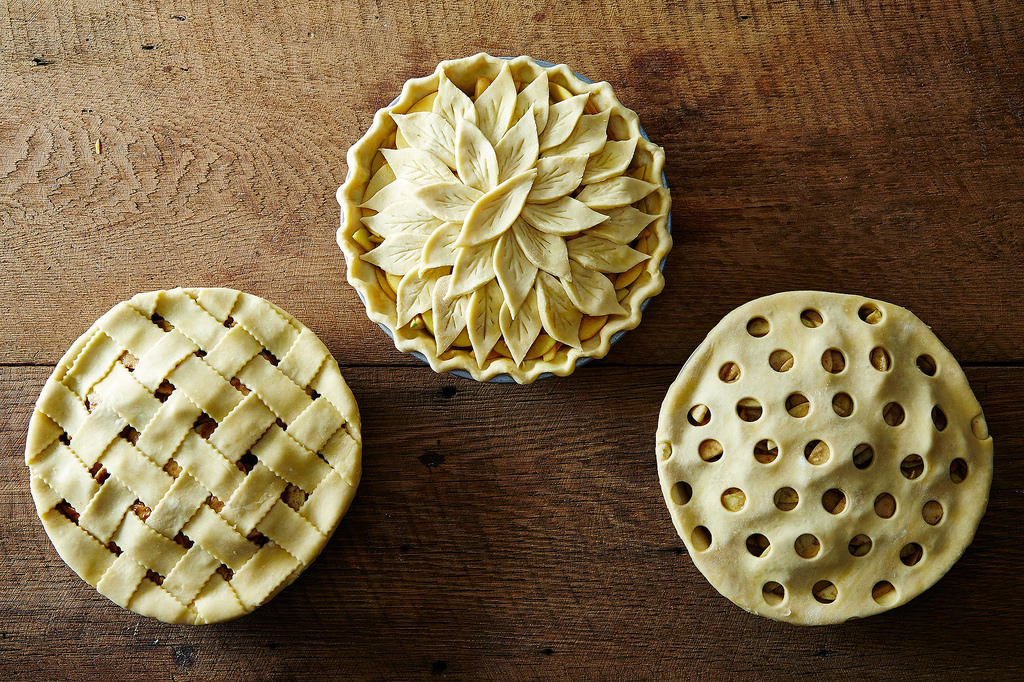
4. The Lattice Look: This is the traditional apple pie crust we all know and love (as seen in the first example on the left). |
||
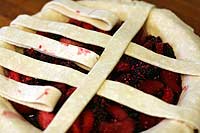 Get started by rolling out your top crust to an eighth of an inch thick. Use a pastry cutter or a sharp knife and cut long, even strips of dough (about half an inch wide). Depending on the size of your pie dish, lay out four to seven parallel strips of the pie dough on top of your filling, leaving about half an inch of space between each one. Then, fold back every other strip. Place one long strip of dough perpendicular to the parallel strips, as shown, and unfold the strips over the perpendicular strip. Now fold back the parallel strips that are running underneath the perpendicular strip, laying down a second perpendicular strip of dough next to the first, leaving some space in between. Continue this process until the weave is complete. Once you're done, trim the crust's edges. Get started by rolling out your top crust to an eighth of an inch thick. Use a pastry cutter or a sharp knife and cut long, even strips of dough (about half an inch wide). Depending on the size of your pie dish, lay out four to seven parallel strips of the pie dough on top of your filling, leaving about half an inch of space between each one. Then, fold back every other strip. Place one long strip of dough perpendicular to the parallel strips, as shown, and unfold the strips over the perpendicular strip. Now fold back the parallel strips that are running underneath the perpendicular strip, laying down a second perpendicular strip of dough next to the first, leaving some space in between. Continue this process until the weave is complete. Once you're done, trim the crust's edges. |
||
|
5. Circles: This look is pretty simple to do and quite innovative too! The pie to the right in the image above is what it'll look like when done. Here's How: Roll your top crust to an eighth of an inch thick. Using a pastry top or a small cup (or any suitable round object), cut holes all over the crust and place on top of your filling, sealing the edges of both your bottom and top crusts. |
||
|
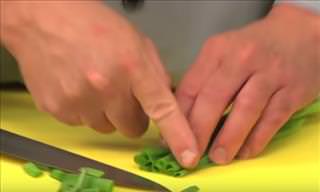
6. Leaves: A great look for an apple pie - the middle pie in the image above is what your final topping will look like. Here's How: Roll your top crust to an eighth of an inch thick. For best results, use a real leaf as a guide to cut out the leaf shapes. Then, using a toothpick or a skewer, lightly engrave a vein design into the top of each leaf. Layer your leaves (overlapping them slightly) starting from the outside edge of the pie in concentric circles. |
||